Vault - Getting Started
Create Albums
If you currently have a folder structure where you have organized your your files under brands; e.g Husqvarna Viking, Pfaff etc, and want to continue to have that overview, start by adding them as Albums.
- Click All Files
- Click on the menu and Add Album
- Name your Album
- Give your Album at least one Label, e.g the same as the album name
- Save Changes
Import Files
Start importing your files by clicking Import Files.

Choose if you want to Upload Folders or Individual Files. The folders will maintain their name after import.
You can upload:
- Embroidery Files: vp3, vp4, xxx, jef, exp, dst, pec, pes, vip, hus, art, exp, sew, shv, hqv
- Encrypted embroidery files from mySewnet Library: evp3 and evp4
- Image files: jpg, jpeg, png, svg, bmp
- PDF files

Click on either Select Folders or Select Files and find your files on your computer.
Vault will list the files chosen. If you want to remove a file from the list, just click the X.
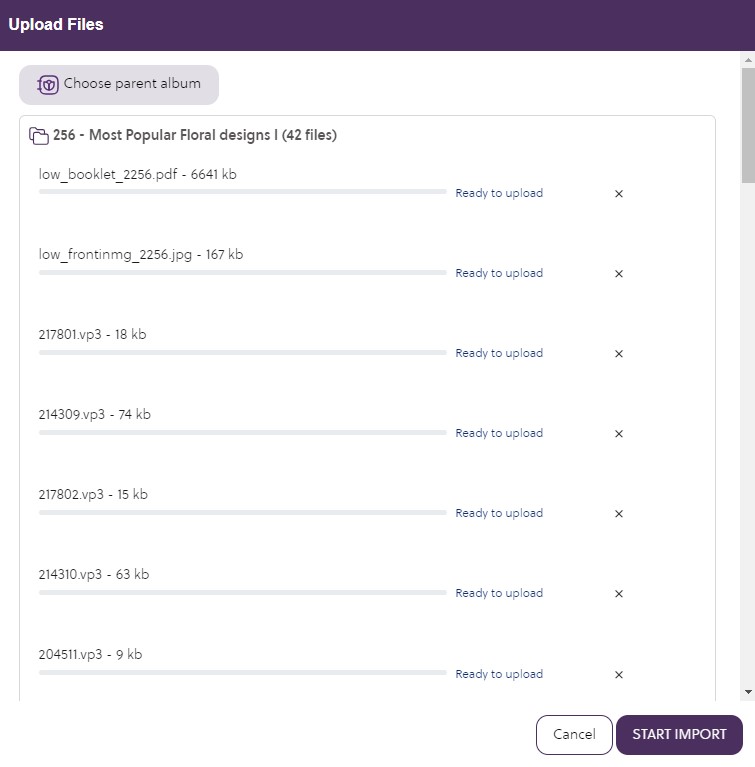
If you want to choose an existing parent album, click on the button at the top to do so.
Click Start Import and all files will be uploaded and verified.
Click Manage Labels.
Note: In this example there is both a pdf and an image, which you can add to your files.
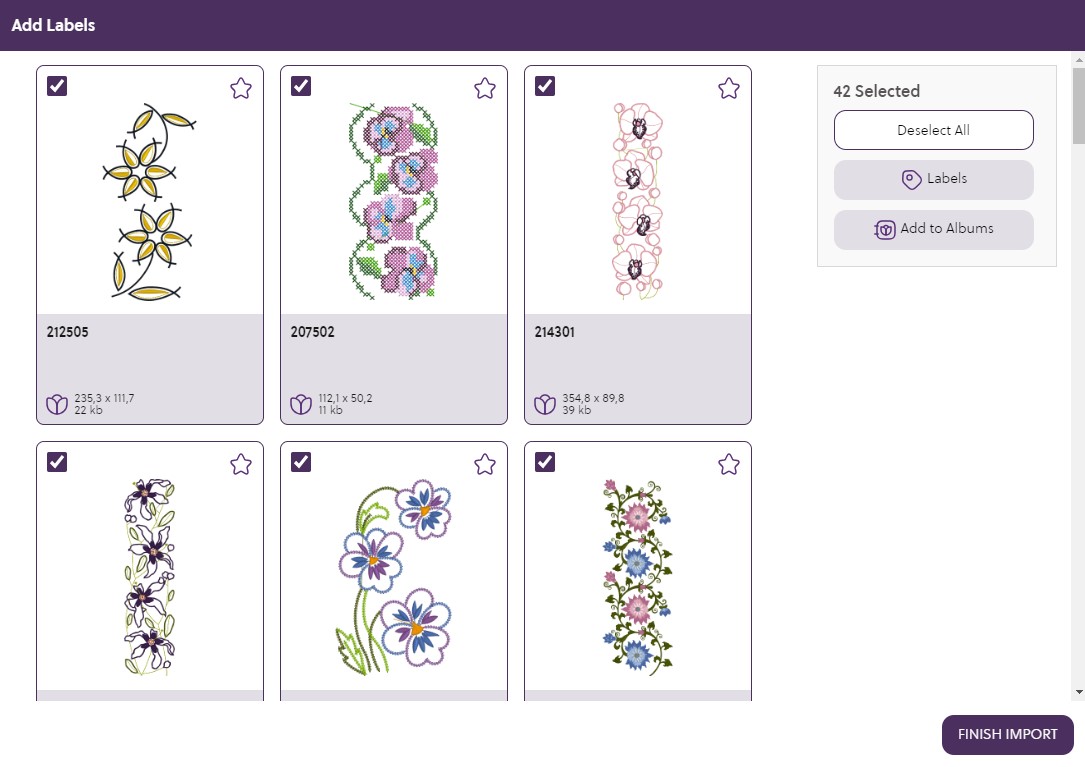
Add Labels
All design are selected as default so start by adding labels that are common to all designs uploaded. E.g flowers, animals, geometric etc.
Manage Labels
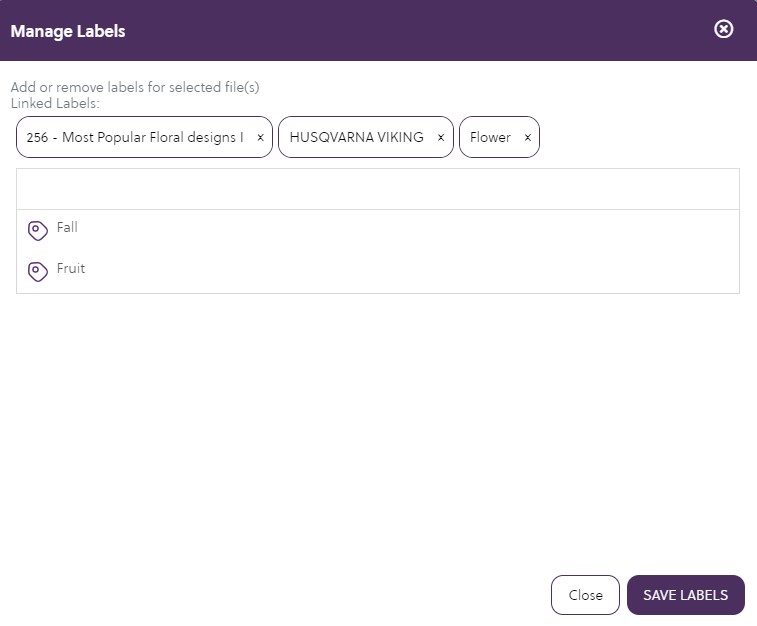
- Click Labels
- Note that all designs have the labels of the folder and the parent album (if that was chosen)
- Add your Label names and press Enter, then new Labels appear in the list
- As soon as you type in a few letters the labels previously used appear
- Click Save Labels
- Click Deselect All, and you can choose which files you want for additional labels. Maybe there are designs in a specific technique or look.
- Click on labels again to add the new labels. Click Save Label
- Continue for as many labels as you wish. Make sure to deselect before selecting again
When you are done click Finish Import.
Search and Filter
Now you will have your Albums listed to the left in your Vault, either on their own or under parent albums.
Search for your design in the top Search box.
Vault Overview
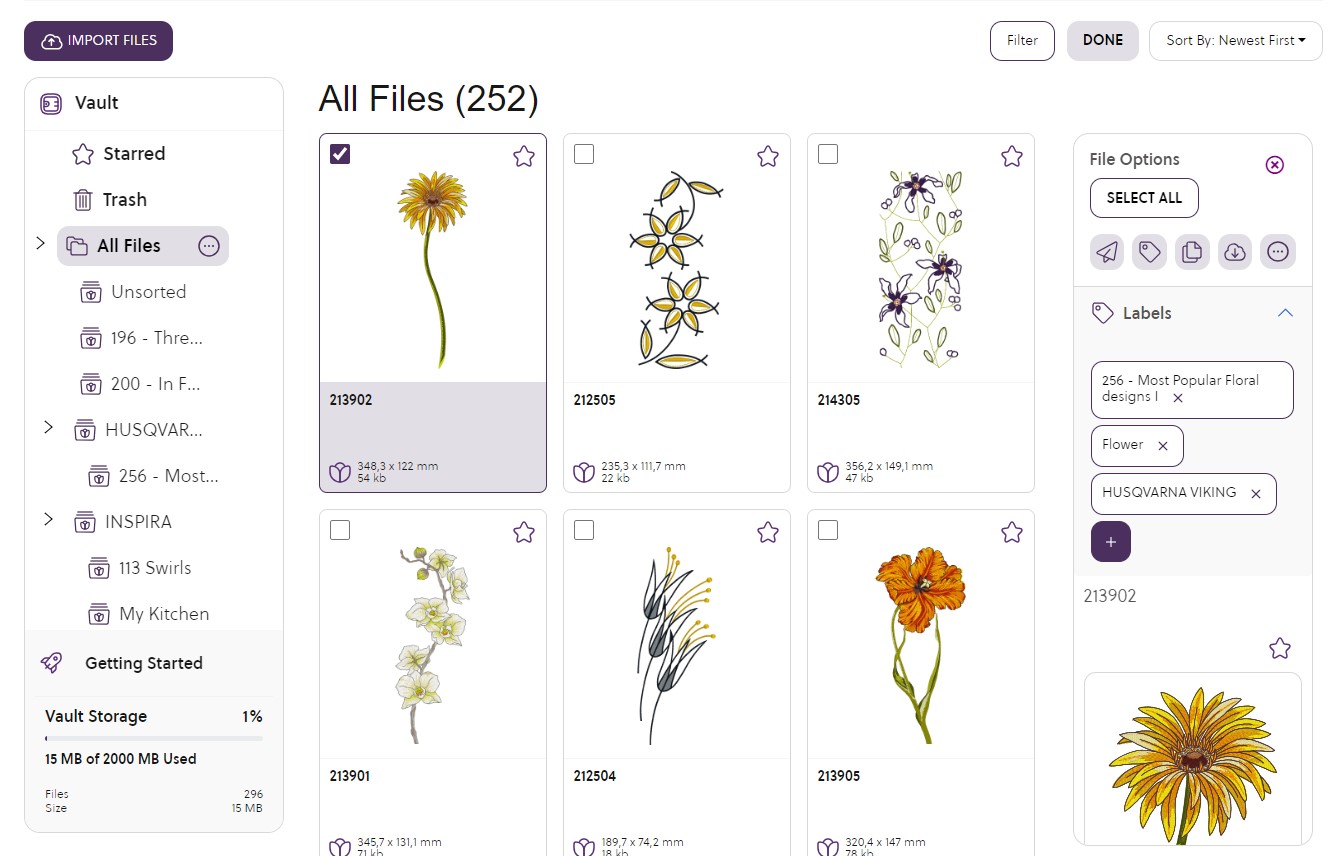
Starred
Click on any file to make it starred as a favorite and they will be found in the Starred Album.
Trash
This is where you find the files you have deleted. The files will remain there for 30 days before they are permanently deleted. You can always restore files from trash.
All Files
This is where you find all files in your Vault. Click on All Files to find Add Album and Download All. Download all will download all files from your Vault if you want to stop using it. It will be downloaded as a .zip file.
Unsorted
You can upload your files without adding any Labels or Albums. They will then be found under Unsorted. So you can always go back and continue adding labels and Albums.
Your Albums and structure are shown in a list in alphabetical order.
Vault Storage
This is the overview the storage used, with the number of files and total size. The maximum is 2Gb (or 2000MB).
File Options
Click on any design and you will see more information.
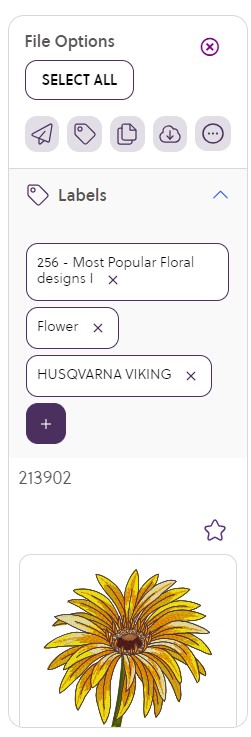
Select All
This will Select all designs visible on screen.
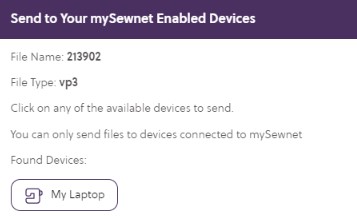
Send 
Click on the Send button to send your design directly to your mySewnet-enabled device. This could be your computer Software or mySewnet-enabled embroidery machine. Make sure you are connected to WiFi and signed in with your mySewnet account on all devices.
Labels 
Click here to manage Labels. This can be done on one file at a time. You can also click on the plus icon in the Labels area. Your files can have several Labels describing what it is. Press the Enter key to add the label and continue with more. Your existing and recent Labels show up when you start typing. Click Save Labels when you are done.
Duplicate 
Click here to make a copy of your file with a new File name. Click OK
Download 
This will download your design to your computer and will be found in the Download Folder. From there you can copy and paste your design to a USB for instance. If you download several files at once, it will be downloaded as a .zip file that needs to be unzipped before use. If you do not want that, just download the files one at a time.
More Options Menu
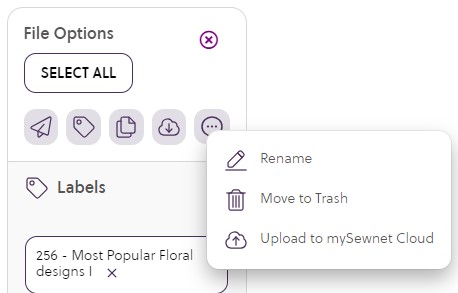
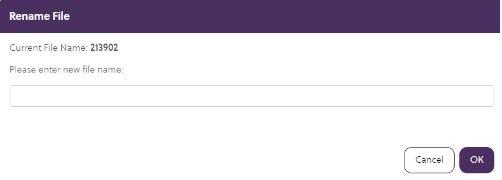
Rename
Enter a design name of your choice. The original file name will still be kept as data (usually a series of numbers). The names do not have to be individual. You can have several files with the same name.
Move to Trash
This will move the file to the Trash, where it will remain for 30 days before being permanently removed. You can always go to the Trash album and Restore your files.
Upload to Cloud 
This will upload a copy of the file to your Cloud storage. It will be found in a folder called “From Vault”. It will have the original File name, usually a series of numbers. To access your Cloud account go to your Dashboard on mySewnet.com.
The Cloud Sync Tool has been discontinued so it will not appear in the Folder on the computer. See more info in the FAQ.
This can also be done with the button above the File Options

Labels
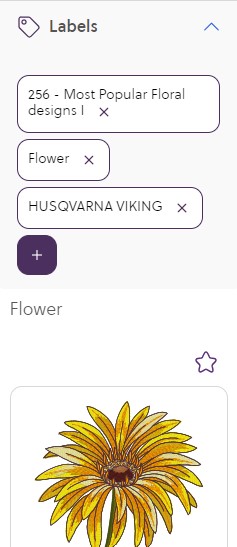
You will find all Labels added to the file and can click on the + sign to add more. The design name given is displayed above the thumbnail image, which is the same as the imported file if you have not renamed it.
Underneath the thumbnail there is more information;
- File Name - The original file name when imported. This will always be kept as data on the file even after the file is renamed.
- File type, File Size, Colors, Stitches, Height and Width.
There is also:
- Owner - If the designs are purchased, the owner would be you. If the designs are from a Library subscription, the owner is Library. If it is a Library design, this will also show as label on the design.
- Imported date and Modified date.
- Stitch List.

Filter
When you click on Filter, you will find different options to filter on:
- Album - Select a specific or several Albums to search in
- File Types - Choose what type of file you are looking for
- Design Size - Filter on Size in height and width
- Color Block Count - Filter on Maximum count
- Stitch Count.- Filter on Maximum count
When you are done with the current filter, click on the button again to Clear Filter.
Select
Click on this button to select multiple files for additional labels etc. Click on the button again to end the multi select.
.
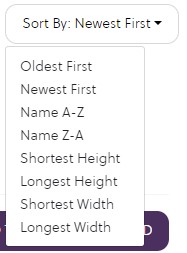
Sort by
This will sort the files by:
- Oldest First
- Newest First
- Name A-Z
- Name Z-A
- Shortest Height
- Longest Height
- Shortest Width
- Longest Width
Search
You can do a free Search in the search area at the top of the page. This Search function will search on Design Names and labels.

Download All
Download all your files from Vault in a .zip file. Click on All Files and Download All.
Drag and Dop your files
You can create Albums in Vault, directly in the Album structure. Click on All Files, Add Album.
Create an new Album. Then you can drag and drop the files you want to add in the Album. Lets say you want an Album with dogs. Just search for all files labeled dogs and drag them to the new folder.
Library Designs imported to Vault
When you upload files from mySewnet Library, the labels from Library will automatically be imported with the files.
FAQ
Can remove all my files from Vault?
Yes - You can click on All Files and Download All to get a zipped folder downloaded including all your files.
Can anyone else see or have access to my files on Vault?
No - This is your personal storage connected to your mySewnet Account with username and password.
Is Vault replacing Cloud?
No - Vault is used for the organizing and Cloud is used as temporary storage of the files you are currently working on in your machine etc.
I uploaded a file to Cloud but I cannot find it in my Cloud folder on my computer?
Unfortunately we had to discontinue the Cloud Sync Tool, so you can use the Cloud website connected through your Dashboard. All designs Uploaded to Cloud will be in the From Vault Folder.
READ MORE ABOUT CLOUD FUNCTIONALITY


 United Kingdom