United States
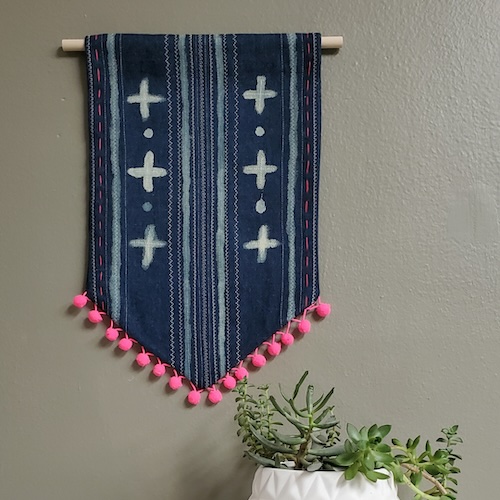
Stitched Denim Pennant
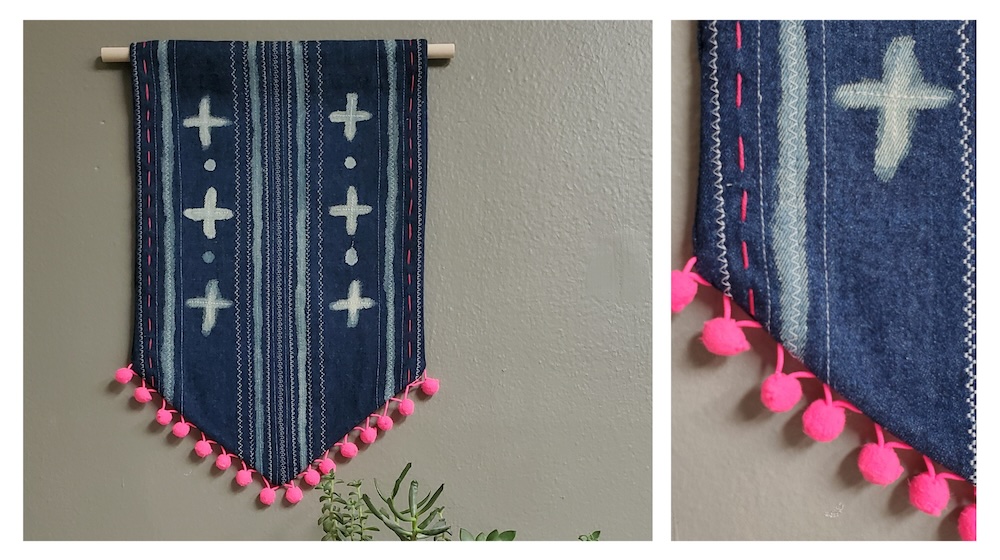 Create a unique wall hanging using denim scraps, stitching, and bleach embellishments. This project offers the perfect excuse to play with the decorative stitches on your sewing machine.
What you need:
- Sewing Machine
- Sewing Thread
- Denim fabric
- Lightweight stabilizer
- Bleach
- Cotton swabs
- 12” dowel
- Decorative rope
- Fabric marking pen or chalk
- Decorative trim (optional)
- Embroidery floss (optional)
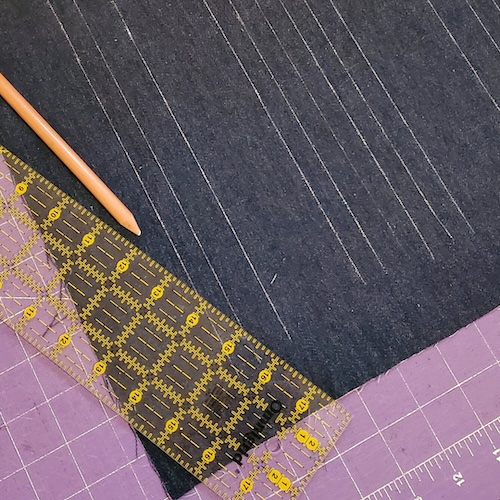
Cut:
- Two pieces of denim 14” x 20”
- One piece of stabilizer 14” x 20”
Prepare:
- Fuse stabilizer to the wrong side of one denim panel.
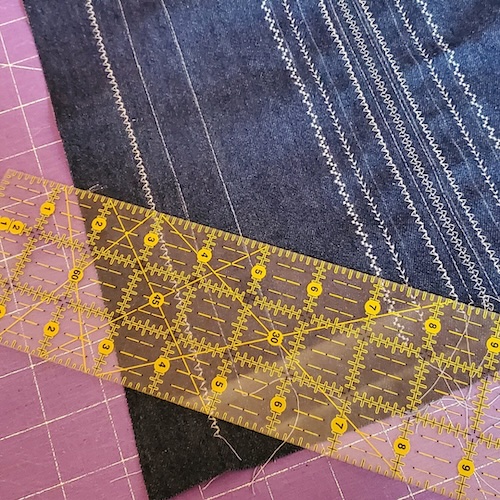
- Using a ruler and fabric chalk, draw evenly spaced lines vertically on one denim panel. Vary the placement to create a unique design. In the sample, the lines are ½” to 1½” apart.
Sew:
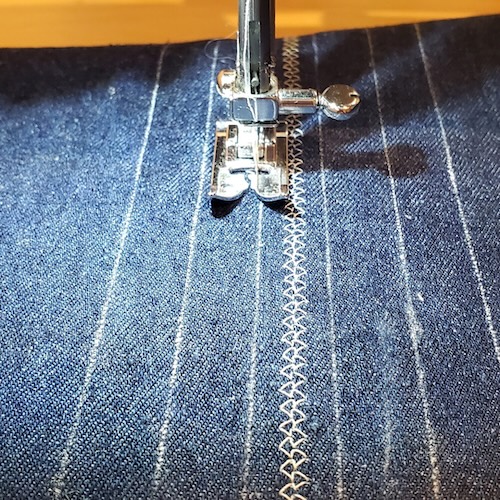
- Select decorative stitches on your sewing machine to use. Note that utility stitches can also be used. The sample incorporates the following stitches: Feather Stitch, Arrowhead Outline Stitch, Triple Domino Stitch, ZigZag Stitch and Straight Stitch.
- Stitch along the chalk lines from the upper edge to the lower edge of the denim panel, starting with the center line of stitching and moving outward. If your machine doesn’t have mirroring, rotate the design and stitch from the lower edge up to maintain stitch orientation.
- Square up the panel edges with scissors or a rotary cutter.
- Measure up from each lower side edge 5 ½” inches; mark with chalk. Draw a line from the center point to the mark and cut along those lines, creating the angled lower edge.
- In a well ventilated space, place an old towel on the floor. Place the stitch panel on the towel. Dip the cotton swabs in bleach, and draw lines and patterns on the denim panel. For whiter lines, trace the patterns multiple times with the swab, and let the bleach dry longer periods of time.
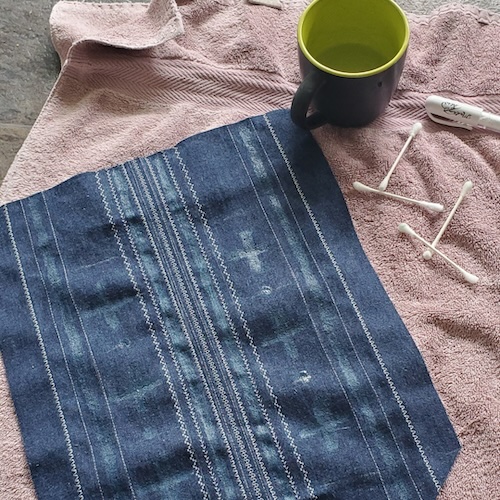
- Rinse the panel, let air dry, and press well.
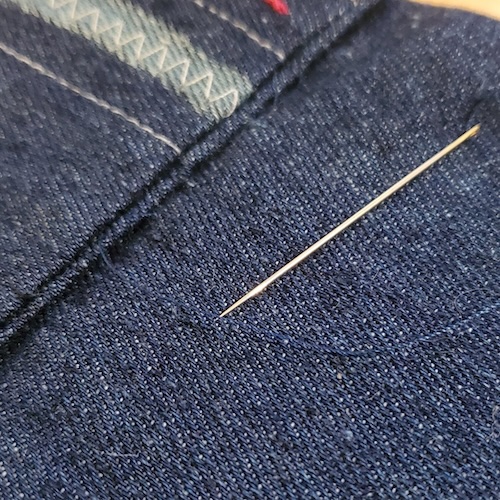
- Add additional stitching to the bleached lines and shapes. Embellish with embroidery floss and hand stitches, if desired.
- Place the embellished panel on the remaining denim panel, and cut around it like a pattern piece to create the pennant wrong side.
- Pin the decorative trim to the lower angled edge, aligning the trim edge with the raw fabric edge. Baste in place.
- Place the pennant wrong side face down on the pennant front, sandwiching the trim between the layers. Pin and stitch around the perimeter, leaving a 3” to 4” opening for turning.
- Clip the corners and turn the pennant right side out. Press well, then hand stitch the opening closed.
- Press the pennant upper edge 1” to the wrong side. Hand stitch the pennant edge in place, to the back layer only.
- Slide the dowel through the casing and hang the pennant.