United States
Shirt School - Lesson 1: Creating the Pattern
Welcome to Shirt School - Lesson 1: Creating the Pattern!
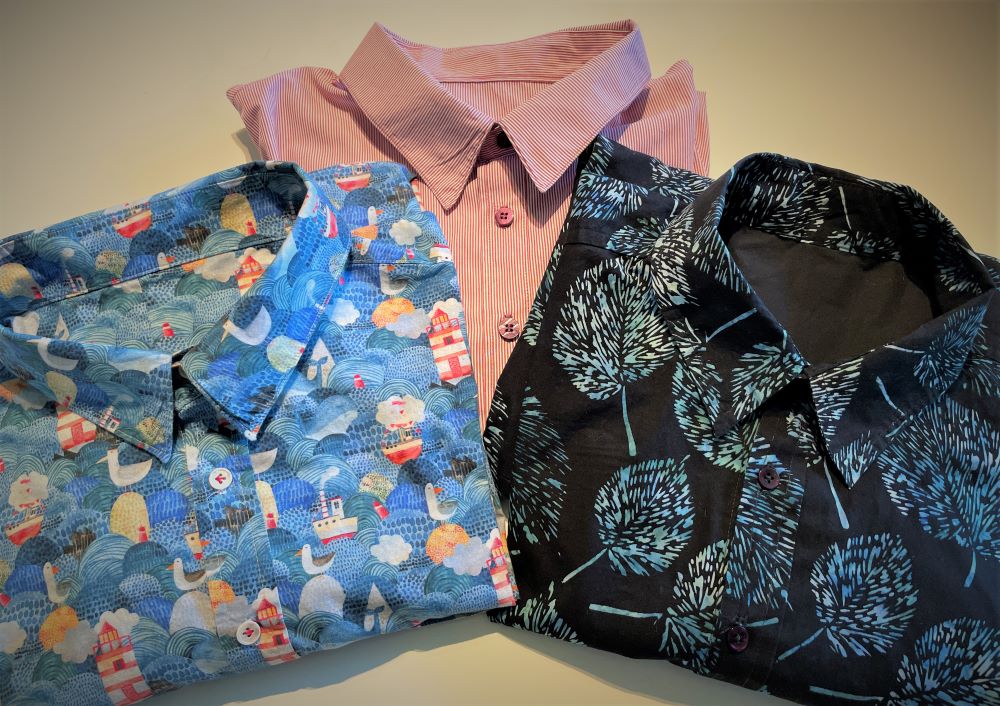
Welcome to the beginning of a 7-part series on crafting the perfect shirt! Written by our very own content creator Mikael Svensson, will be your guide throughout this journey, helping you navigate from selecting and adjusting the pattern to completing your masterpiece.
This shirt-making adventure is designed to be beginner-friendly. At every stage, I've handpicked the simplest methods, ensuring that your finished shirt looks polished and ready to impress. Our goal? To have people asking where you purchased it, not if you made it yourself! Plus, this pattern is generously sized, catering to sizes up to 4XL. Let's get started on creating your perfect shirt!
Introduction:
Creating a shirt involves combining various details to form the final product. The method outlined below is a semi-professional approach, carefully crafted to be efficient and straightforward at each stage. Simply follow the steps provided to achieve optimal results.
This shirt design offers plenty of room for personalization. It's recommended to start with the standard version outlined here before experimenting with different details. Additional tutorials on creating variations such as collars, cuffs, sleeves, and more are available in the educational section of mySewnet Studio. Simply search for "shirt school" to access them. Happy sewing!
Finished shirt measurements
|
size |
chest |
Back length from base of neck |
Collar width |
Sleeve length |
|
Small-Medium |
43” (110cm) |
29,5” (75cm) |
15,5” (39cm) |
23” (59cm) |
|
Large |
46” (118cm) |
30” (76cm) |
16” (41cm) |
23” (59cm) |
|
X-large |
49” (126cm) |
30,5” (77cm) |
17” (43cm) |
23” (59cm) |
|
2xl |
53” (135cm) |
31” (78cm) |
17,5” (45cm) |
23” (59cm) |
|
3xl |
56” (143cm) |
31” (79cm) |
18,5” (47cm) |
23” (59cm) |
|
4xl |
59” (151cm) |
31,5” (80cm) |
19,5” (49cm) |
23” (59cm) |
Here's a beginner-friendly checklist for everything you'll need to make your shirt:
- Fabric: The amount you'll need depends on your size, but a general rule is to go for about two lengths of the shirt and one length for the arms. Pro tip: Before buying fabric, lay out your paper pattern with seam allowances and hems on fabric of similar width to calculate the yardage needed. This little trick can save you money!
- Extra Fabric: Don't forget to grab a bit more for the cuffs, pocket, and collar. While you can often cut these pieces around the larger pattern pieces, I suggest adding around 12 inches (30 cm) extra just to be safe.
- Fusible Interfacing: This helps give your shirt structure and a polished look. I prefer the woven type for a softer and more natural appearance.
- Sewing Thread: Make sure you have enough thread to sew all your pieces together.
- Buttons: Look for buttons that are about ⅜ inches (1 cm) in diameter. You'll need around ten, but it's always good to have a few extras, especially if your shirt is on the longer side.
- PDF Pattern: Don't forget to have your PDF pattern ready to go. This will be your guide throughout the entire sewing process. Download Here
Printing and Assembling the Pattern
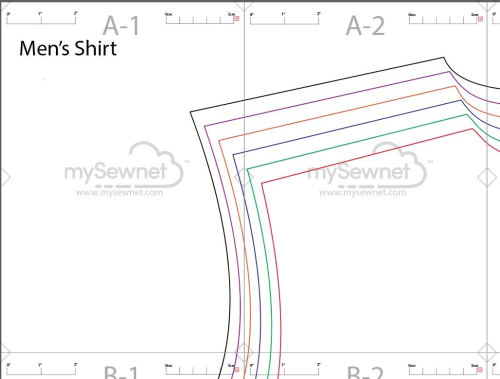
1. Print out the PDF. Print in actual size and start by measuring the size check lines for accuracy.
2. Tape the pages together to make the pattern. The markings on the center and corners should be aligned.
Choosing the right size from the finished shirt measurements
3. The shirts are in sizes Small-Medium to 4XL. See the measurement chart above for guidance. This is to help you decide which size to choose. If you need guidance, you can measure a shirt that you already have for comparison.
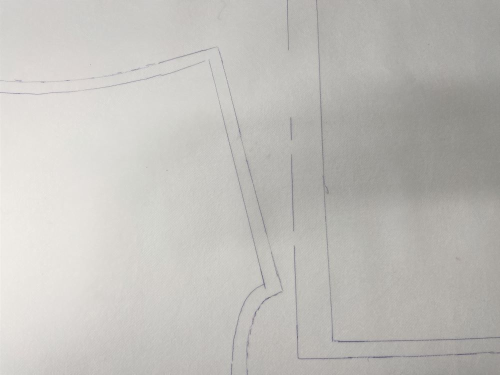
4. Trace the pattern pieces on tissue paper or similar. Leave at least 4” (10cm) at the front edge to make room for the front placket. Do not cut out the pattern pieces yet.
Adjusting the pattern according to your style options.
The pattern has No extra width added at the center front because I wanted you to have the opportunity to change the look by using different front plackets.
In this standard shirt we will use the simplest of methods, the double folded edge.
5. To adjust the pattern for a double folded front. Add 3” (7,5cm to the front edge. This includes the seam allowance here.

Adding seam allowances
6. Add ⅜” (1cm) seam allowance to all sides except the hemline where 1 1/4” (3cm) should be added. At the center front there should be no seam allowance added, it is included in the 3” (7,5cm) we already added to the pattern. No seam allowances are to be added on fold lines.
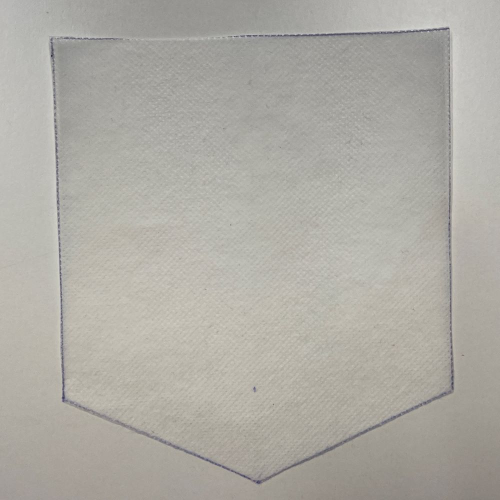
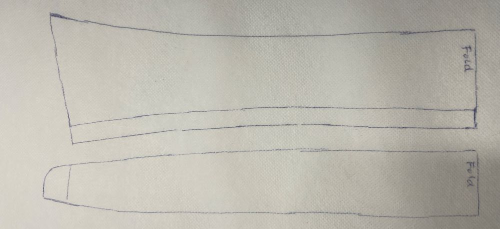
7. On the pocket, collar, collar stand and cuff pieces no seam allowance should be added except at the lower edge of the collar, where a ⅜” (1cm) seam allowance is needed. See image below. These pattern pieces will only be cut out in interfacing, not the shirt fabric.
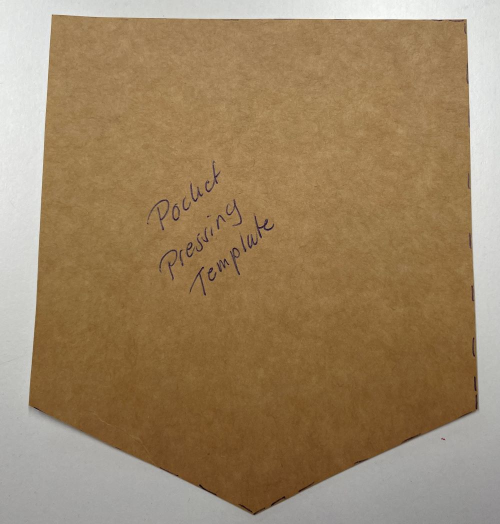
8. Cut out the pocket pattern piece and make a cardstock template from it. Thin cardboard from a cereal box will be fine! This will be a pocket pressing template that you can use repeatedly.