 United States
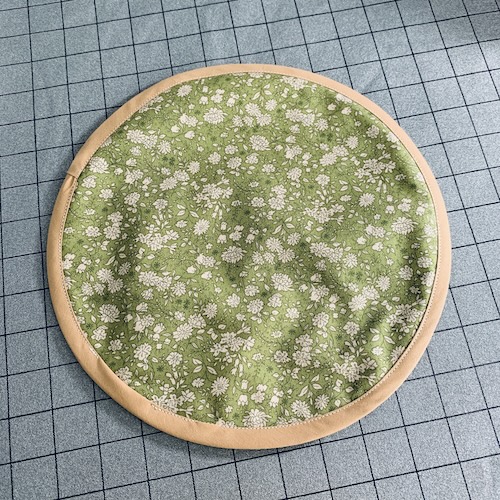
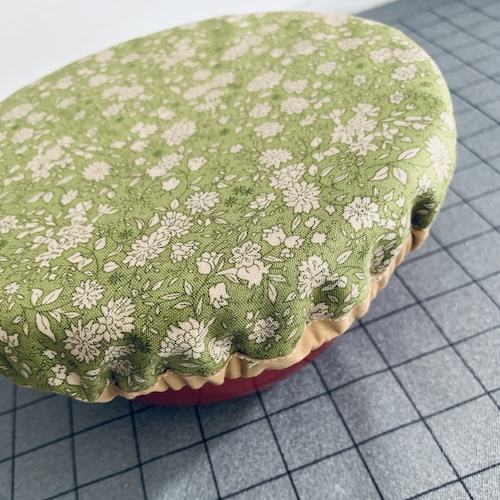
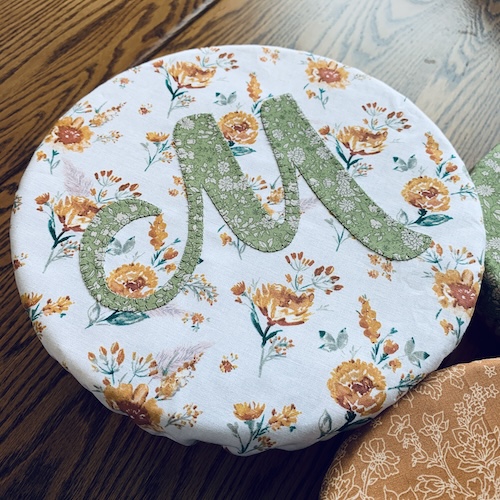
Reusable Bowl Covers
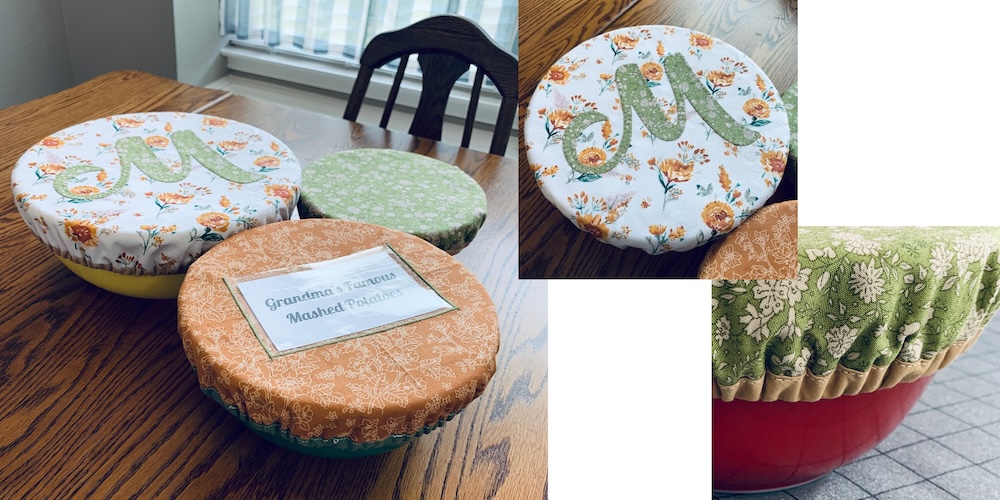
Go green & save money by creating your own reusable & washable bowl covers! They are great for any holiday throughout the year with matching fabric. Personalize with a monogram or a vinyl card slot to label the dish or alert others of possible allergy ingredients.
Everything you need to complete this project in one place. Use this convenient checklist to ensure you have all required materials in your sewing room, or take it with you while you shop for supplies.
What you need:
- Download Instructions
- SINGER® Quantum Stylist™ 9960
- Main Fabric - x1 Fat Quarter
- Coordinating Fabric - x1 Fat Quarter
- Bowl for Covering
- Vinyl Fuse (matte or gloss)
- Coordinating Thread
- ¼” Elastic
- x1 Pkg Coordinating Extra Wide Double Fold Bias Tape
- SINGER® Regular Point Needles
- SINGER® 8.5” ProSeries Scissors
- SINGER® SteamCraft Steam Iron
- Pins or Clips
- Safety Pin
- Marking Pen or Chalk
Optional:
- Monogram:
- Inspira® Stitch N’ Fuse II
- Inspira® Fusible “No Show” Mesh (for the back side)
- Accent Coordinating Fabric
- SINGER® Open Toe Presser Foot
- Coordinating Thread
- Clear Vinyl Slot:
- Clear Vinyl (light weight gage)
- Inspira® Fusible “No Show” Mesh (for the back side)
- Coordinating Thread
Project Steps
- Take the bowl you’re wanting to cover & place it upside down on the wrong side of the main fabric.
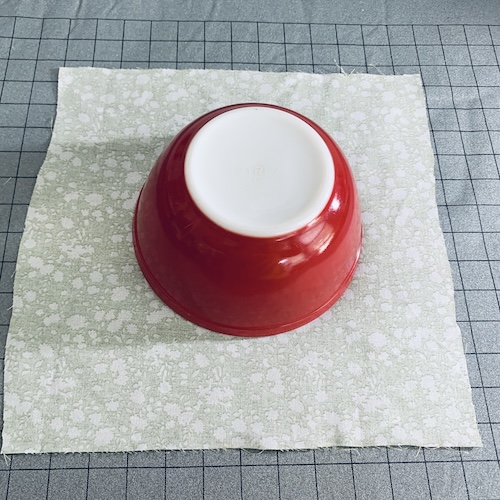
- Using your marking pen, draw around the edge of the bowl.
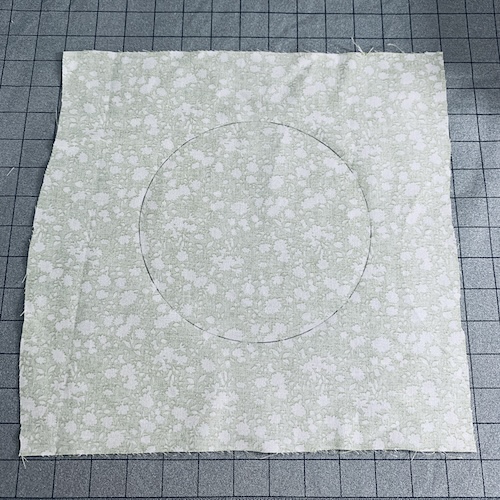
- Using a measuring tape & marking pen draw hashes all the way around the bowl outline.
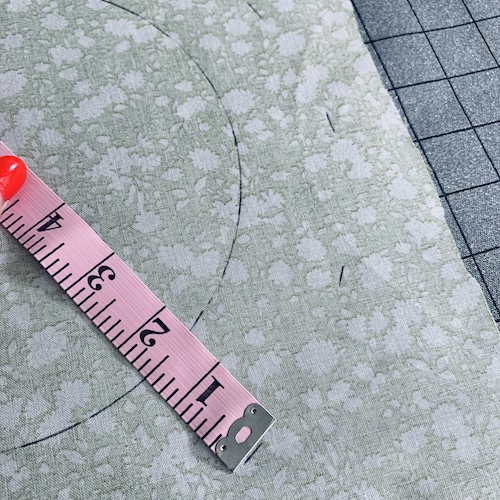
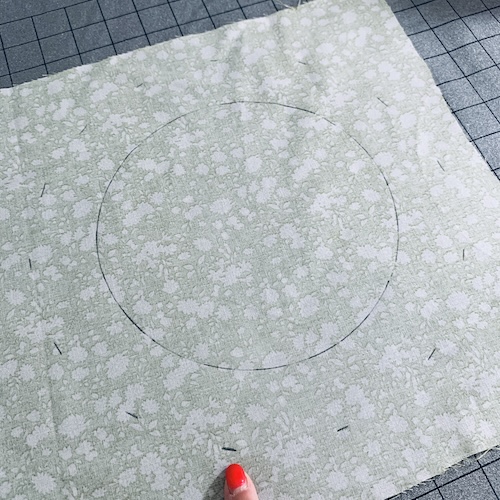
- Roughly connect the hash marks together to create a full circle around the bowl outline circle.
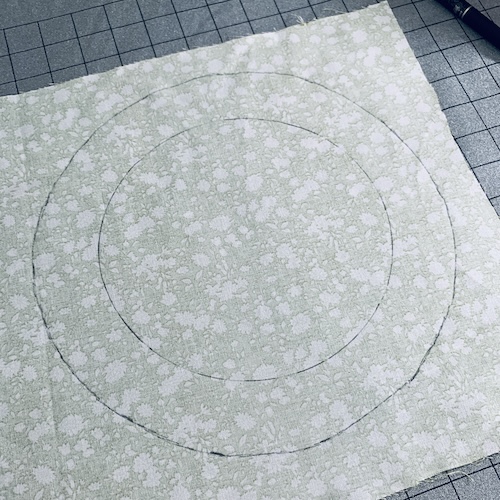
- Using your Singer®5” ProSeries Scissors cut around the outer circle & set aside.
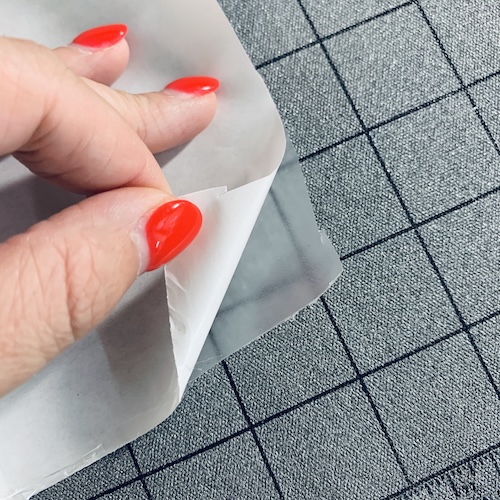
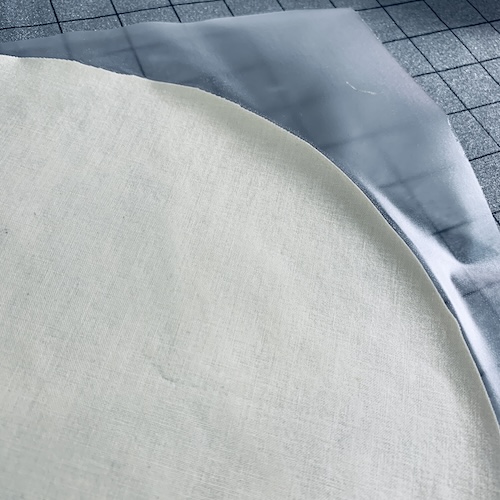
- Take the vinyl fuse & cut off a piece big enough to cover the size of a circle like you just cut from the main fabric.
- Peel away the paper side of the vinyl fuse.
8. Place it over top of the right side of the coordinating fabric with the sticky side down.
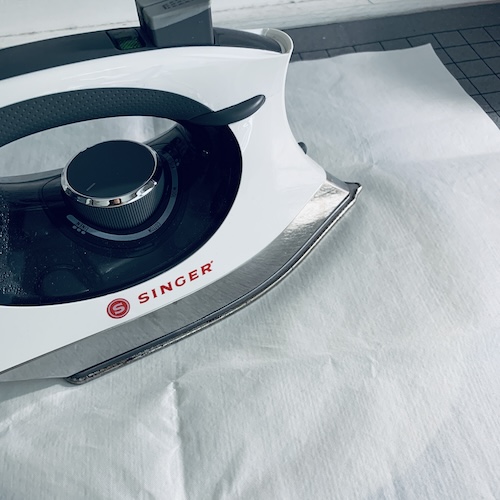
- Place the paper that was just pulled off over top of the vinyl fuse to protect it from the heat of the iron.
- Using the SINGER® SteamCraft Steam Iron press the vinyl fuse to the coordinating fabric. Take off the pressing paper.
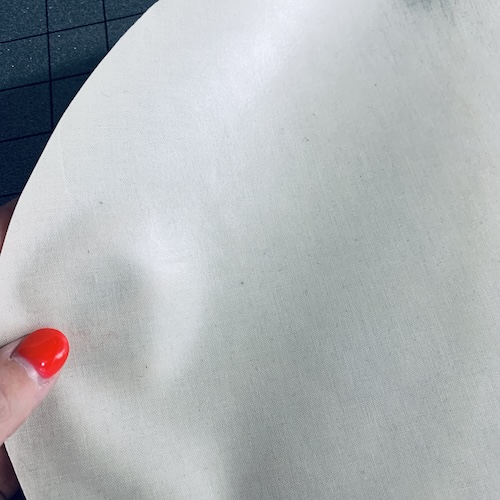
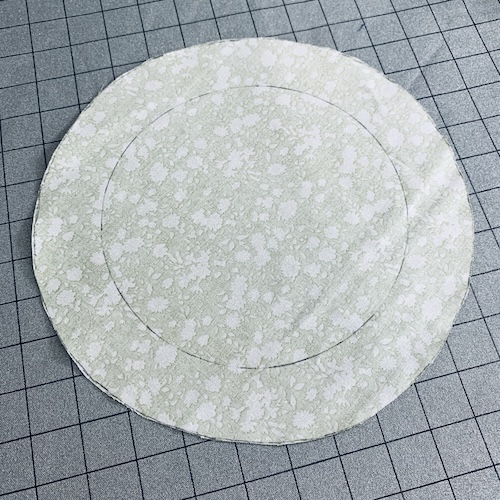
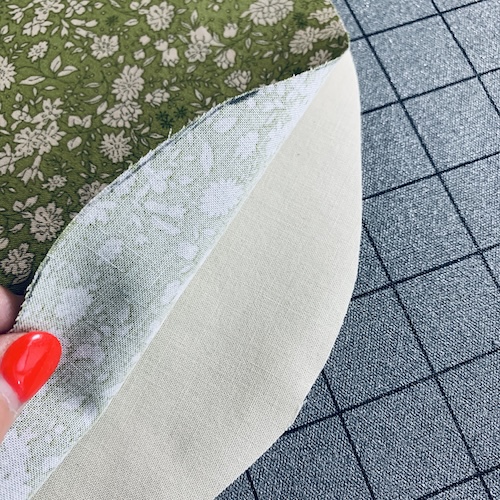
- Place the main fabric circle on top of the coordinating fabric & using your Singer®5” ProSeries Scissors cut around it to create an equal circle.
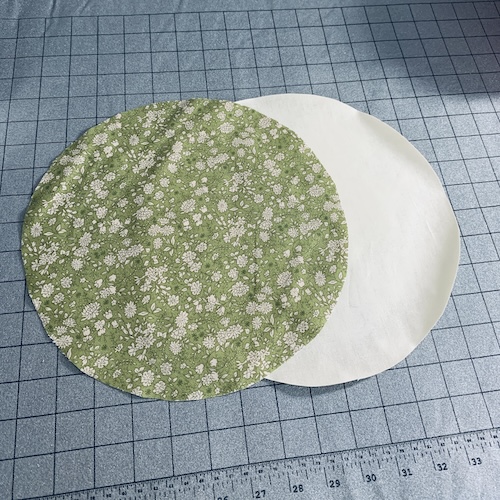
- Place the vinyl fused coordinating fabric circle right side down with the main fabric circle right side up, lining up the edges.
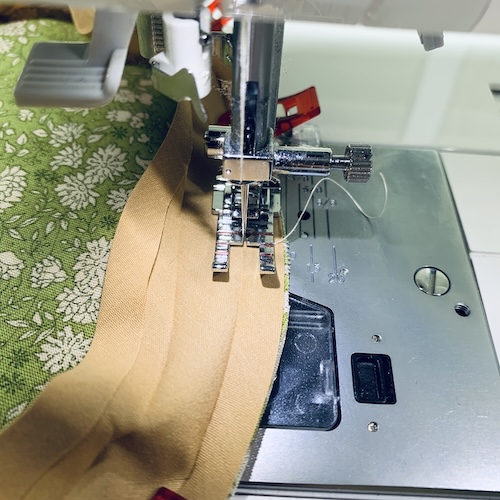
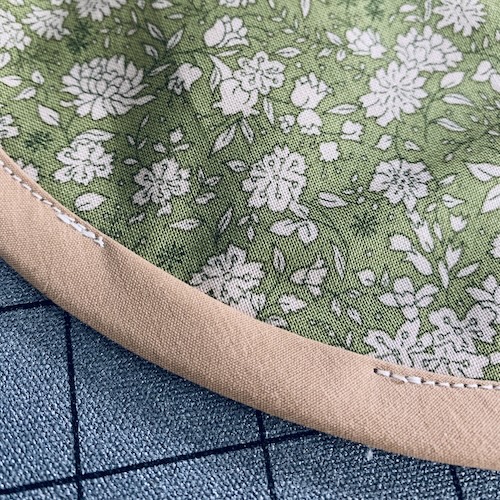
- Take the double fold bias tape & open it up completely.
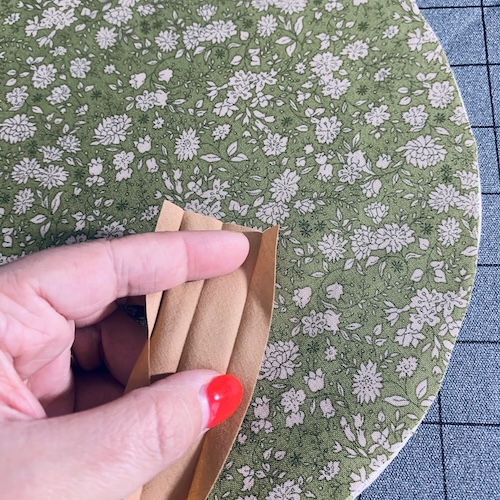
- Fold over the raw edge ¼” & press with your SINGER® SteamCraft Steam Iron.

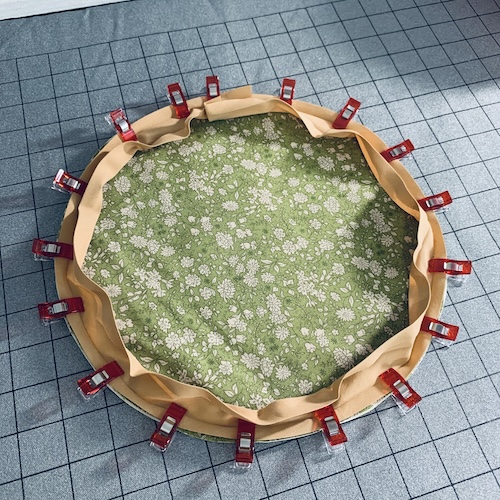
- Leaving the bias tape open, clip or pin it to the edge of the circle sandwich, lining up the raw edges.
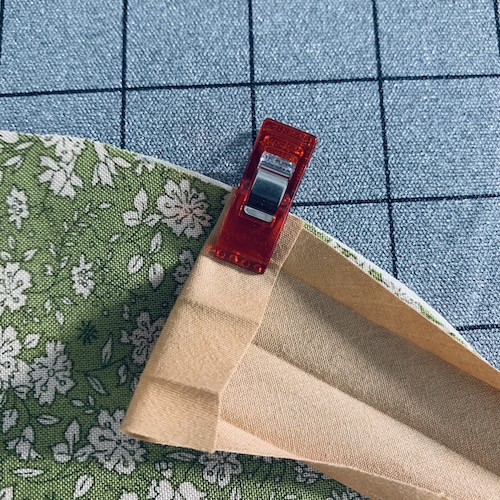
- Working all the way around the fabric circle sandwich, continue to clip or pin the raw edges together.
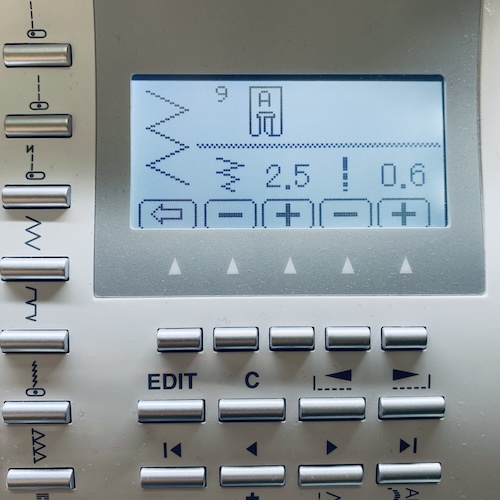
- Using the Singer® Quarter Inch Piecing Presser Foot sew on the closest pressed fold to the edge of the circle sandwich, all the way around.
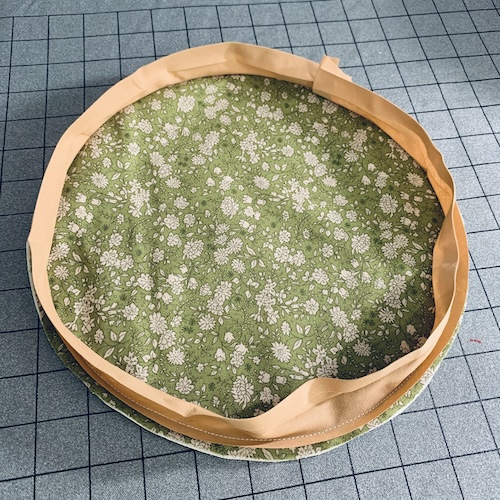
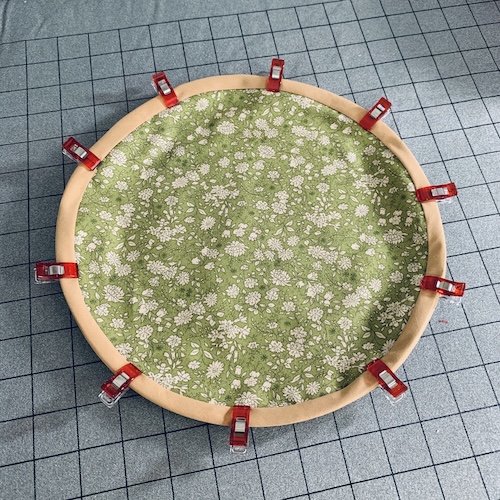
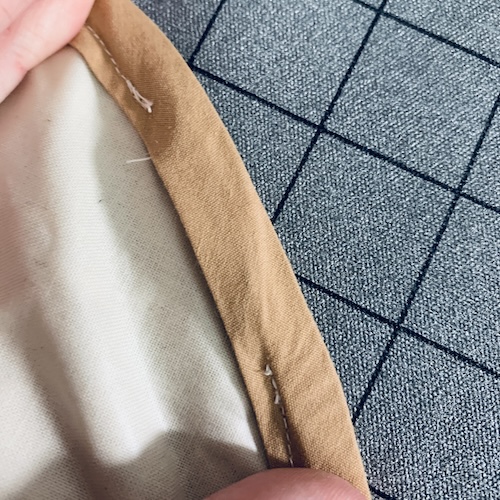
- Fold the double fold bias tape back in on itself & around the raw edge of the circle sandwich to the backside.
- Pressing the edge with your SINGER® SteamCraft Steam Iron can help it fall into place naturally.
- Clip or pin to hold in place all the way around.
- Using the Singer® Quarter Inch Piecing Presser Foot sew around the circle close to the folded edge leaving a 1 ½” opening to insert the elastic.
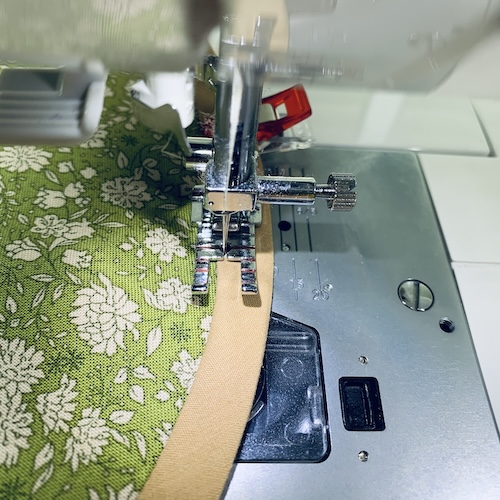
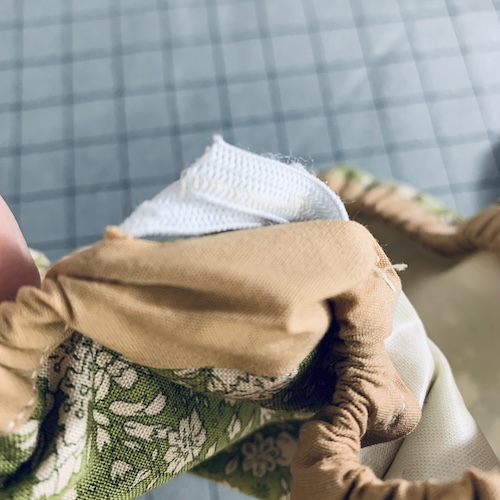
- Using a safety pin, pin it to the raw edge of the elastic.
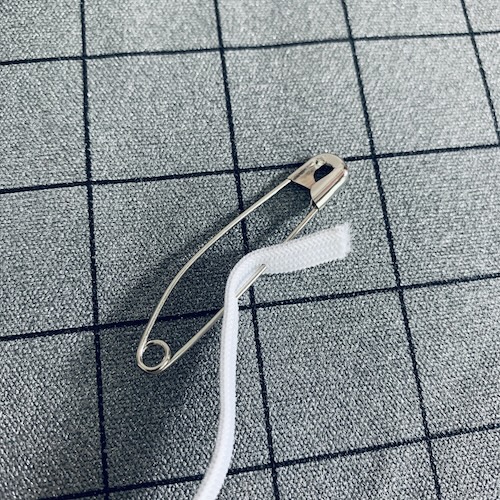
- Feed the safety pin through the 1 ½” opening. Work slowly.
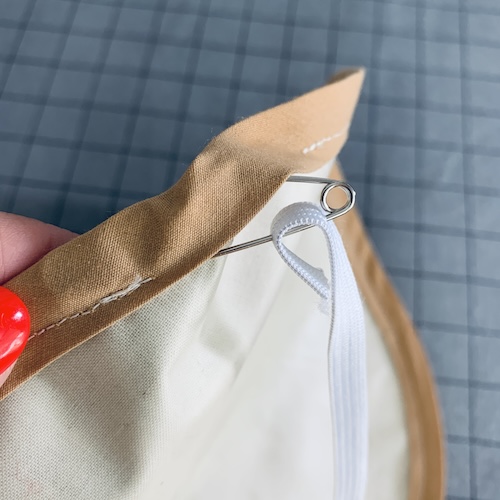
- Pull the elastic so that you have a good scrunch/gather of the bias edge.
- Line up the raw edges & sew a skinny, close zig zag about ½” long to stitch them together.
- Stretch out the area where the opening is & place it under the presser foot.
- Sew in the same manner as in step #21 to close up the opening.

- Place your new bowl cover on your bowl & admire!
OPTIONAL:
- Add a monogrammed letter to the top of the bowl cover after step #5.
- Add a clear vinyl slot for a recipe card or if there is a peanut or any other possible allergy ingredient with your family & friends.
