 United States
Mermaid Tail Crossbody
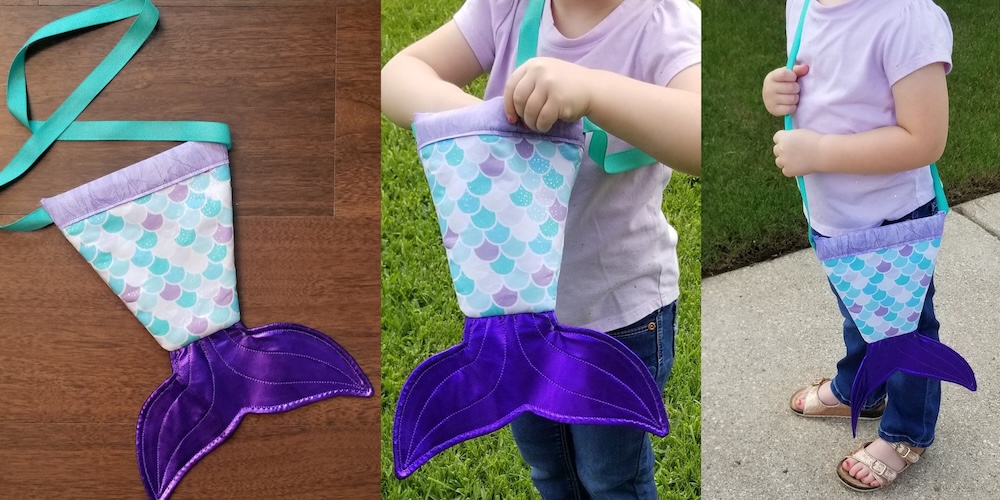
Whether you have a special little one who’s into mermaids or you personally have a love for them this mermaid tail crossbody is perfect. It includes an easy snap opening!
Everything you need to complete this project in one place. Use this convenient checklist to ensure you have all required materials in your sewing room, or take it with you while you shop for supplies.
What you need:
- Singer® Quantum Stylist™ 9960
- Singer® Sew Easy Foot
- Singer® Non-Stick Presser Foot
- Singer® Quarter Inch Piecing Presser Foot
- ½ yd Main Fabric (Tail Body)
- ½ yd Tail Lining Fabric
- ¼ yd Coordinating Metallic Pleather Fabric (Tail Fin)
- 1 yd Coordinating Twill Tape OR Ribbon (Strap)
- Singer® SteamCraft Steam Iron
- Singer® Ironing & Crafting Station
- Metal Measuring Tape
- Warm & Natural Batting
- Pellon Decor-Bond Fusible Stabilizer
- Coordinating Sewing Thread
- Rotary Cutter & Mat OR Fabric Scissors (Cutting Fabric)
- Crafting Scissors (Cutting Metal Measuring Tape)
- Pin or Clips
- Marking Pen
Optional:
- Duct Tape
- Singer® S0100 Serger
Project Steps:
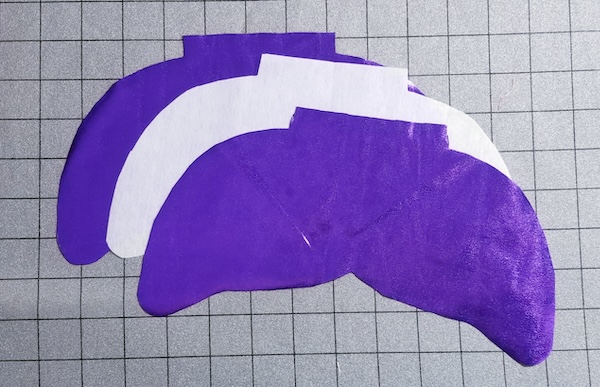
- Cut out provided pattern pieces.
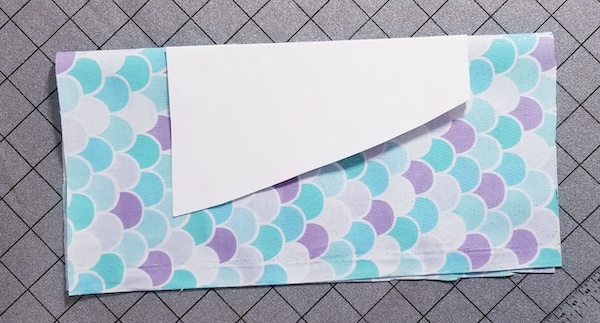
- Cut out x2 of pattern piece A from the main fabric (tail body) & Warm & Natural batting on the fold according to the pattern piece.
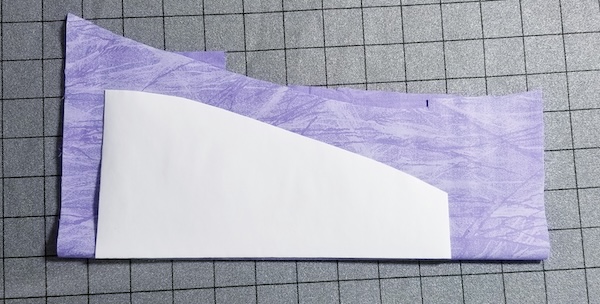
- Cut out x2 of pattern piece B from the tail lining fabric on the fold according to the pattern piece.
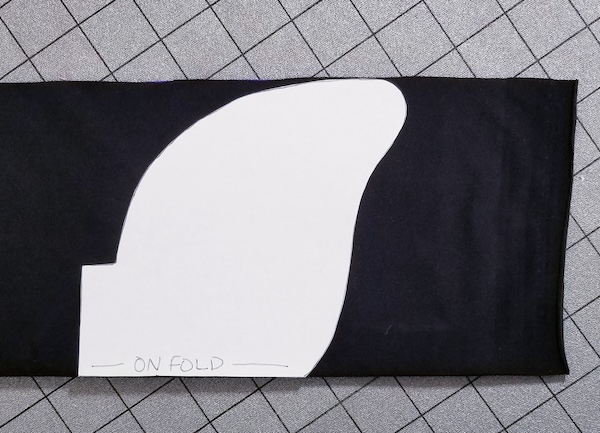
- Cut out x2 of pattern piece C from coordinating fabric (tail fin) & x1 of pattern piece C from Pellon Decor-Bond fusible stabilizer on the fold according to the pattern piece.
- Using the Singer® SteamCraft Steam Iron to fuse the Pellon Decor-Bond fusible stabilizer to one of the cutouts of the tail fin (pattern piece C).
- Place the tail fin pieces right sides together. Pin or clip in place. Using the Singer® Sew Easy Foot at a ⅜” seam allowance sew around the tail fin, backstitch at the beginning & end. Leave the short straight edge open for turning.
Pro-Tip: When sewing, place the fin without the stabilizer on it against the feed dogs to avoid any gathering or puckering.

- Cut close to the seam around the tail fin.

- Turn right side out & press using the Singer® SteamCraft Steam Iron.
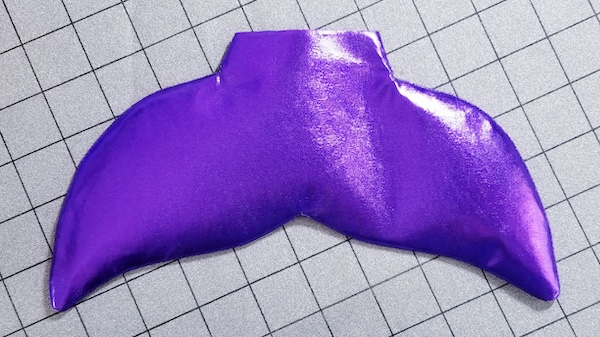
- Using the Singer® Non-Stick Presser Foot top stitch around the tail fin, also feel free to add accent lines with the curve of the tail. Set aside.
Pro-Tip: Using Singer® Non-Stick Presser Foot on the pleather fabric can help move the fabric more smoothly.
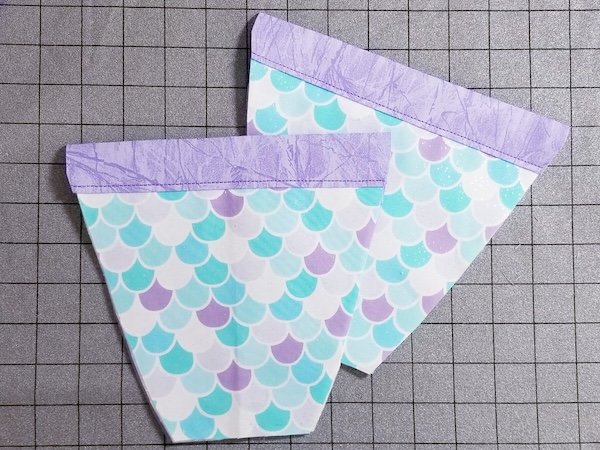
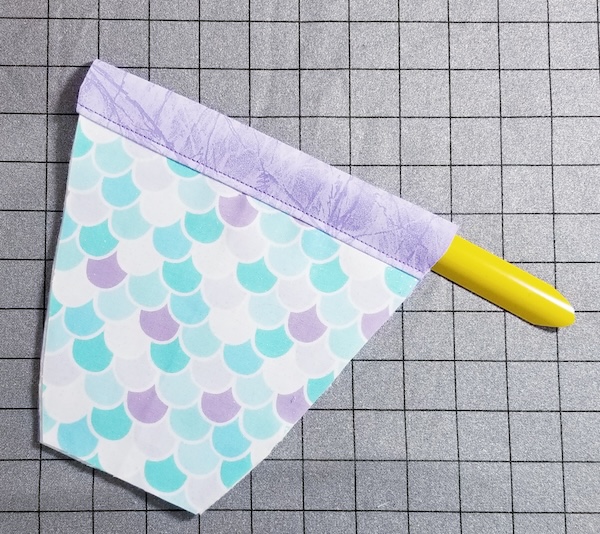
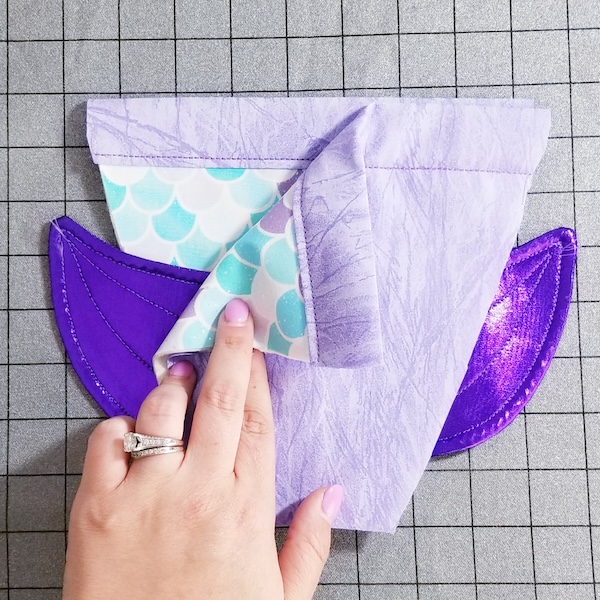
11. Take one each of the tail body, Warm & Natural batting & tail lining. Place the tail lining right side down.
12. Place the Warm & Natural batting on top lining up the bottom short edge. Pin or clip in place.
13. Place the tail body right side up on top of the Warm & Natural batting again lining up the bottom short edge. Pin or clip in place.
14. Using the Singer® Ironing & Crafting Station fold over the top edge of the tail lining a ¼”, press with the Singer® SteamCraft Steam Iron.
15. Fold that same edge over again onto the tail body at 1 ¼”. Press with the Singer® SteamCraft Steam Iron. Pin or clip in place. Straighten up the side edges with your rotary cutter & mat.
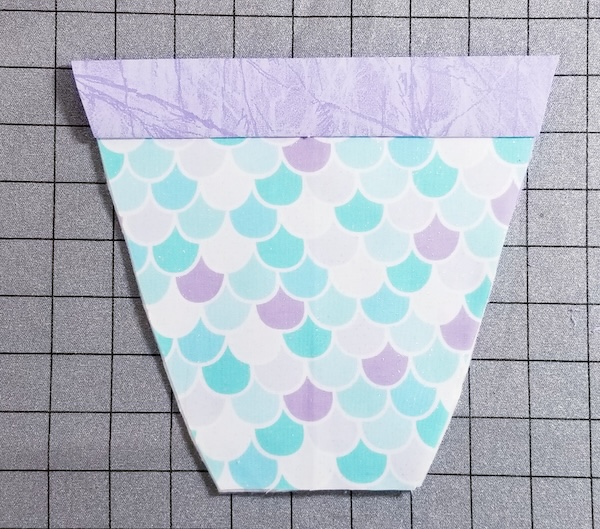
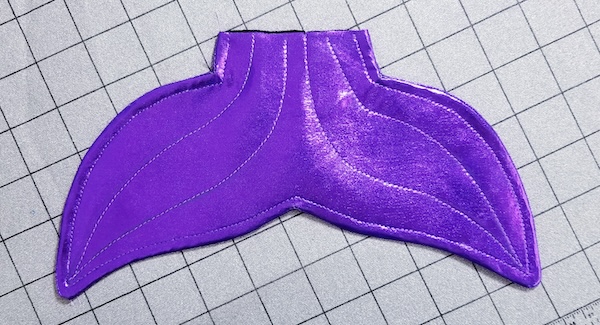
16. Using the reinforced stitch, top stitch ⅛” away from the bottom edge. 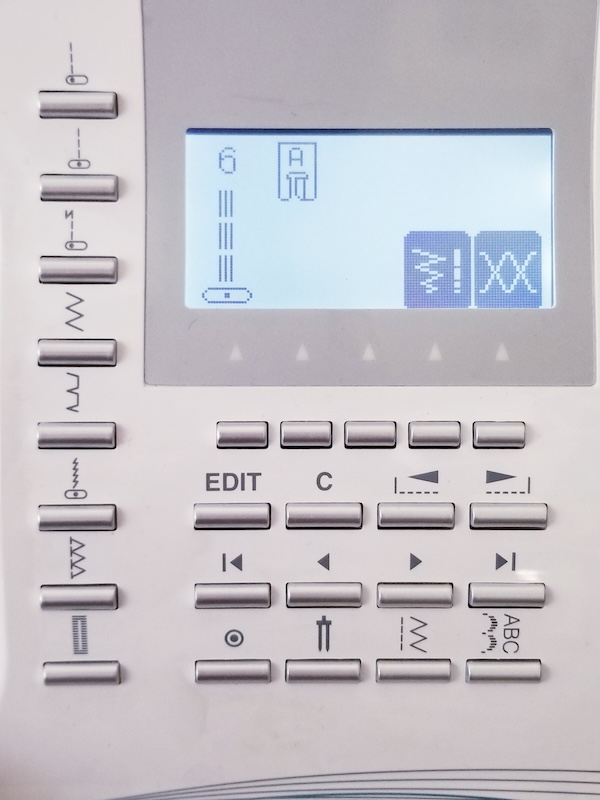
17. Repeat steps 10-15 with the other set of tail body fabrics.
18. Using your crafting scissors cut x2 of metal measuring tape at 6” long. Curve the edges to avoid the sharp corners, you can also add duct tape to the end to smooth them out. 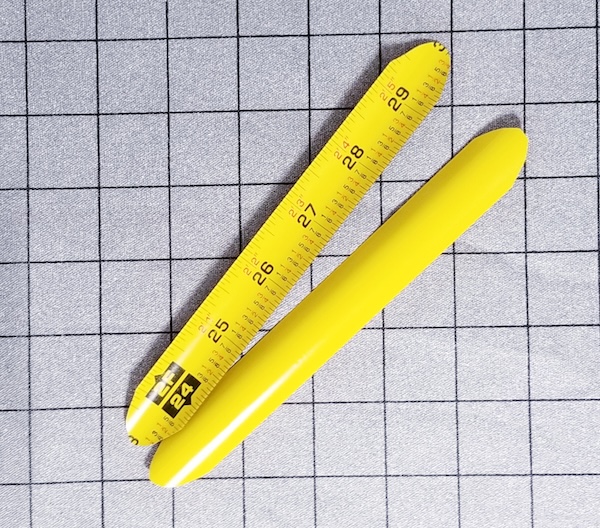
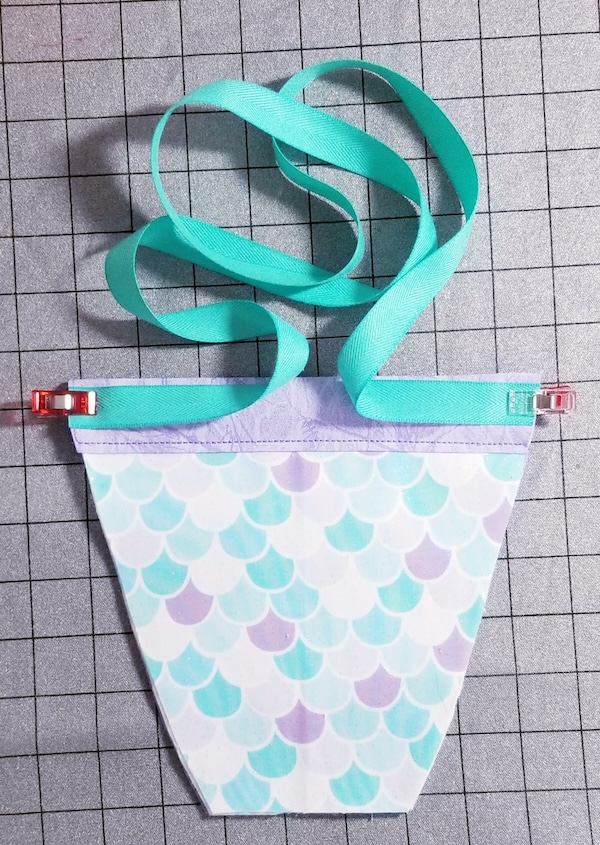
19. Place one of the measuring tape strips into the opening of the fold over lining trim. The numbers on the measuring tape need to face what will be the inside of the crossbody.
20. Repeat step 18 with the second measuring tape strip.
21. Take one of the tail body sections & place it right side up. clip the end of your twill ribbon to the top edge of the tail body with the raw edges out. Pin or clip in place.
21. Take the tail fin & line it up the short edges. Centering the tail fin.
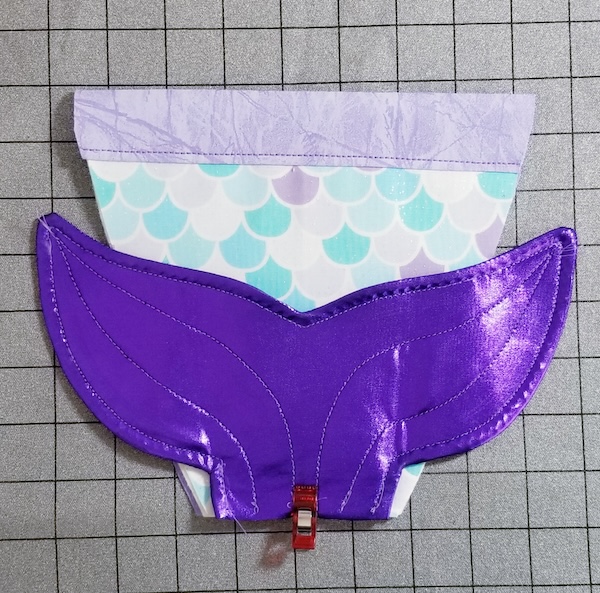
23. Make sure the tail fin ends are folded into the center of the tail body section, to avoid sewing into the tail fin side seam. Pin or clip in place.
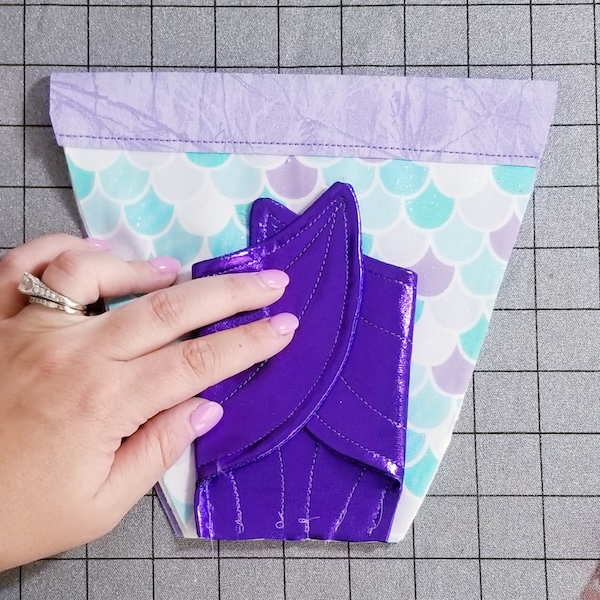
24. Take the second tail body section & place it right side down lining up the raw edges.
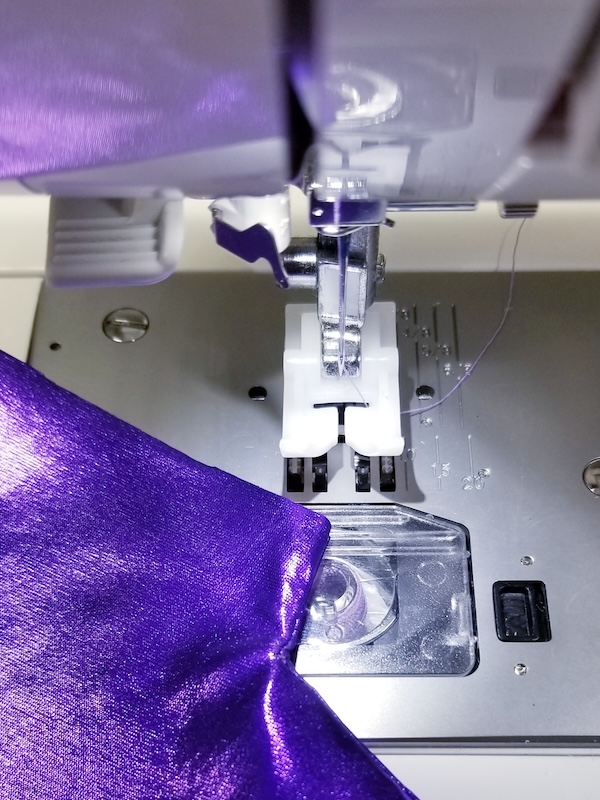
25. Sew along the side seams & bottom edge using the Singer® Quarter Inch Piecing Presser Foot, backstitch at the beginning & end to lock in place. Be careful not to hit the metal measuring tape when sewing down.
Optional: Using your Singer® S0100 Serger serge the raw edges to keep from fraying or you can go back around using the Singer® All Purpose Foot & an overcast stitch to clean up the raw edges.
- Turn right side out & enjoy!