 United States
Learn how to make Fine Art with your Embroidery Machine! Part 1
 Use your embroidery machine as a base for your creativity. With the mySewnet embroidery software there are so many features you can use to express your creativity. In this educational series we will investigate some of the features that are available.
Learn how to make Fine Art with your Embroidery Machine, Part 2 here !
Building the base for embroidery:
First, we will make a canvas to build your art on. The purpose is to get a firm background that will not distort or shrink. I will show you a straightforward way to do this background in the quilt block wizard.
The canvas should be a little larger than the finished result, e.g. I have a picture frame with a 130x180mm opening. I make the canvas 140x190mm to prevent the raw edges from being visible when finished.
The foundation needs to be sturdy and able to hold a lot of stitching. Therefore, we must make a base layer of stitching.
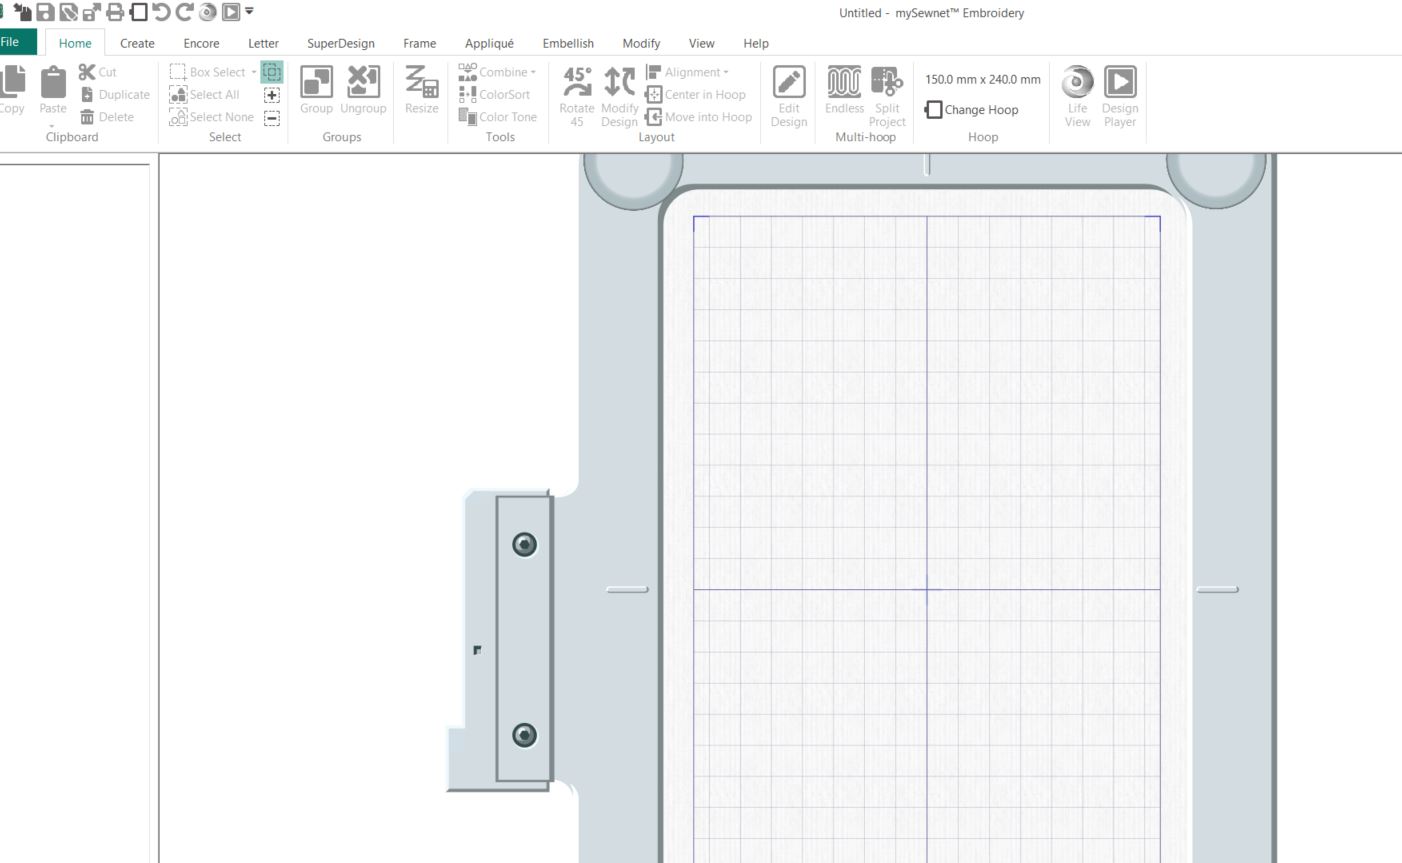
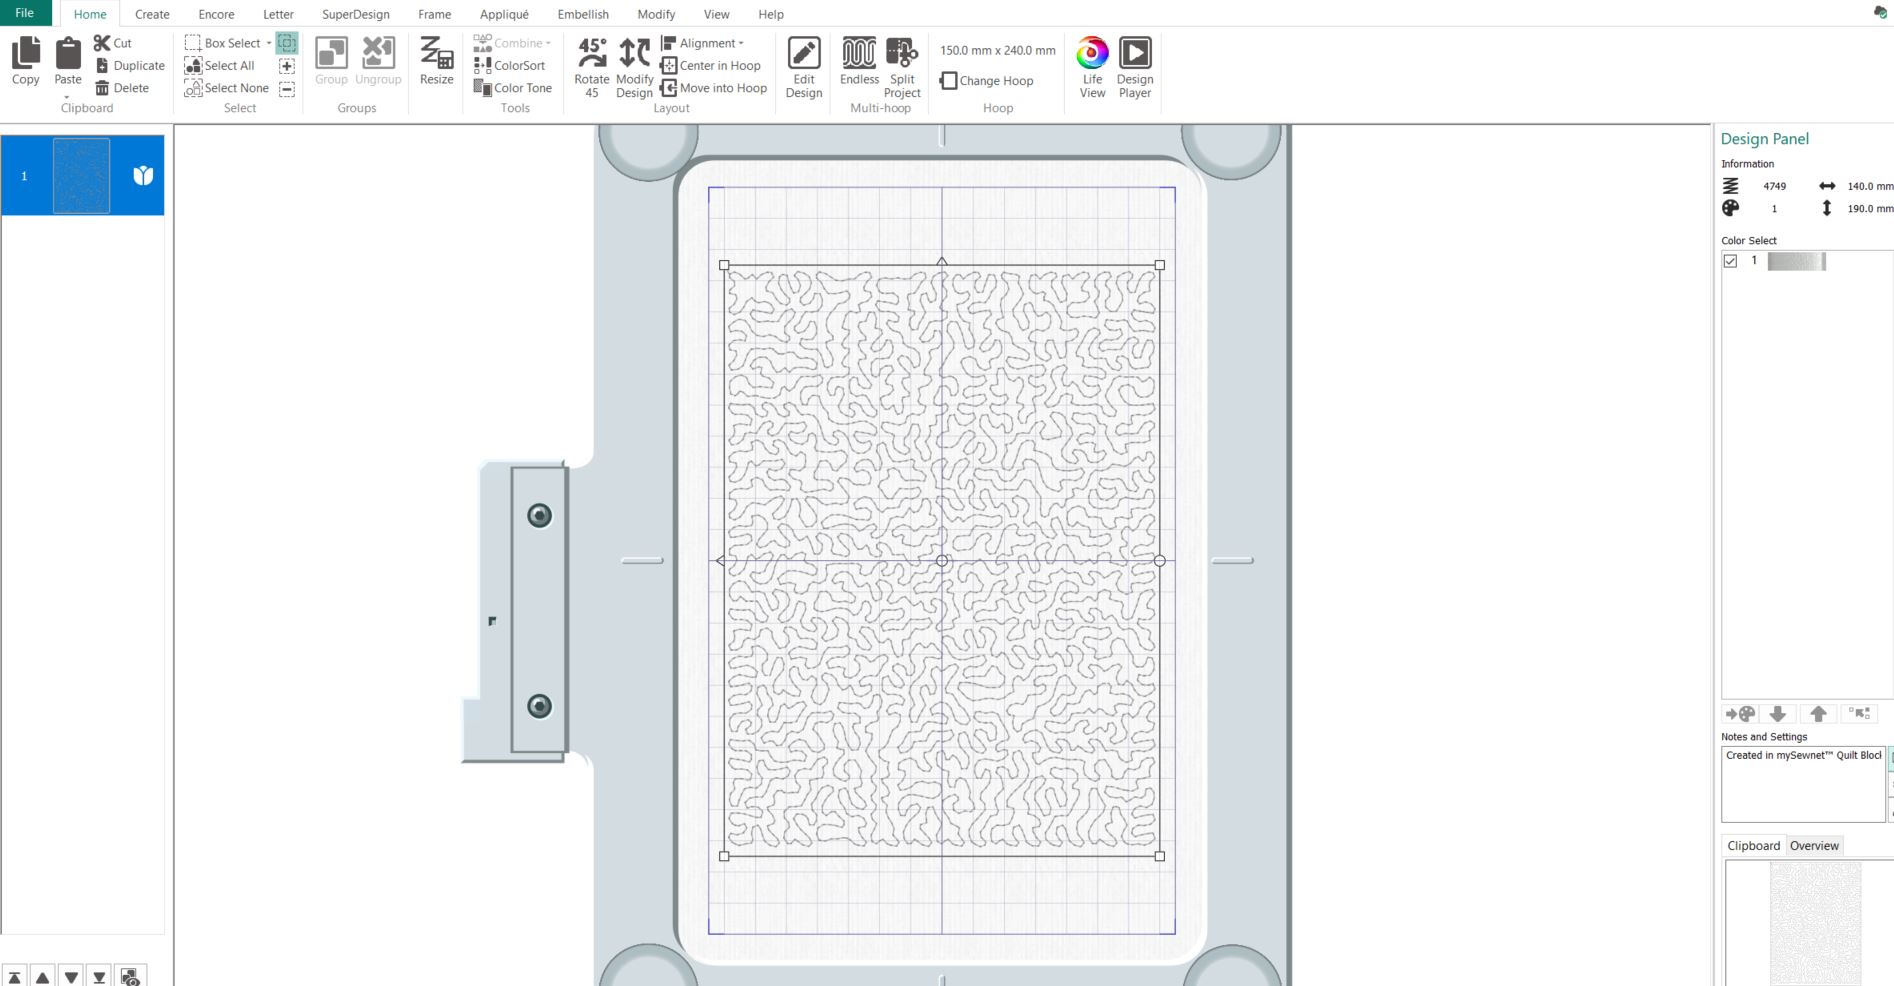
1. Open your mySewnet software, choose Blank Canvas and select the 150x240mm Creative Grand Metal Hoop.
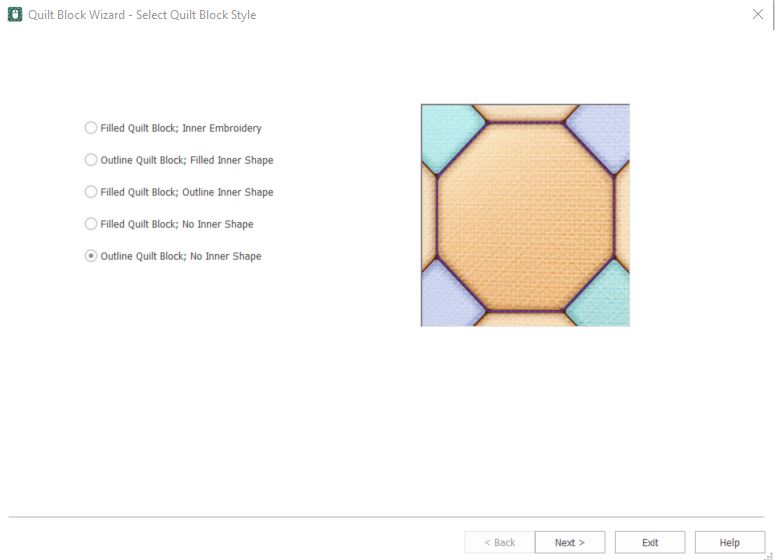
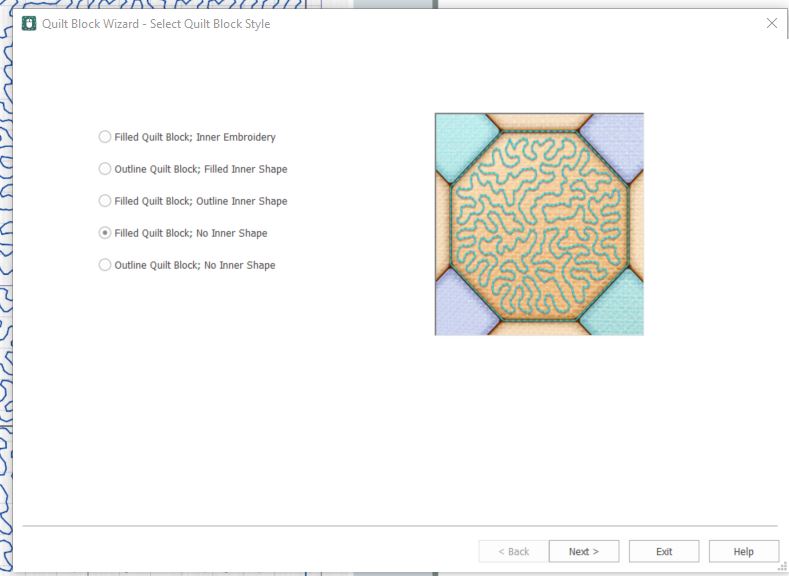
2. Go to Create and click on Quilt Block, select Filled Quilt Block; No Inner Shape. Click next


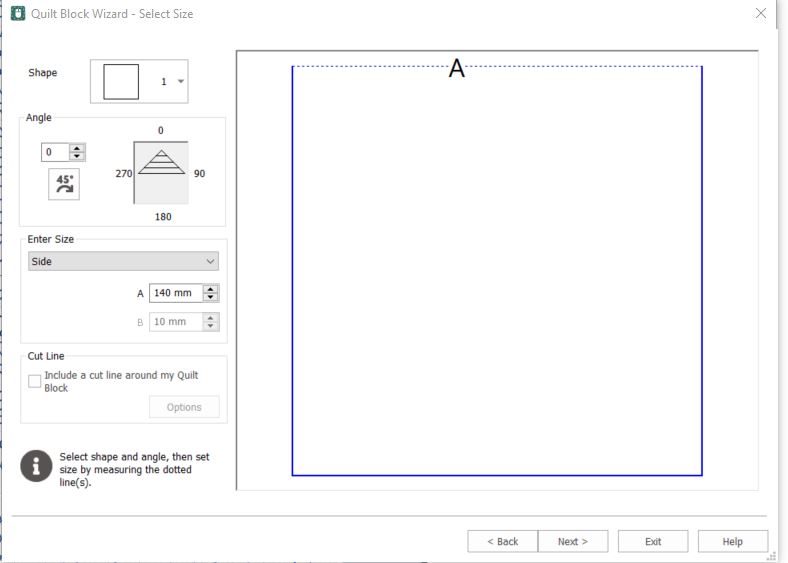
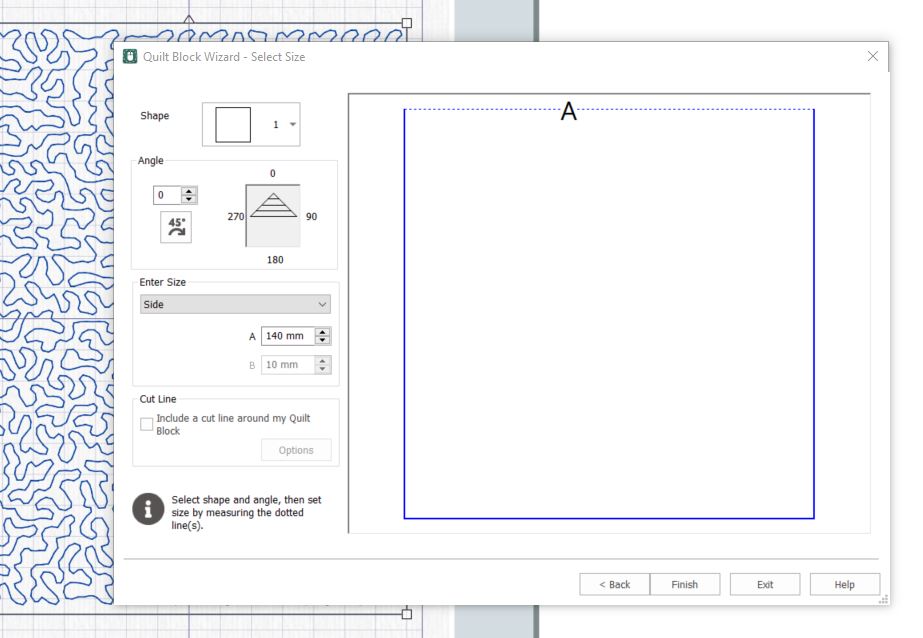
3. Select the rectangle (shape 2) Set Size A to 140mm and B to 190mm. Click next.
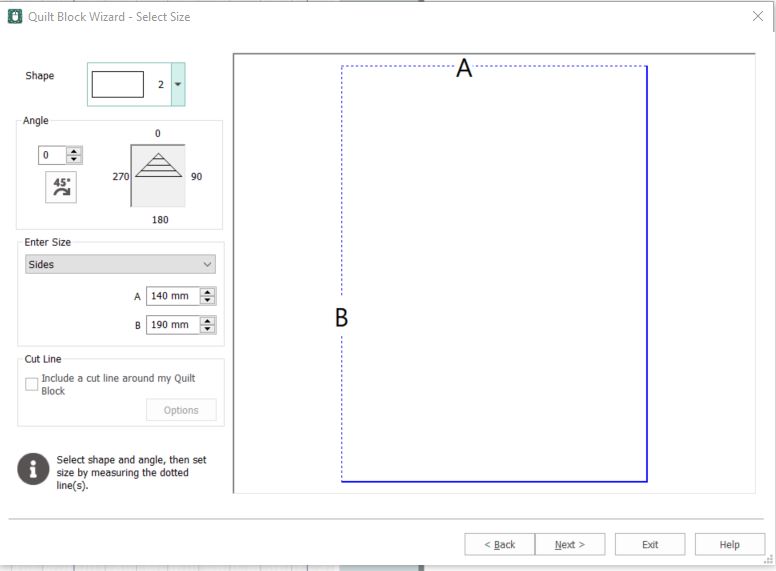
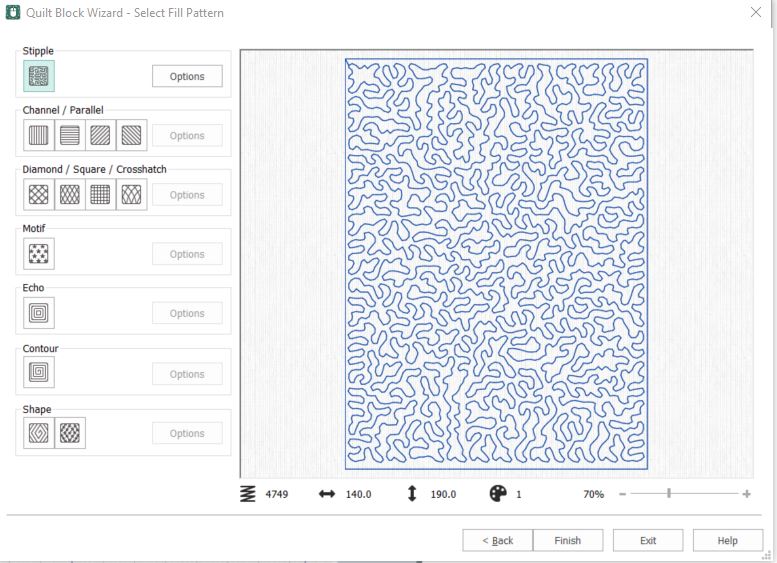
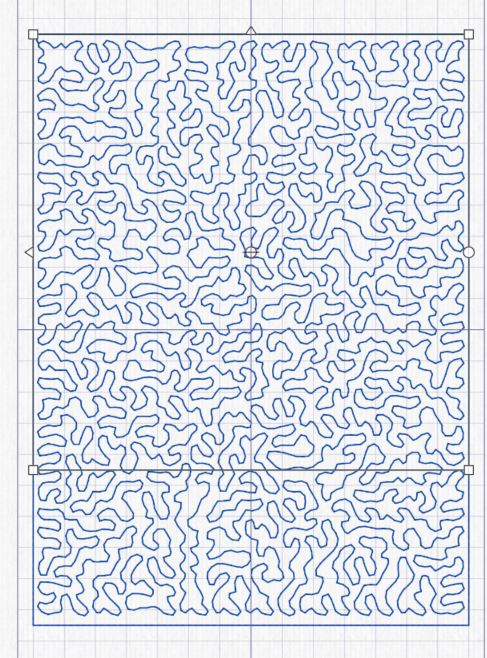
4. A stipple pattern will appear in the area, we will adjust to that: Click on options.
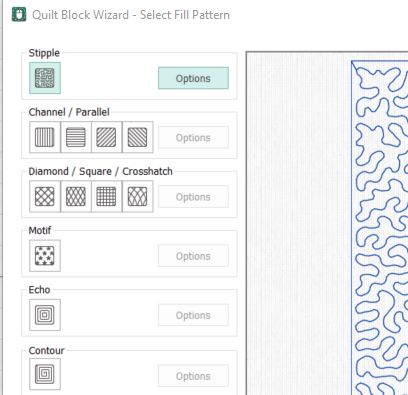
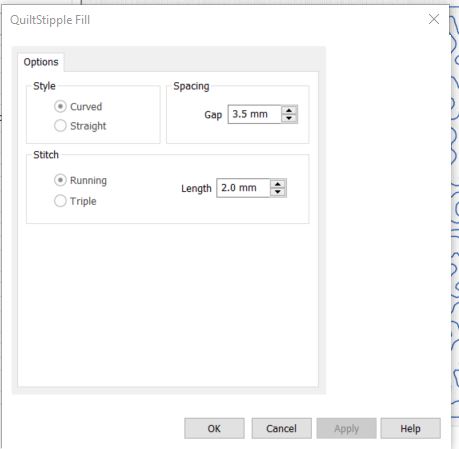
5. A Quilt Stipple Fill dialog box will appear. Set the Gap to 3,5mm and the Length to 2,0mm, click OK.
 6. The stippling pattern will change in the rectangle, click on finish.
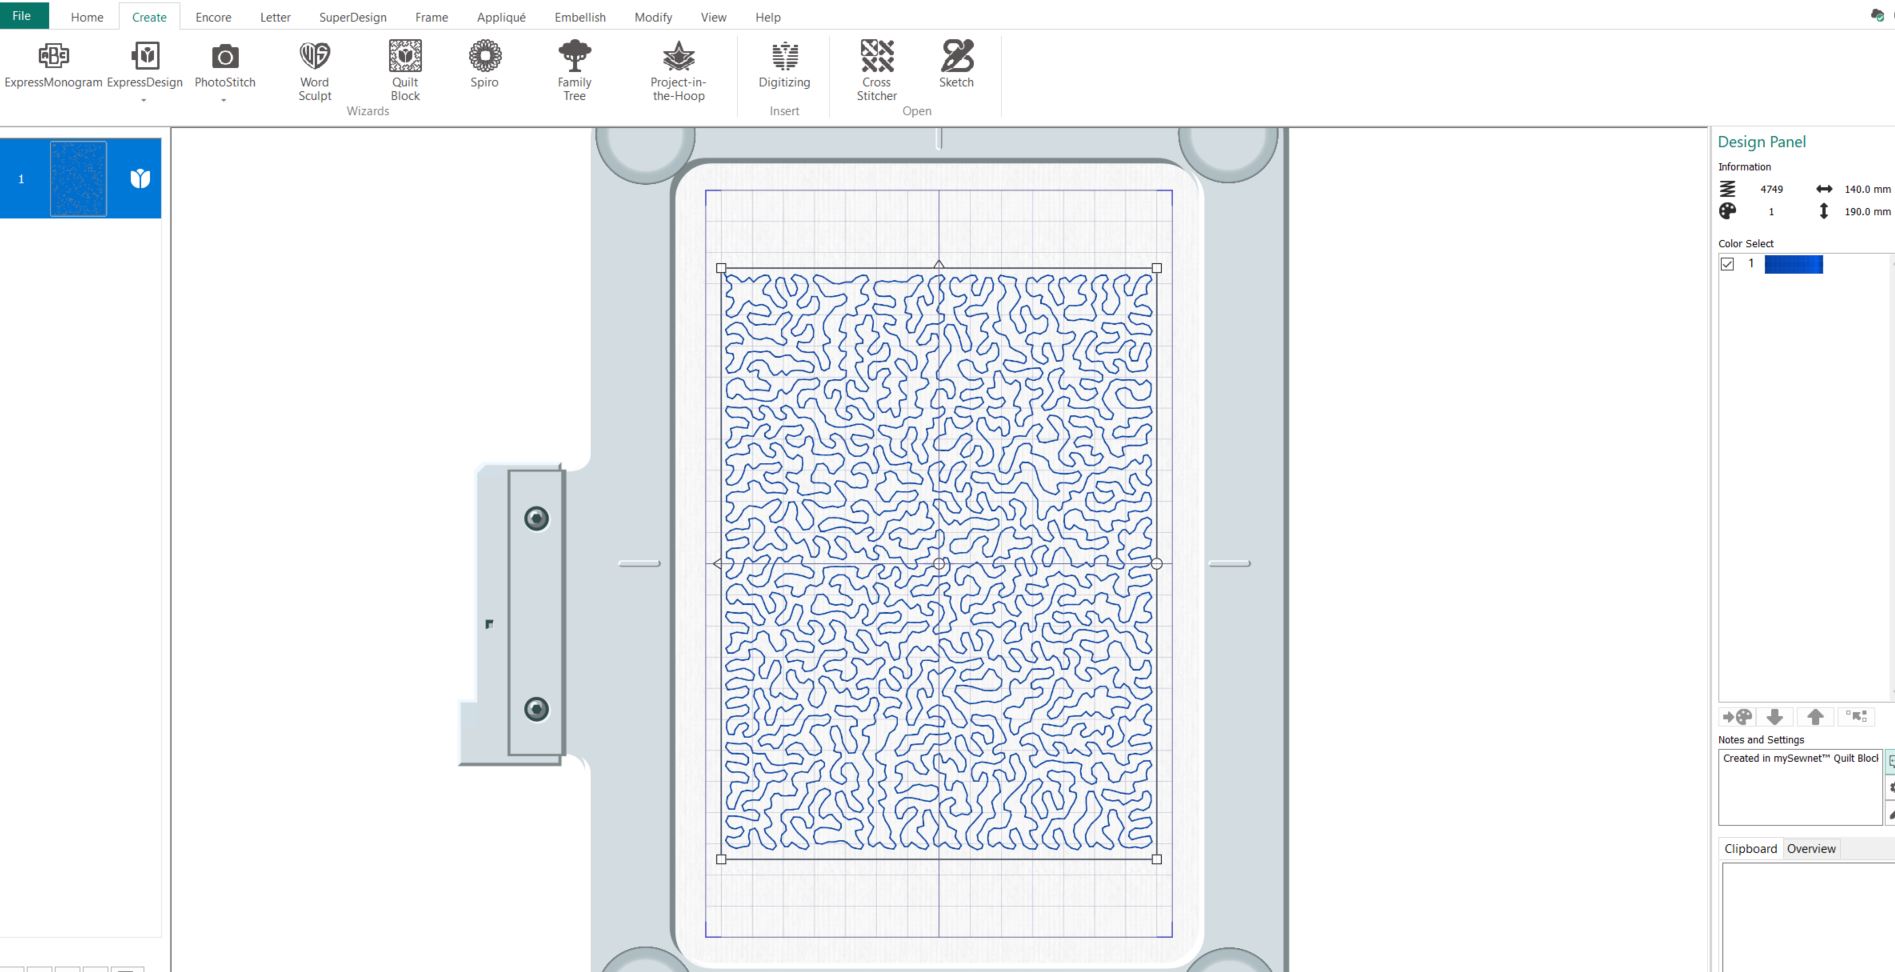
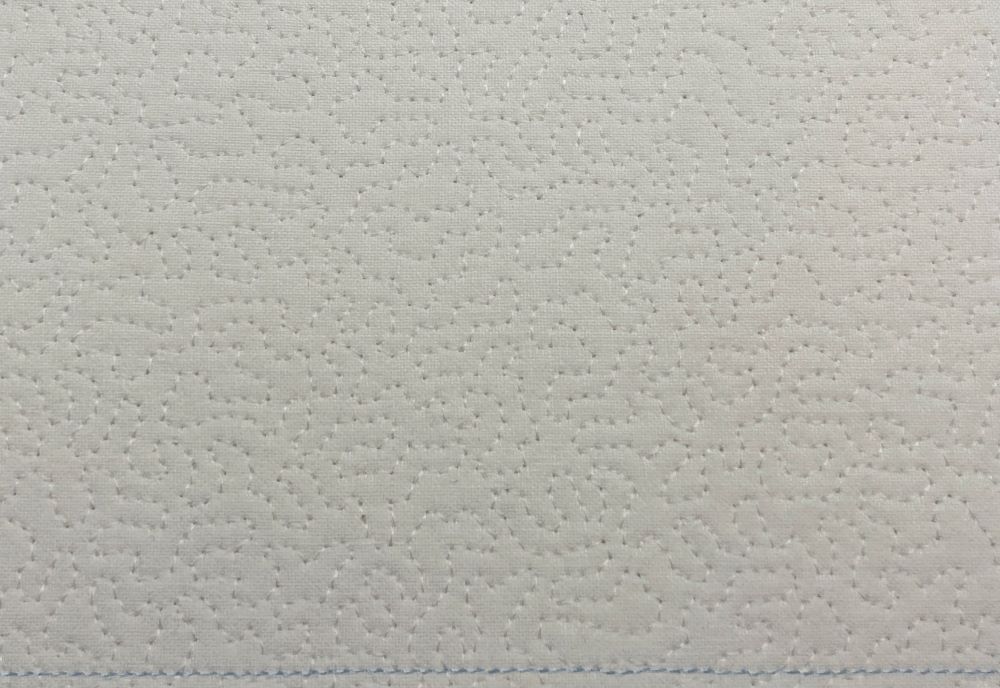
 7. Now we have made a base layer for the embroidery.
Make Layers
Sky: The sky will be made in a similar way, but we will use another fill option for this.
8. Decide what size you want, let the sky and foreground that we will make later overlap a little. I am thinking of the golden rule of two-thirds, so I make the sky two thirds of the height plus 10mm=140 mm. The width will be 140mm as well.
Go to Quilt Block again, select Outline Quilt Block; No Inner Shape. This is to make an outline for the sky in the background. Click next.
9. Select the square (shape1) Set the Size to 140x140mm, click Finish.
10. The sky square outline will now appear in the hoop, use the arrow keys to move the square up to the top of the background.
11. Now we will make a fill pattern for the sky: Go back to the quilt lock wizard, this time select: Filled Quilt block; No Inner Shape., click Next.
12. Select the square and size to 140 mm if not already preselected, click Next.
 13. Now click on Motif and then Options:
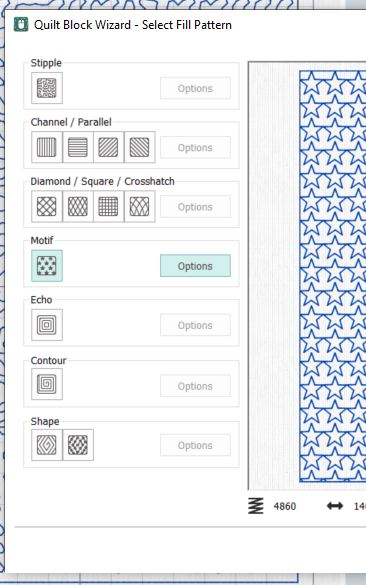
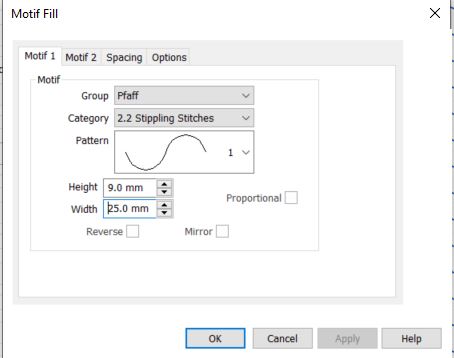
14. A new dialog box will open: In the Motif 1 tab select Group: Pfaff, Category 2:2 Stippling Stitches, Pattern1, uncheck proportional and set the Height to 9mm and the Width to 25mm.
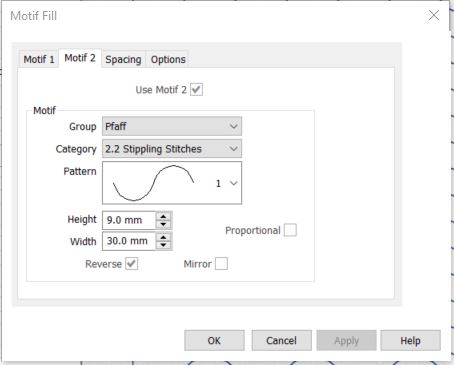
Select Motif 2 tab. Start by checking the box Use Motif 2, then Select Group: Pfaff, Category 2:2 Stippling Stitches, Pattern1, uncheck Proportional and set the Height to 9mm and the Width to 30mm. Also check the Reverse box.
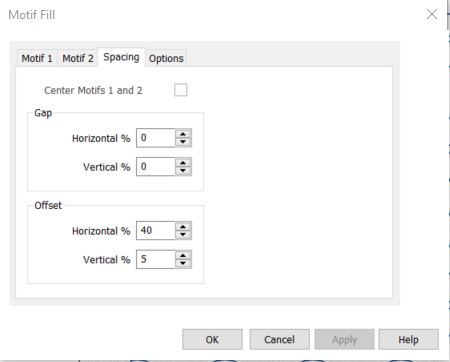
Go to the offset tab and set the offset to 40% Horizontal and 5% Vertical. Click OK
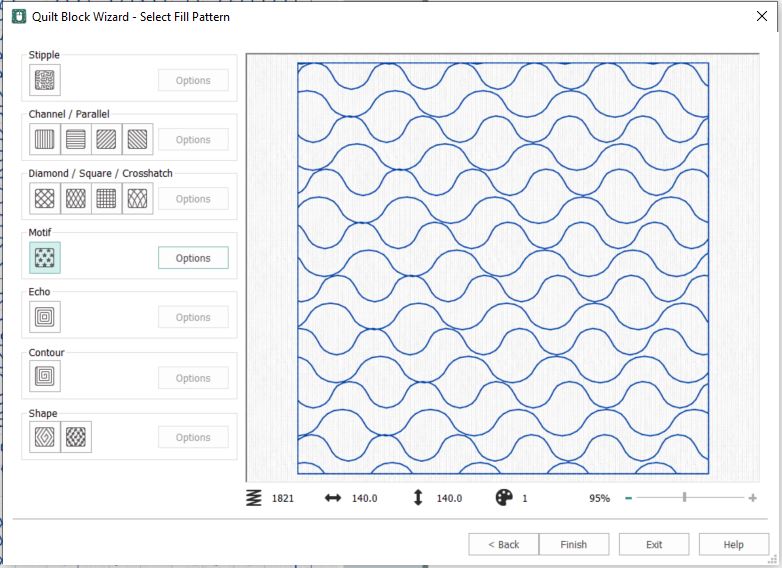
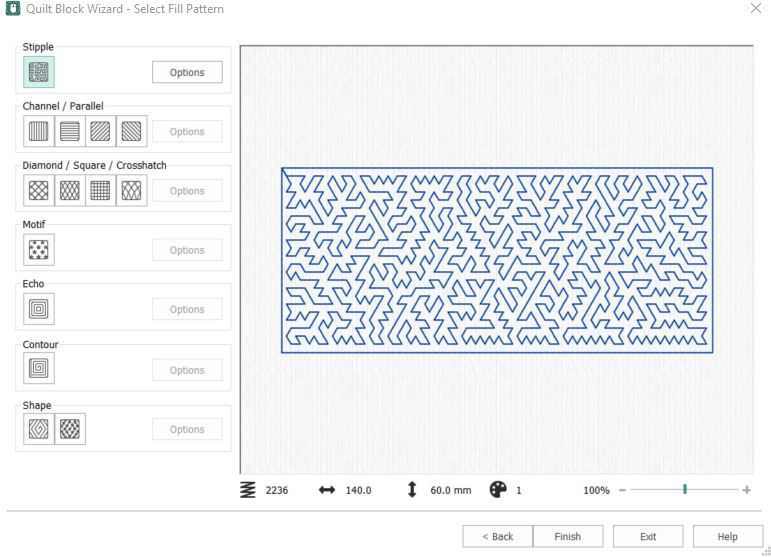
15. Now the pattern will look like this: an irregular pattern, that will look more natural. You can play with the different settings as you like.
16. Click Finish, the sky quilting will now appear on the screen, use the arrow keys to move it to the top, on top of the outline. Now it is time for the ground.
17. Go to quilt block again, choose Outline Quilt Block; No Inner Shape. Click Next. Select the Rectangle and set the Height to 60mm and the Width to 140mm. Click Finish.
Now you have made the outline for the ground. Move it in place with the arrow keys. The lower edges should be aligned.
18. Go to Quilt block again, select Filled Quilt Block; No Inner Shape, click next.
19. If not already preselected: Select the Rectangle and set the Width (A) to 140mm and the Height (B) to 60mm, click next. The rectangle will be filled with stippling stitches. We will do some changes in the fill pattern: Click on options:
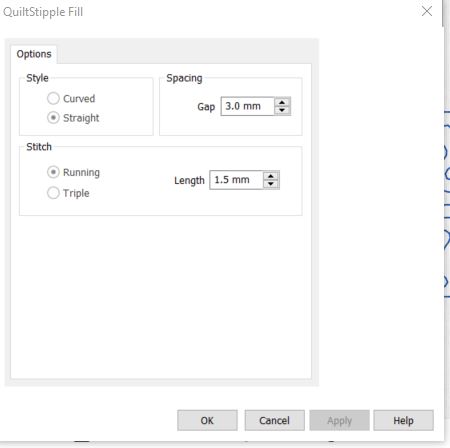
20. In Options set the Style to Straight, the Gap to 3mm and the stitch length to 1,5mm. Leave the stitch as a running stitch. Click OK.
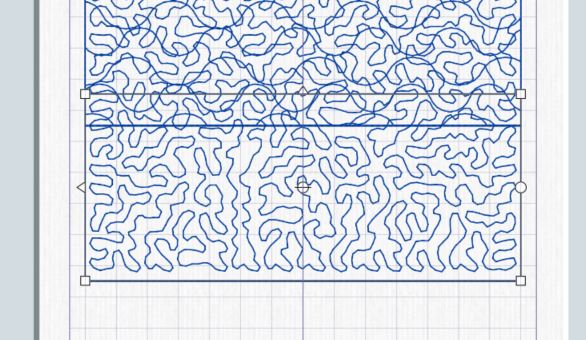
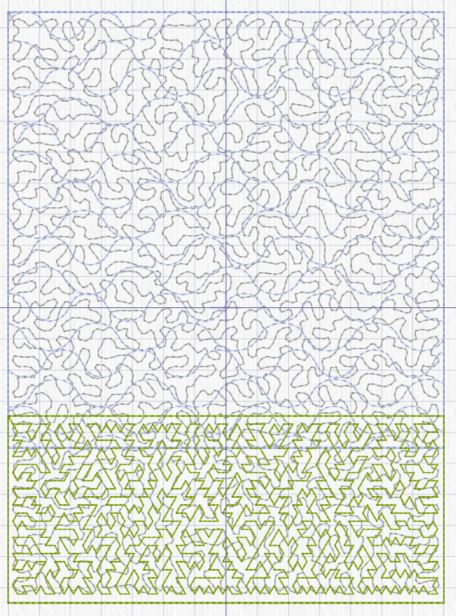
21. Now it will look like this: Click Finish and use the arrow keys to move the ground in place.
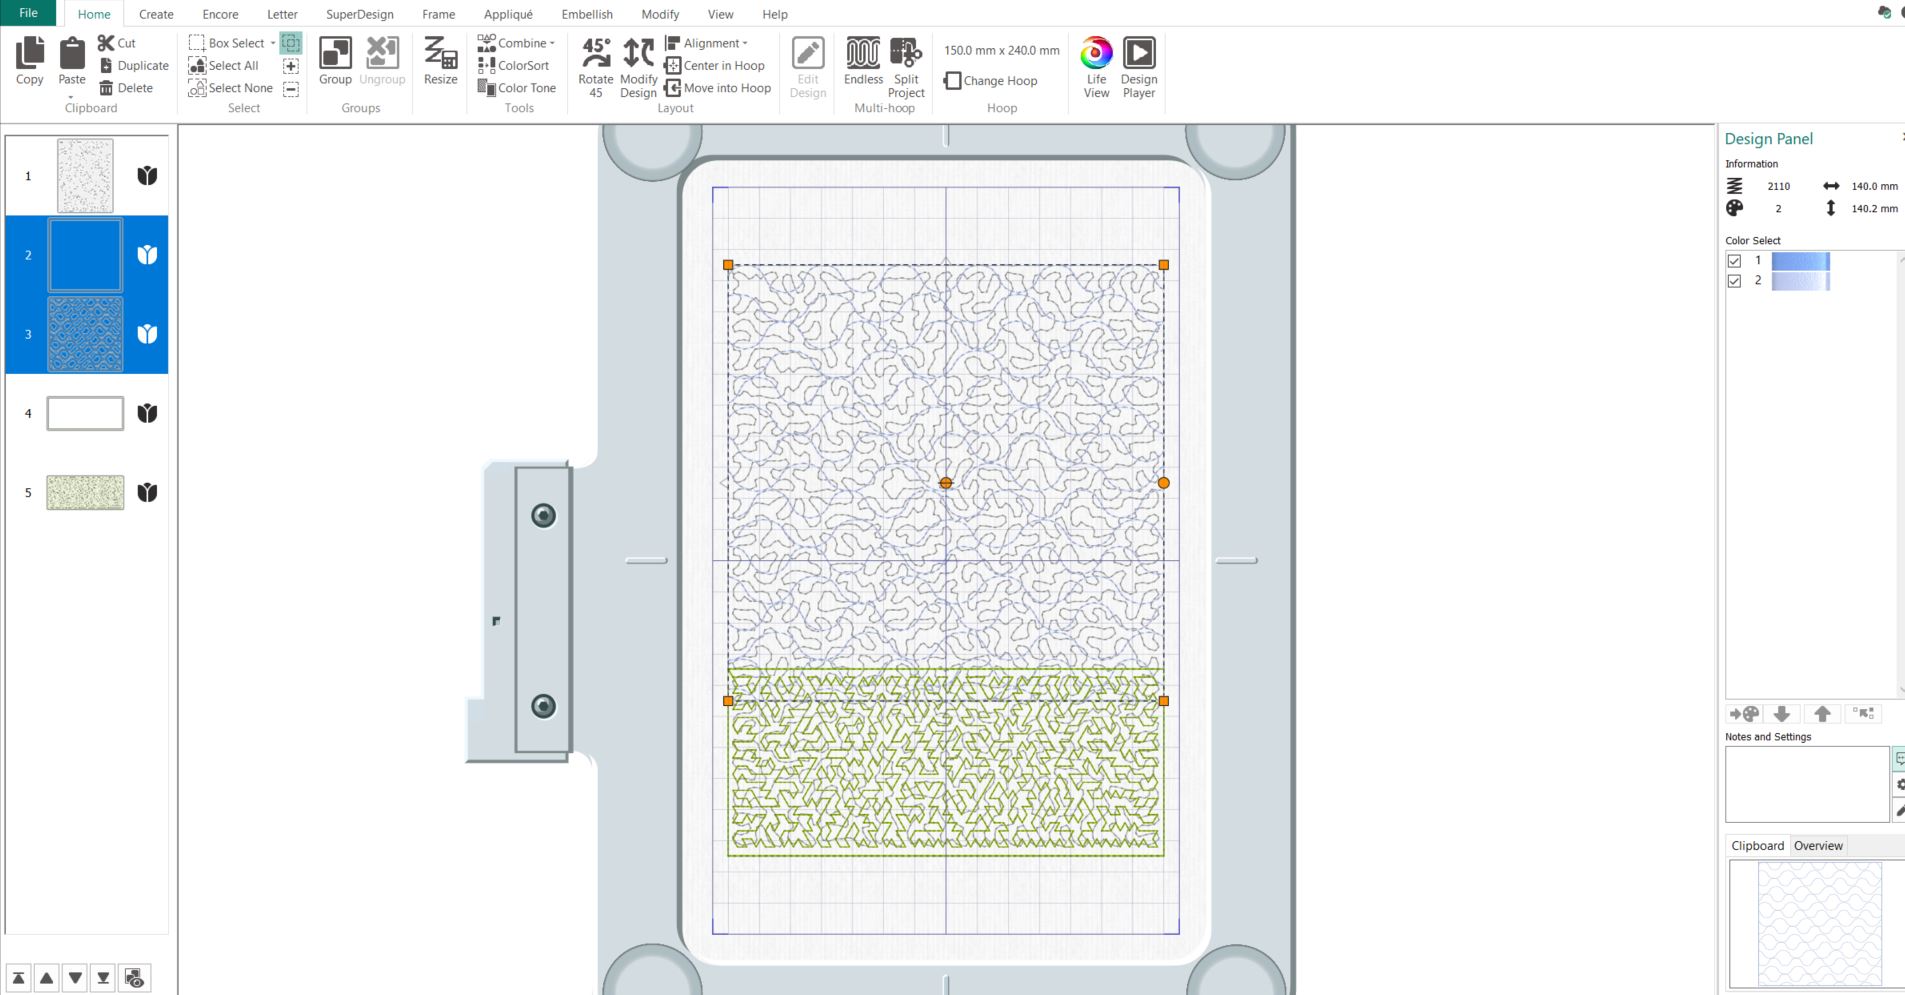
22. This is how it should look when finished.
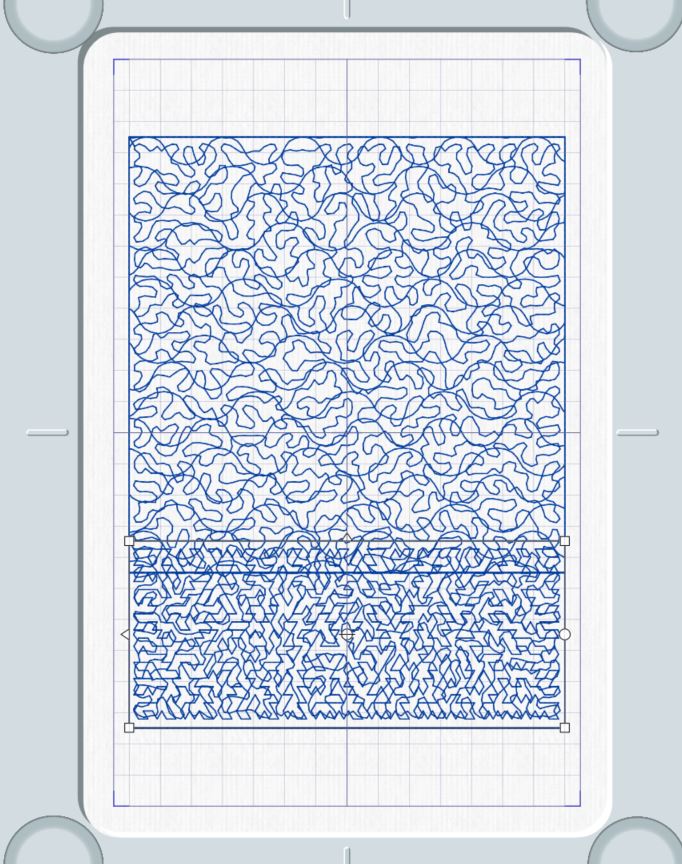
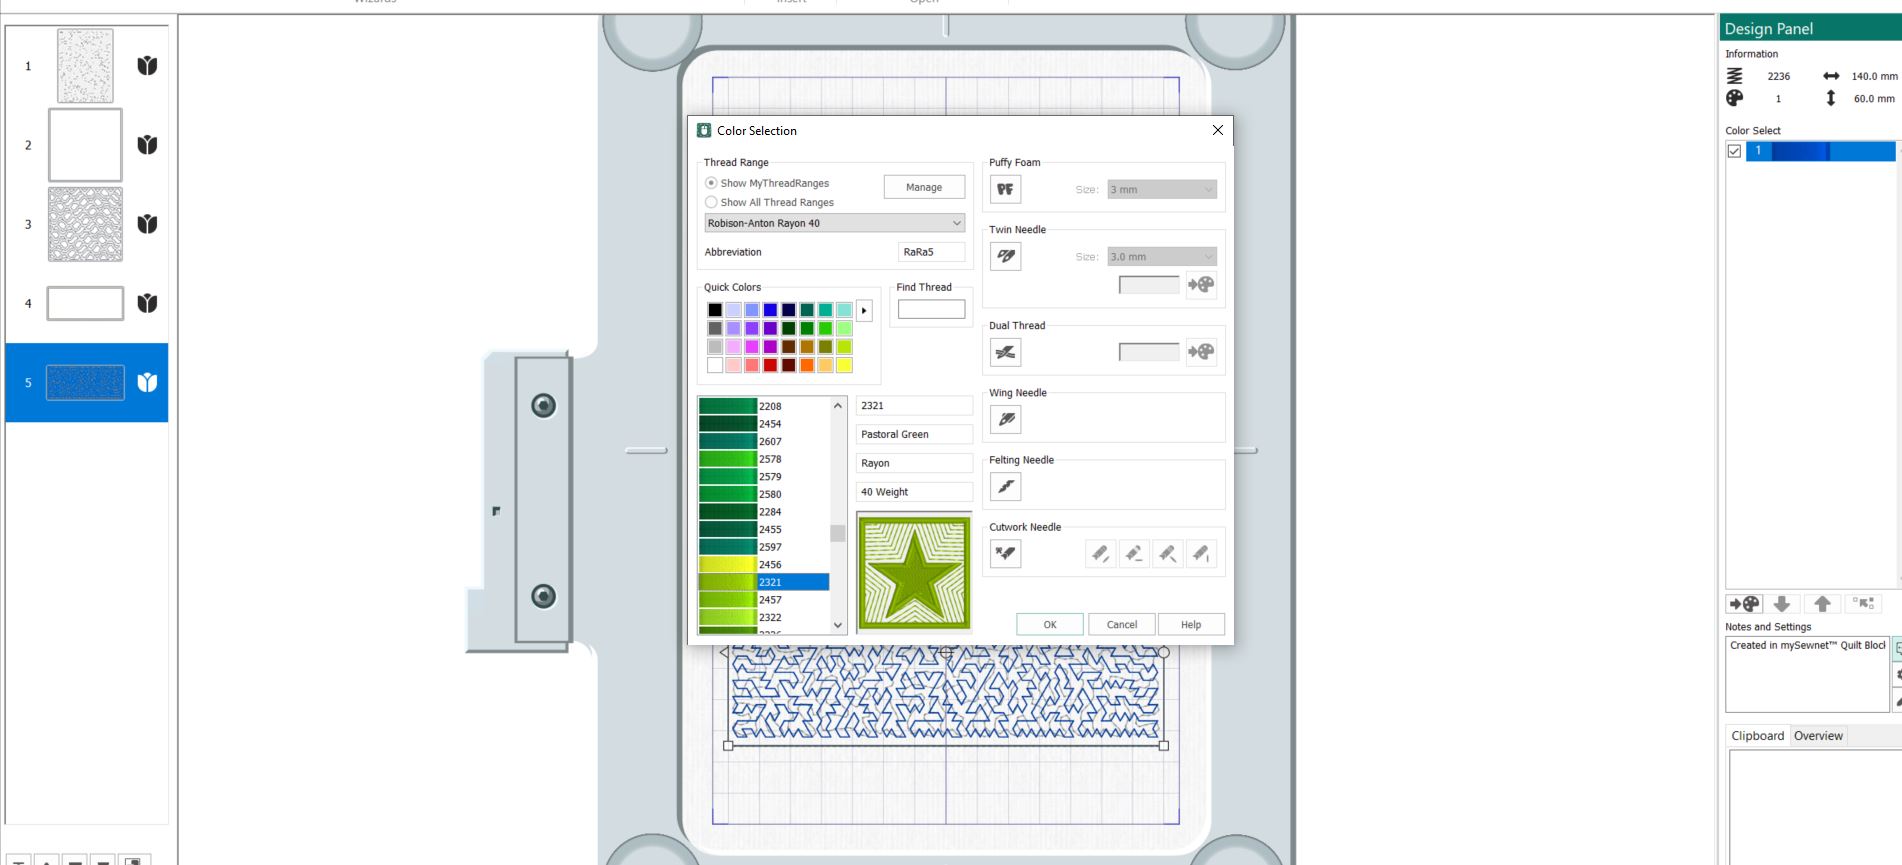
23. As a last step we will change the colors of the different parts.
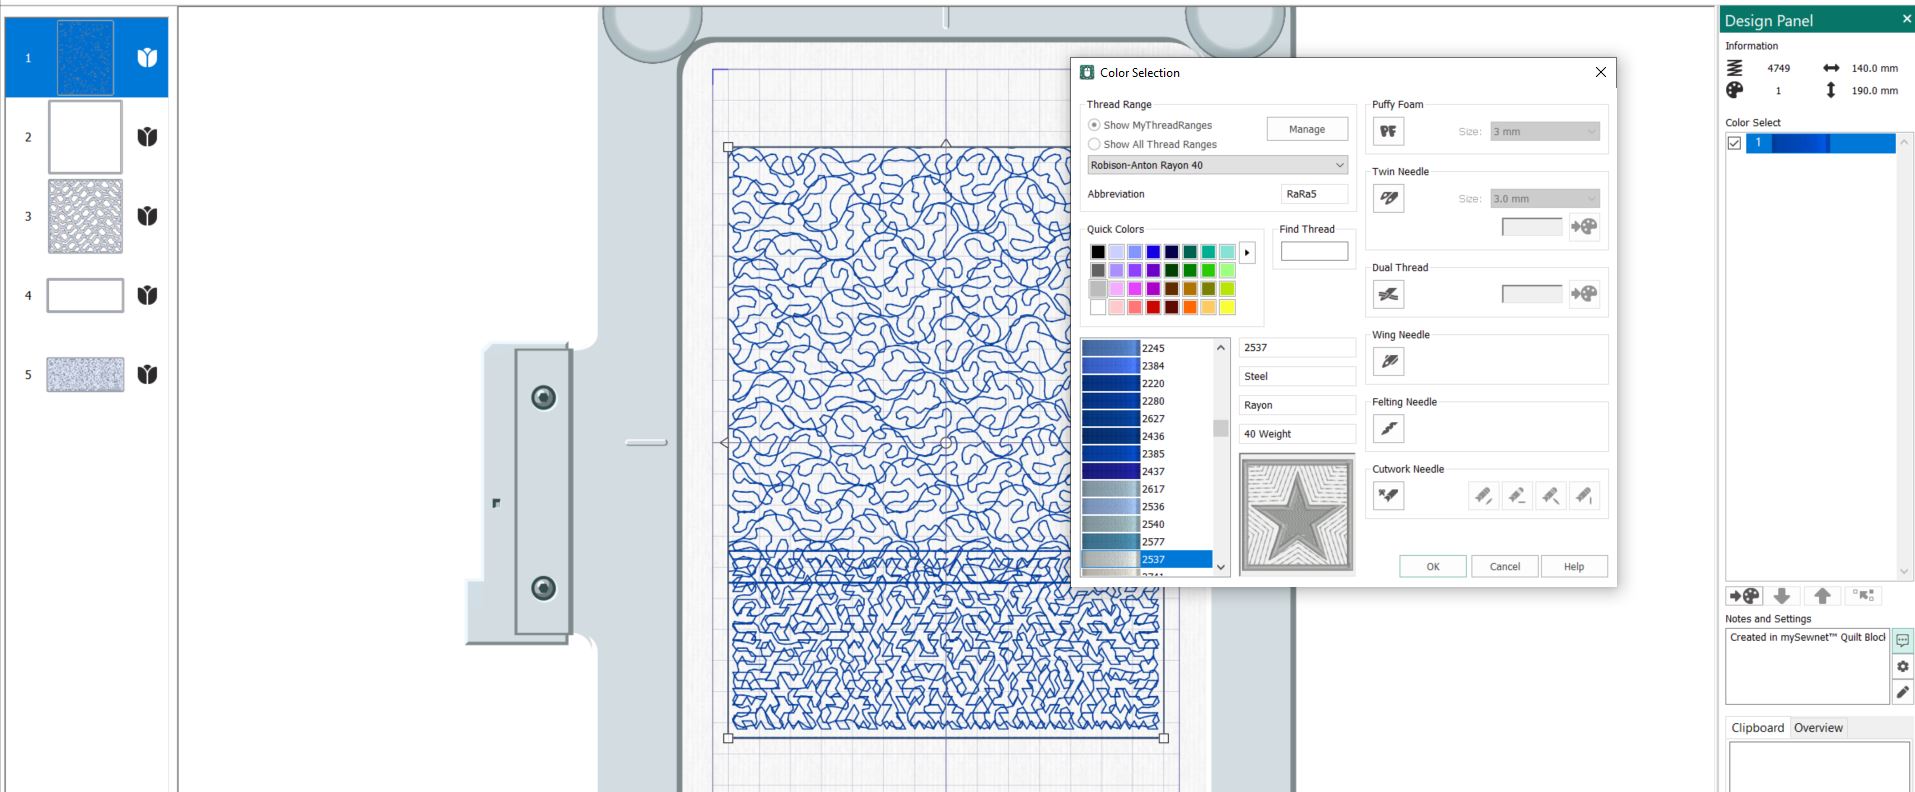
24. Color 1 change to light gray.
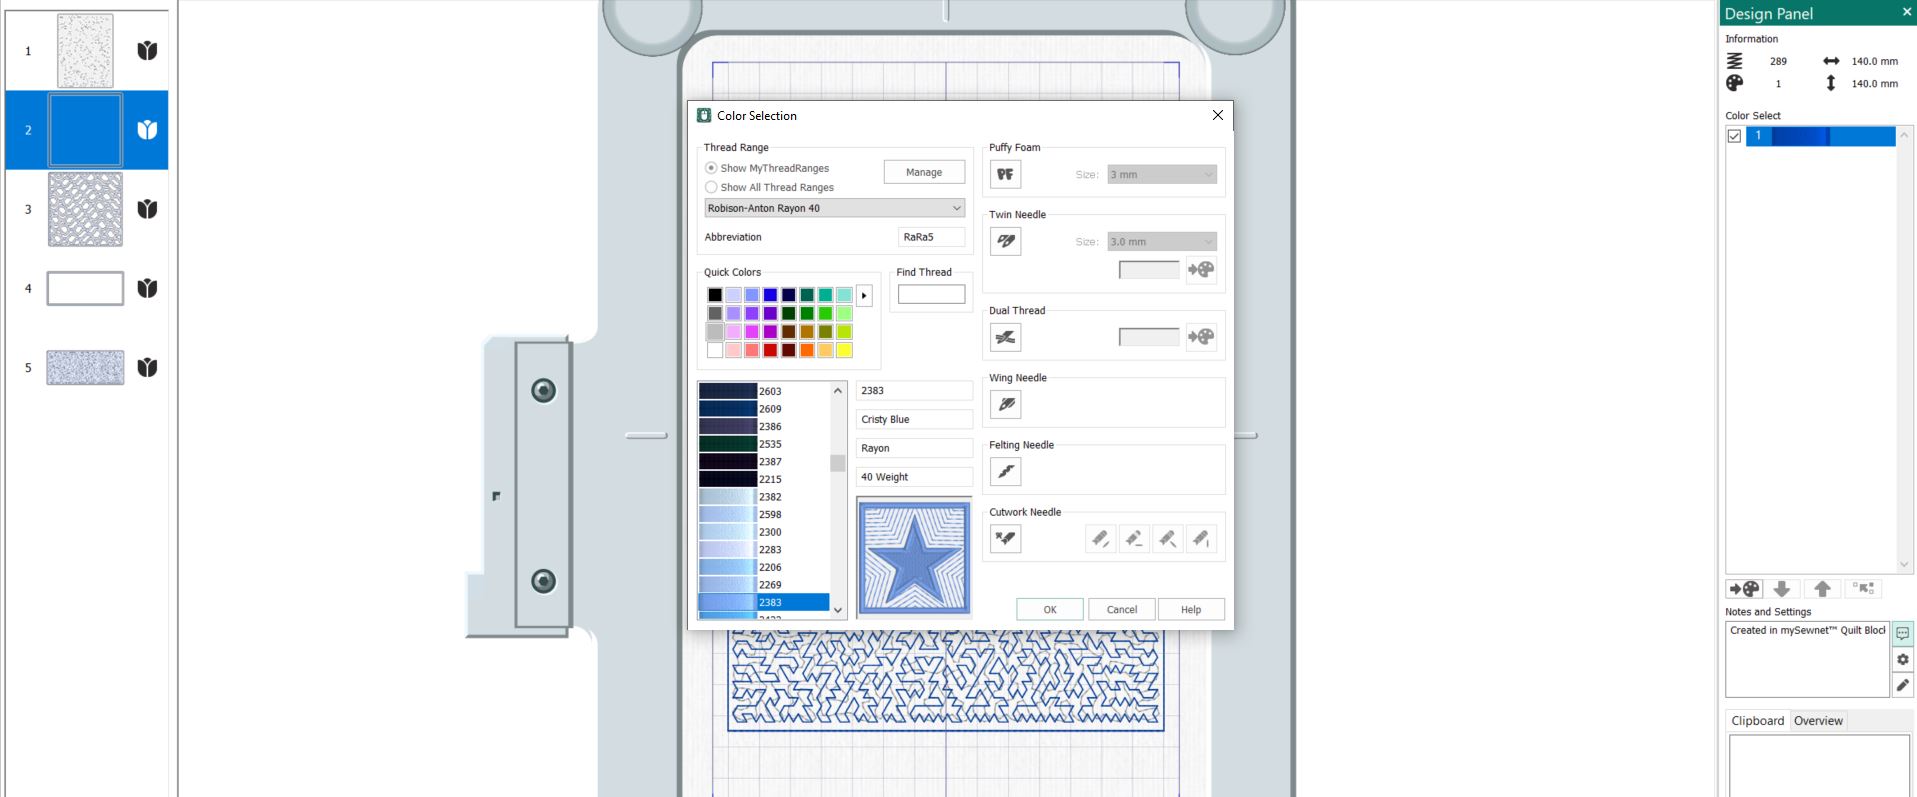
25. Color 2 medium blue.
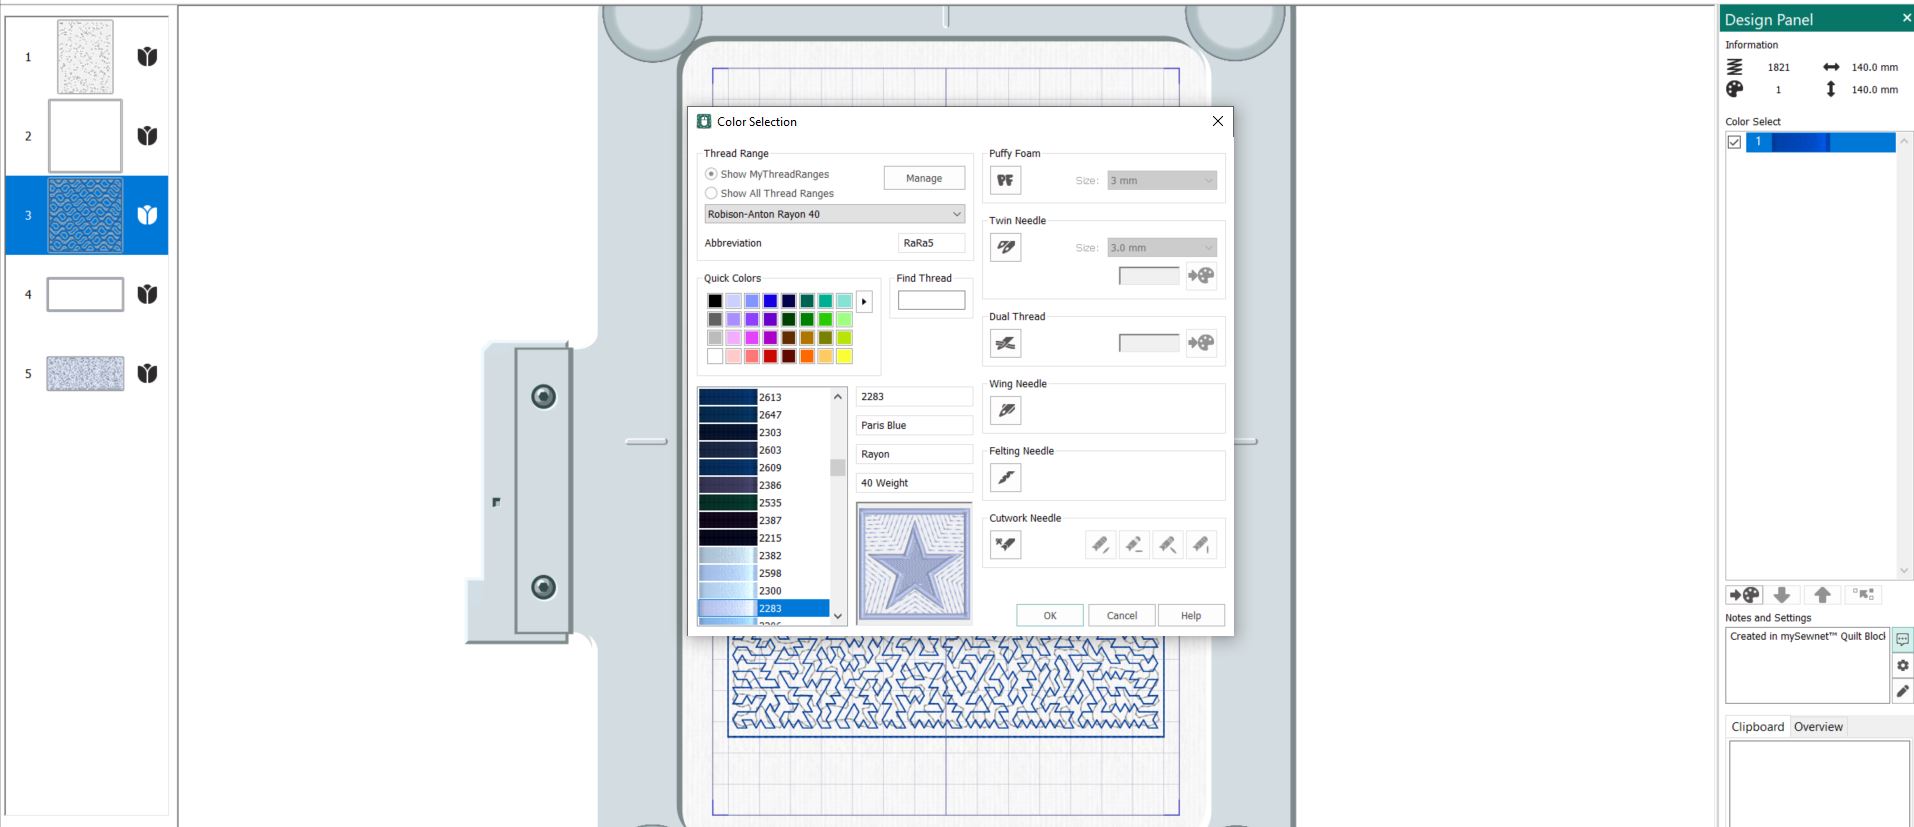
 26. Color 3 Light Blue.
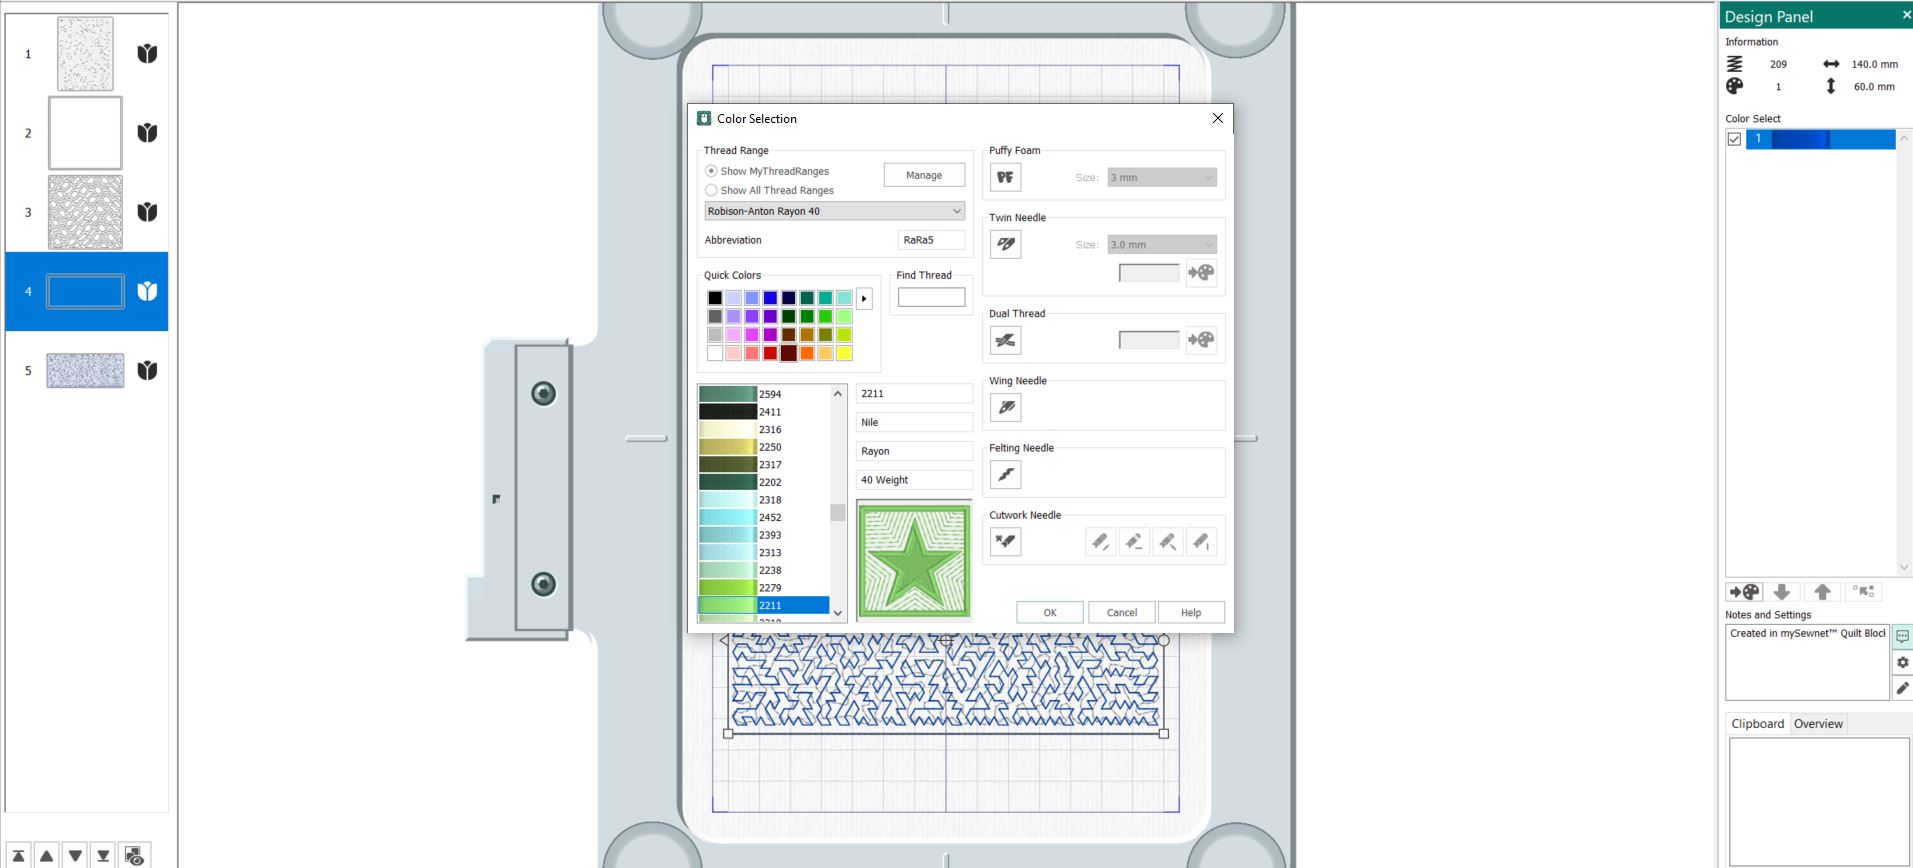
27. Color 4 Light Green.
28. Color 5 grass green.
29. Now we have made the base for our landscape art embroidery!
Saving the separate parts of the embroidery
30. Go to the Home tab, select the first part of the embroidery (gray). Click on Copy. The embroidery will be visible on the clipboard down on the right side.
31. Go to file, select New Window, Blank Canvas and the 150x240mm metal hoop. Click on Paste. The embroidery will now be transferred into the empty hoop.
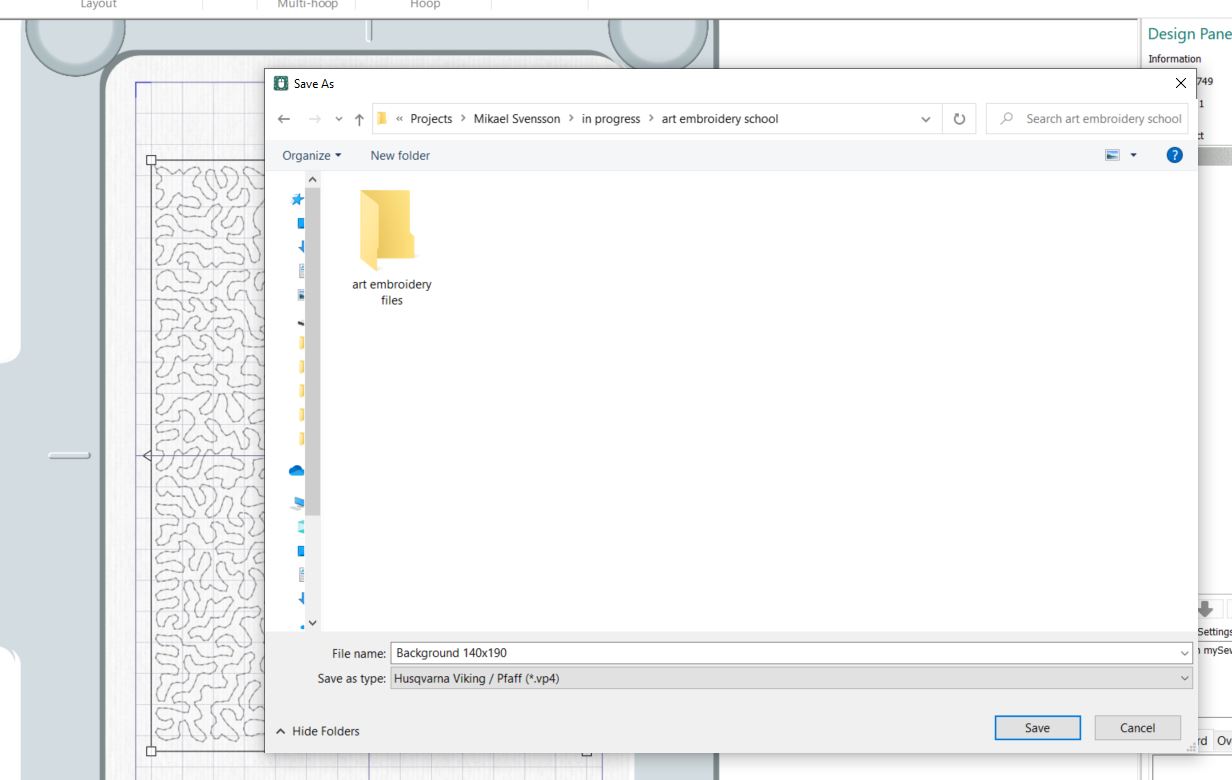
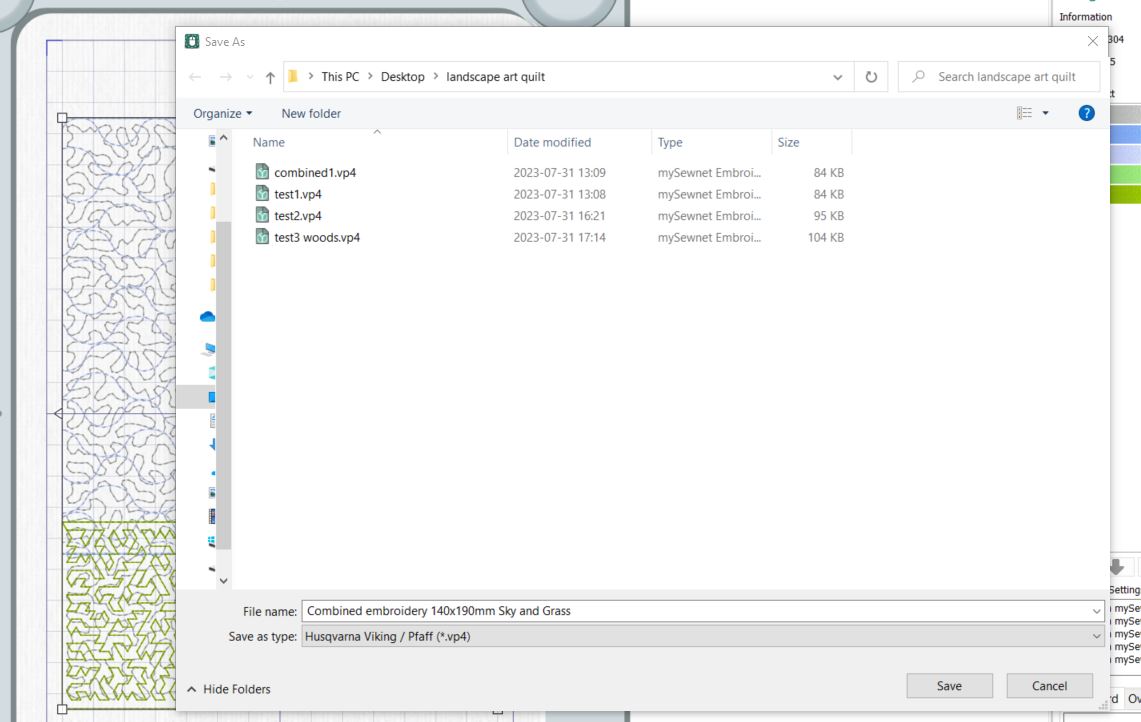
32. Go to File and select Save As. Give the file the name Background 140x190. If you use the size in the file name, it will be easier later when you want to make embroideries with different elements.
 33. Close the file and continue with the next part, in this case we want to have the next two files in the same embroidery file. Hold down the CTRL key and click on the two files, click on Copy.
34. Go to file and open a new window, select blank canvas and the 240x15mm Creative Grand Metal Hoop. Click Paste and go to File, Save As and name it Sky 140x140.
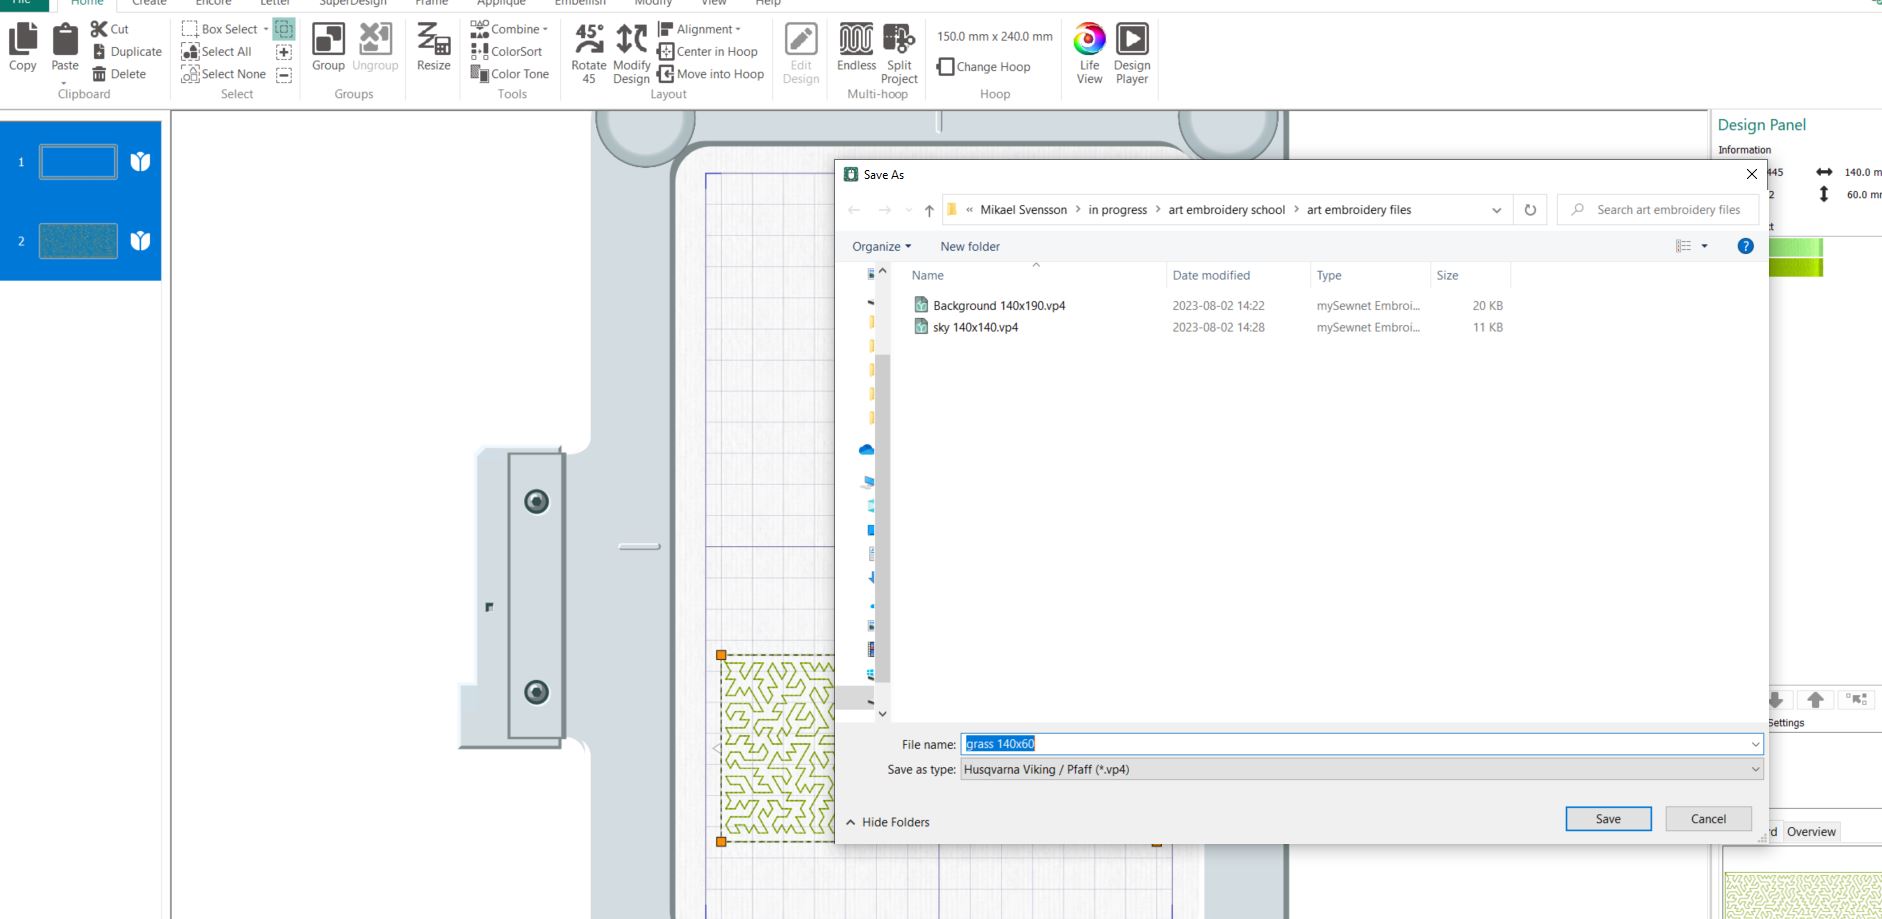
35. Close the new file and repeat once more with the two last parts combined in one file. Save it as Grass 140x60.
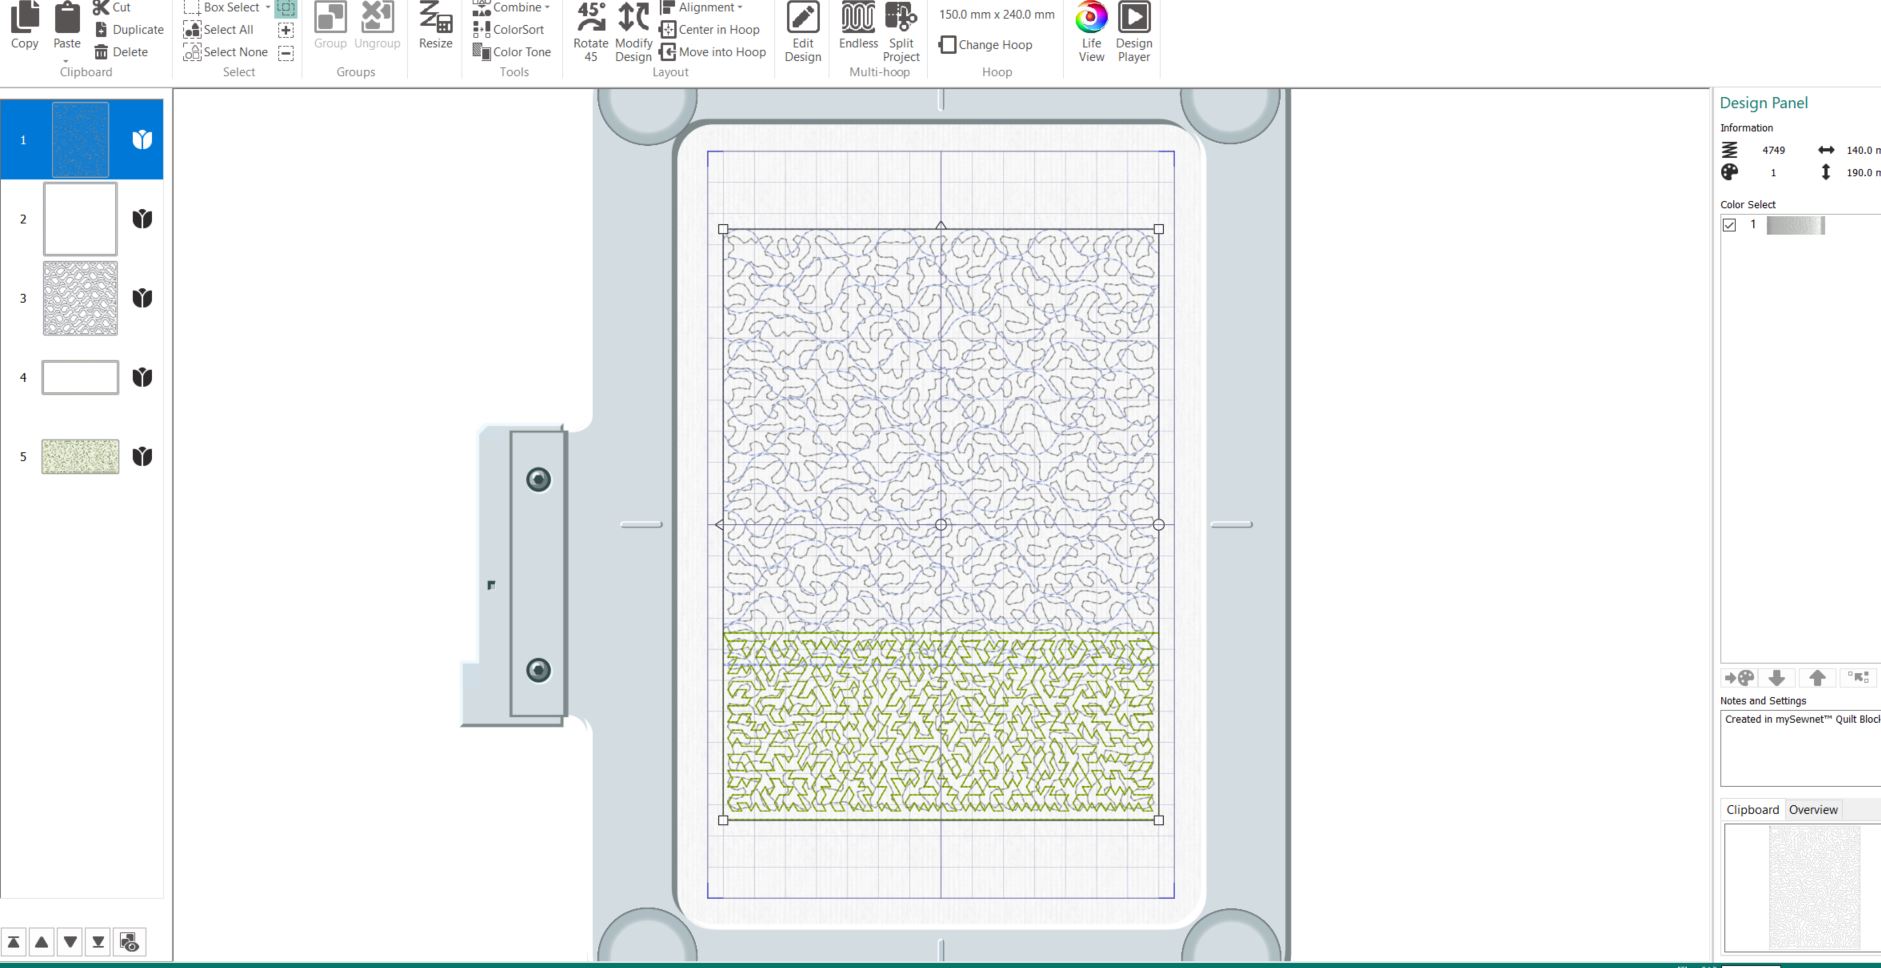
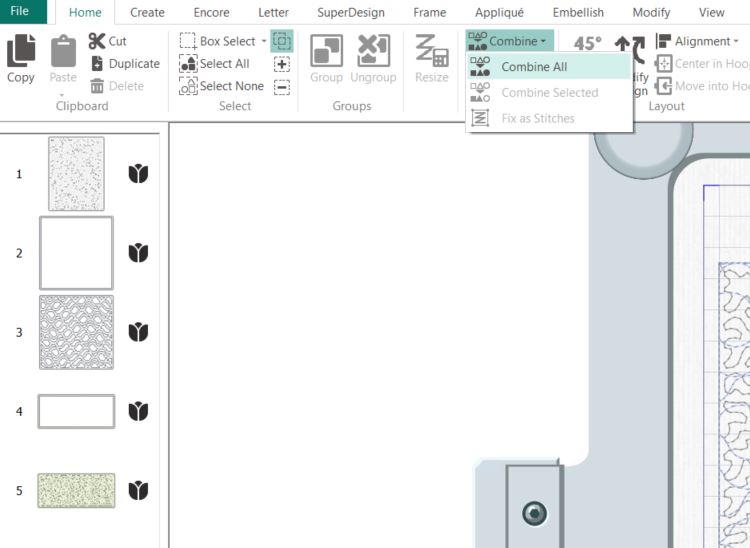
36. Now you have saved all the different parts of the embroidery. Now it is time to prepare the whole embroidery for saving. Go to Combine, select Combine All.
37. Now the embroidery is ready to save. Go to File, Save, and save it as: Combined embroidery 140x190. Sky and Grass. Store it in the same folder as the other parts.
Stitching out the art piece!
38. Start by opening the file in mySewnet embroidery program. Select the hoop you want to use, I prefer the metal hoops for this kind of embroidery, they are easy to hoop the fabric in and it is easy to add layers as you go.
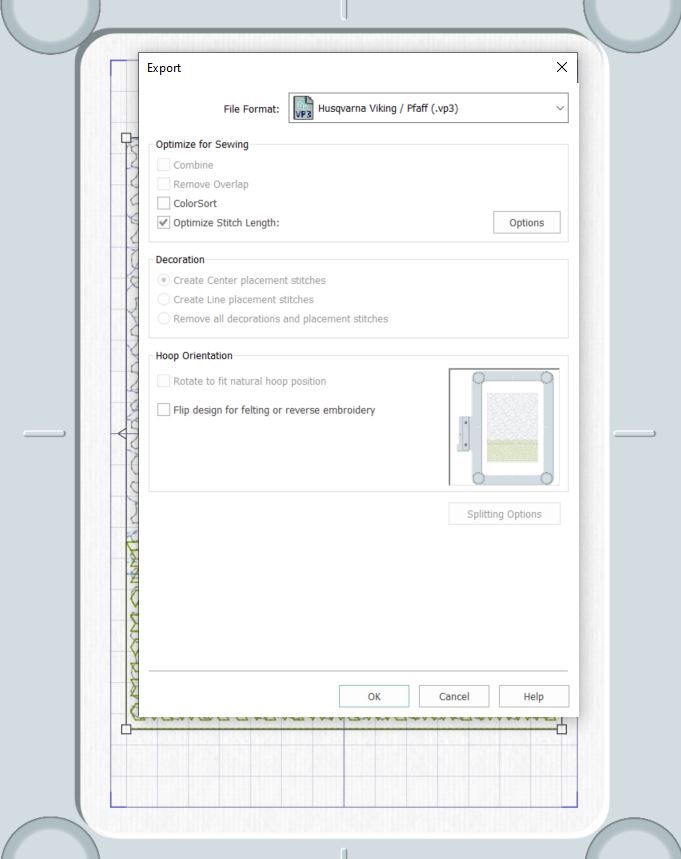
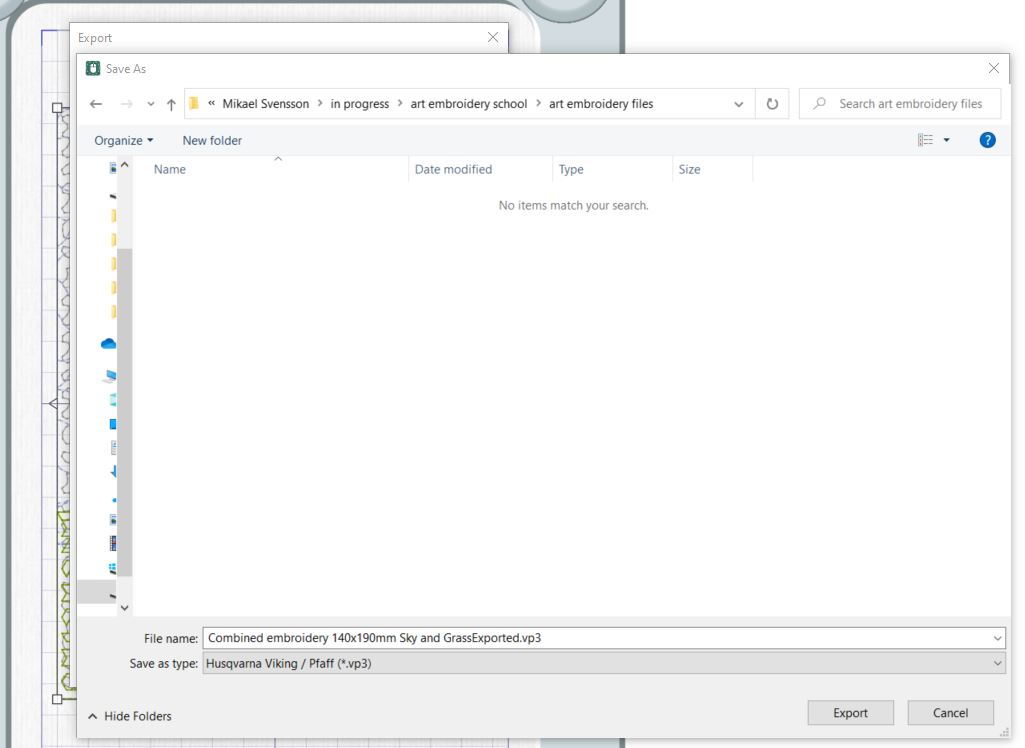
39. Go to File Export. Select the output format for the embroidery file, in this case vp3. Deselect ColorSort. The reason for this is that sometimes different colors that should be stitched out separately are merged. When we do In-The-Hoop designs this is not wanted. Click OK.
40. Save the embroidery in the same file as the other parts of the embroidery. Then send it to your machine or save it on a USB-stick.
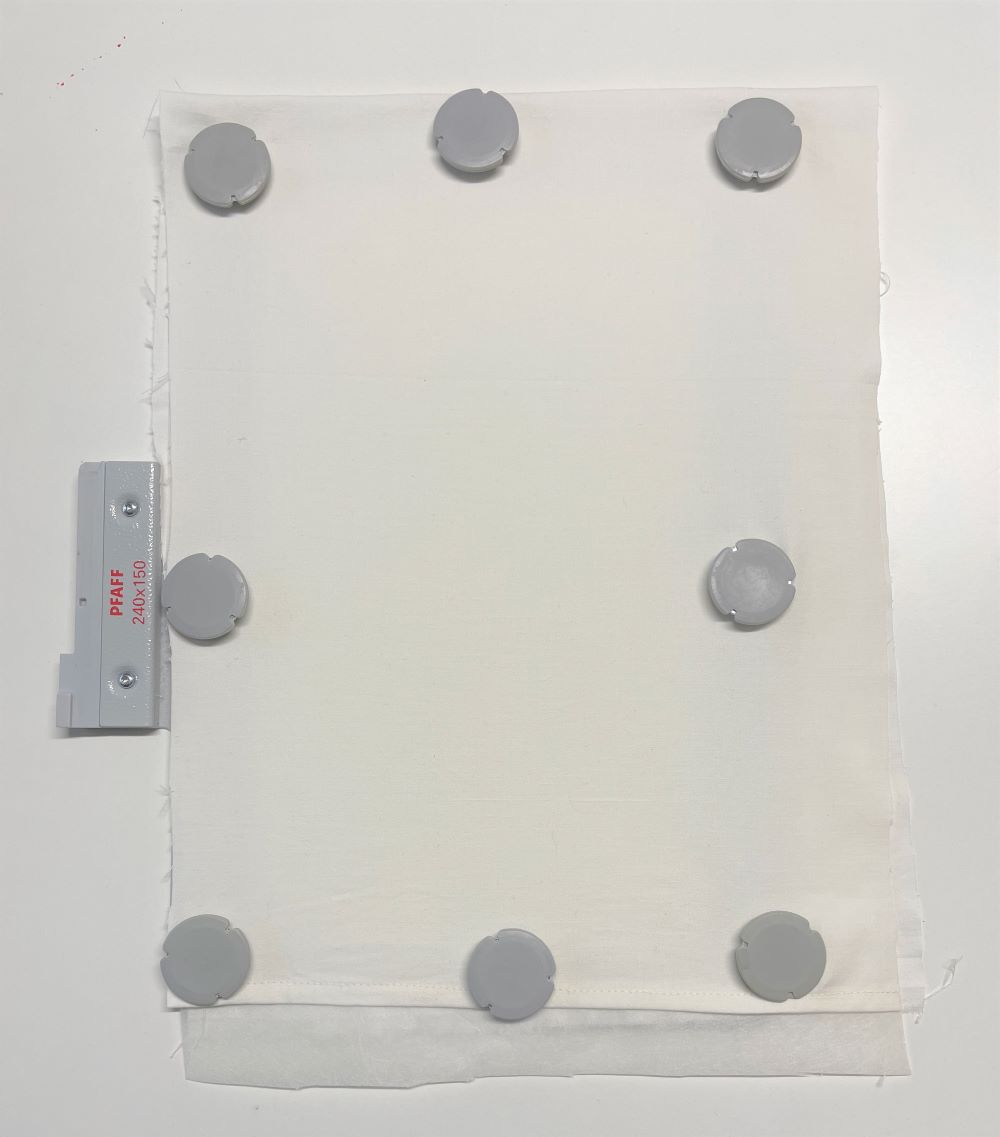
 Preparing the Hoop
41. Put a cut-away stabilizer between two layers of fabric. You can use canvas or cotton fabric. I prefer the 150x240mm Creative Grand Metal Hoop, but other hoops can work as well. Put the Hoop in the machine and prepare for embroidery.
Stitching the design out
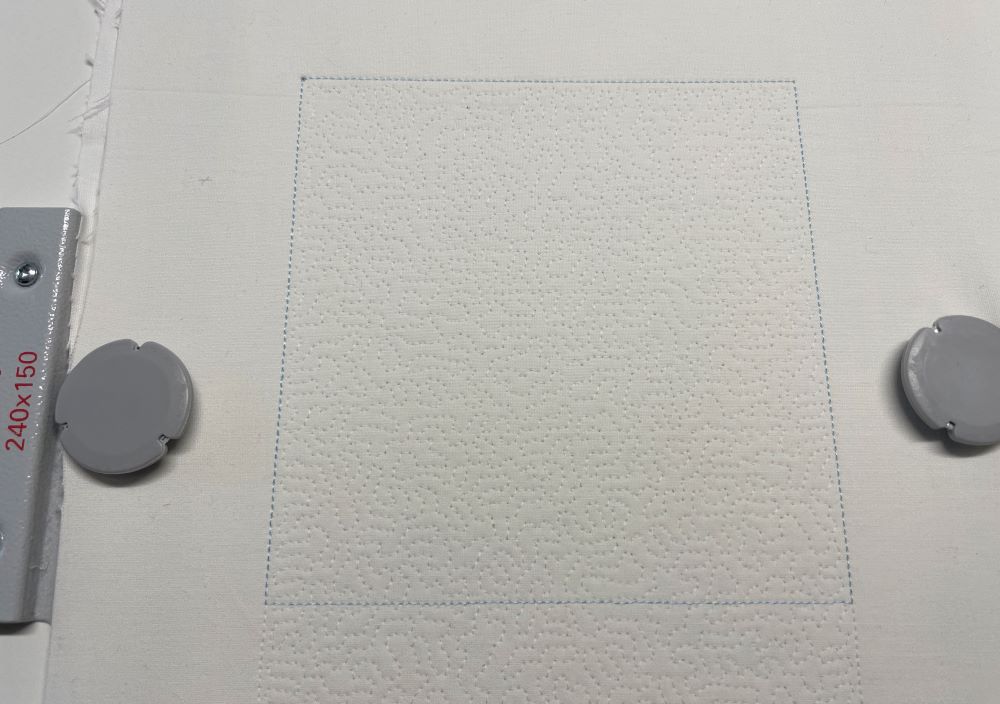
42. Stitch out color 1. Use a thread that coordinates with the fabric.
 43. Change to light blue thread, stitch out color 2, this will show you where the sky is.
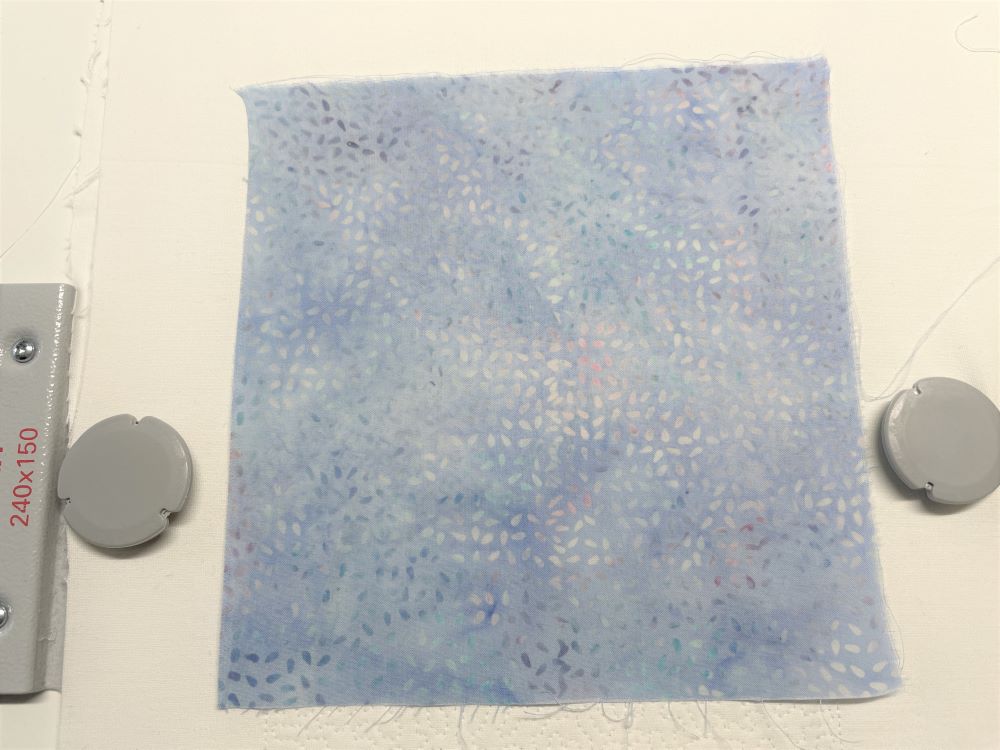
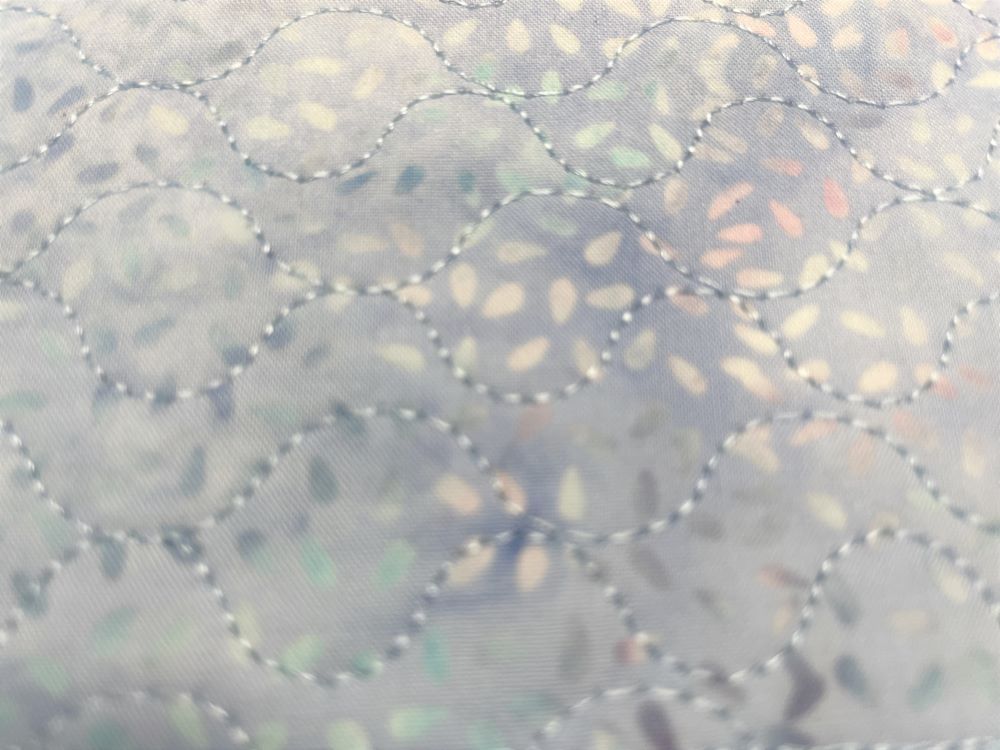
 44. Place fabric on top, you can use a batik, sky print or several layers of tulle and organza. If using several layers, make sure the top layer covers the whole surface. Use a sheer organza or tulle for this.
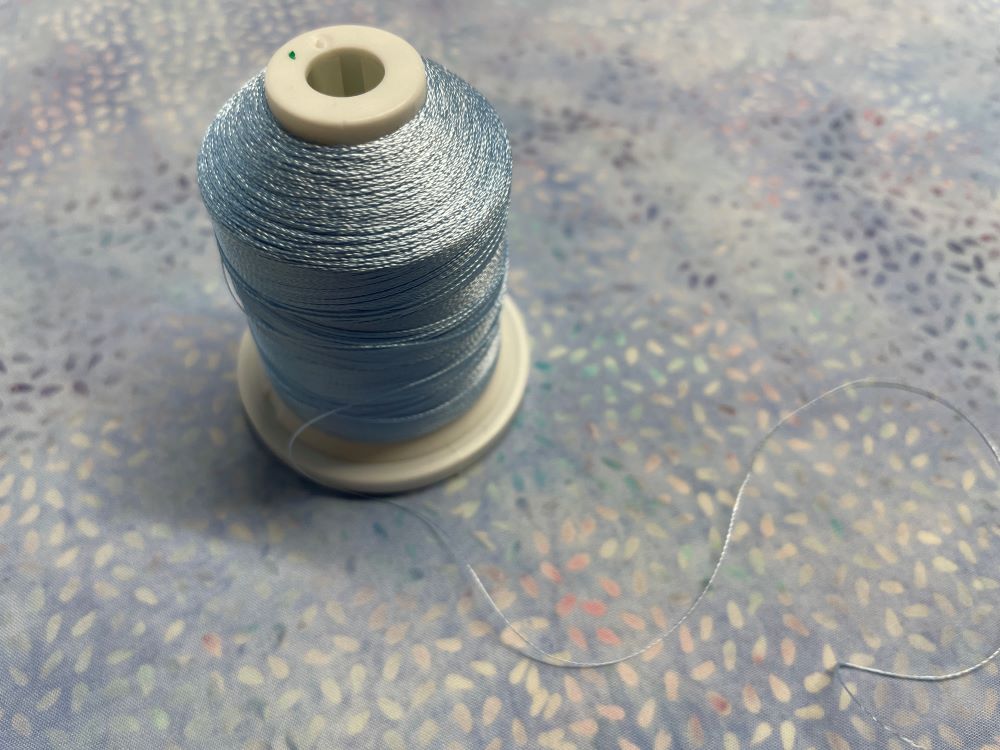
 45. Stitch out color 3, this will secure the fabric and quilt the layers together. Use a thread that blends in as much as possible or use a monofilament thread.
46. Next in turn is the grass or foreground, stitch out the next color to get the placement. 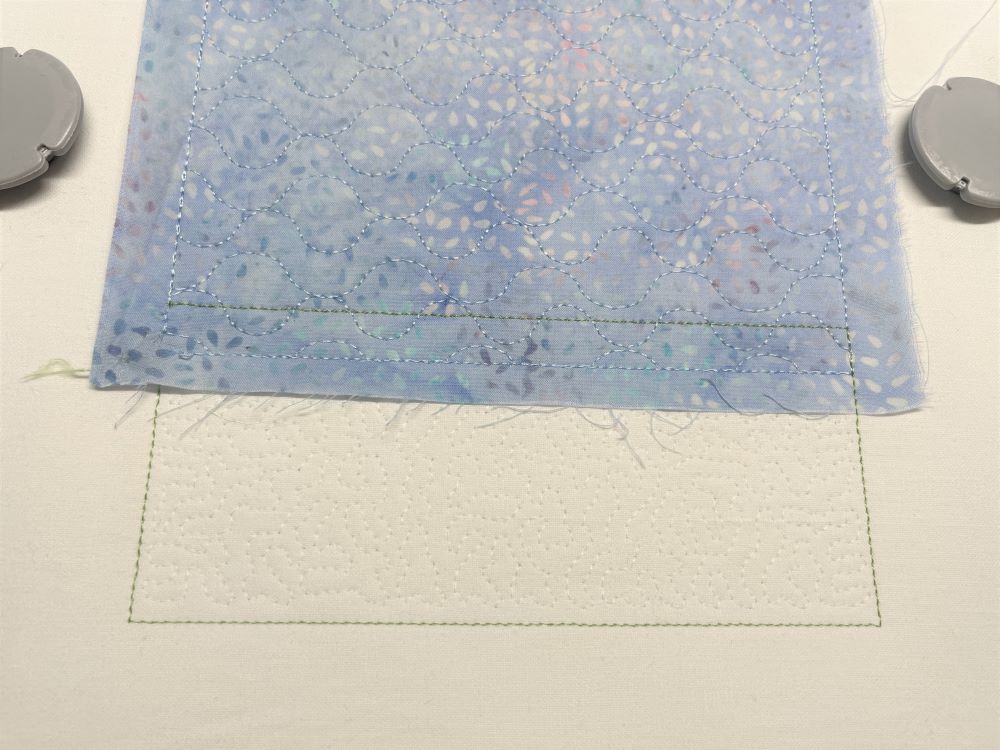
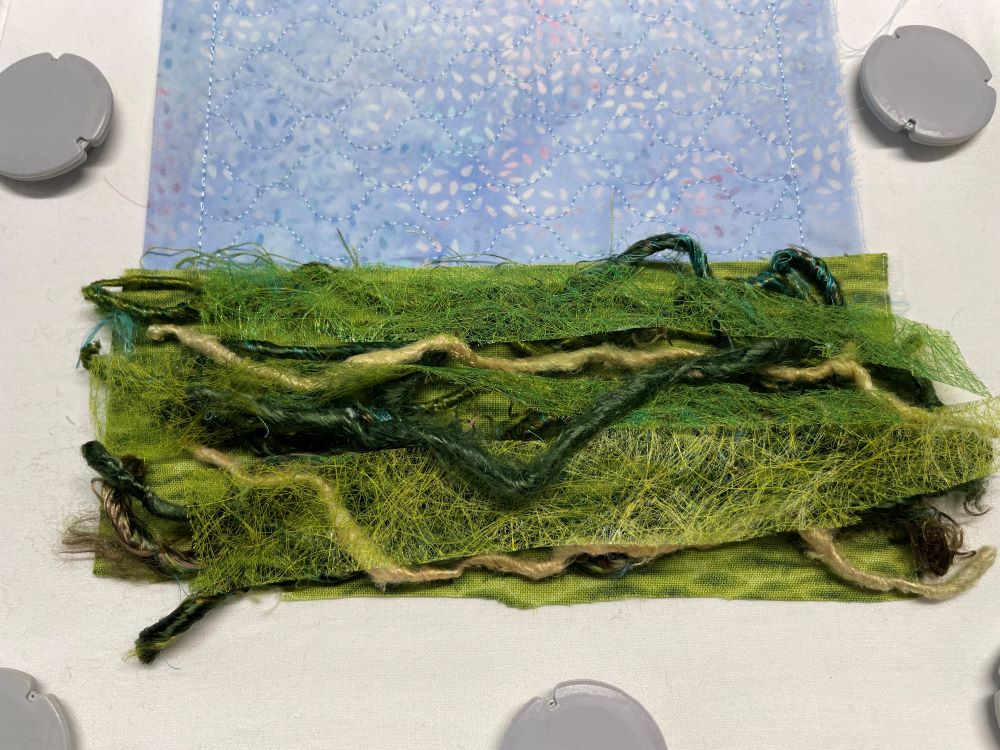
47. Cover the area with yarn, fibers, small pieces of fabric etc. I Used small pieces of fiber fabric and silk yarn.
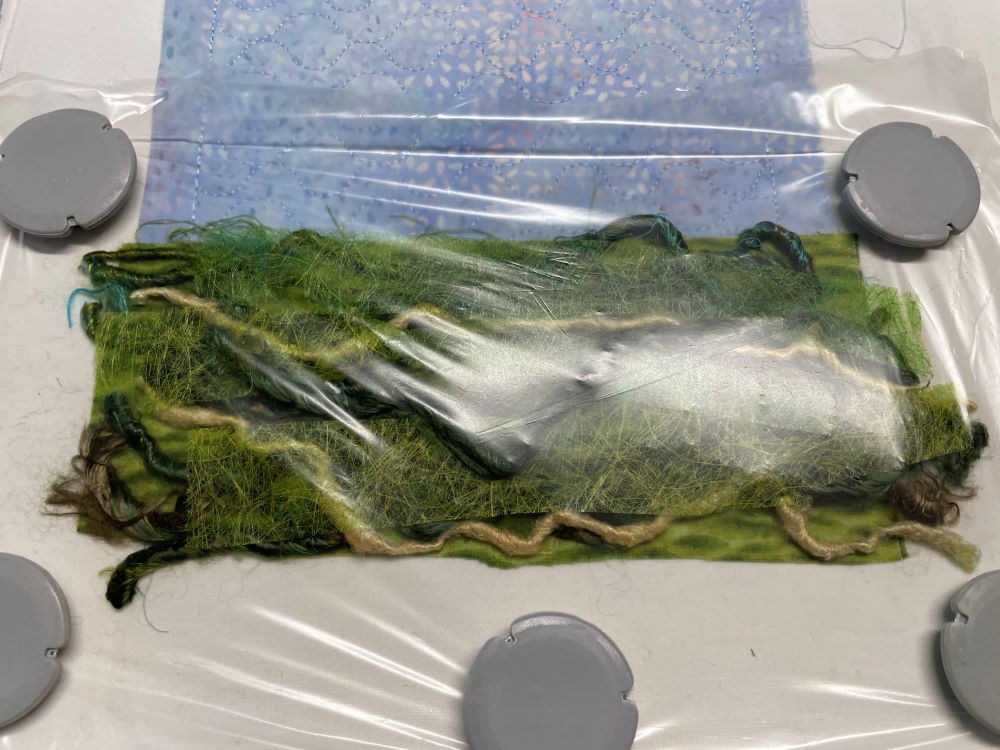
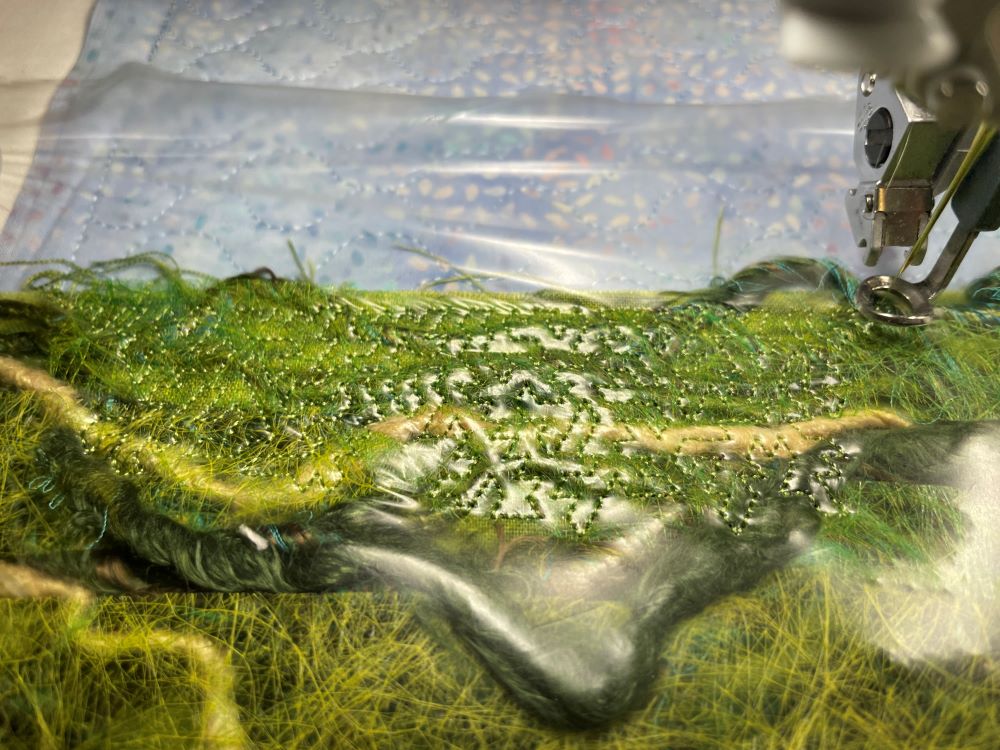
 48. Cover the area with water soluble stabilizer. This will prevent the threads from getting caught in the needle when sewing.
 49. Stitch out the next color.
 50. When finished, unhoop and rinse the water-soluble stabilizer away. Let it dry and cut away excess fabric. Save the small snippets for decoration.
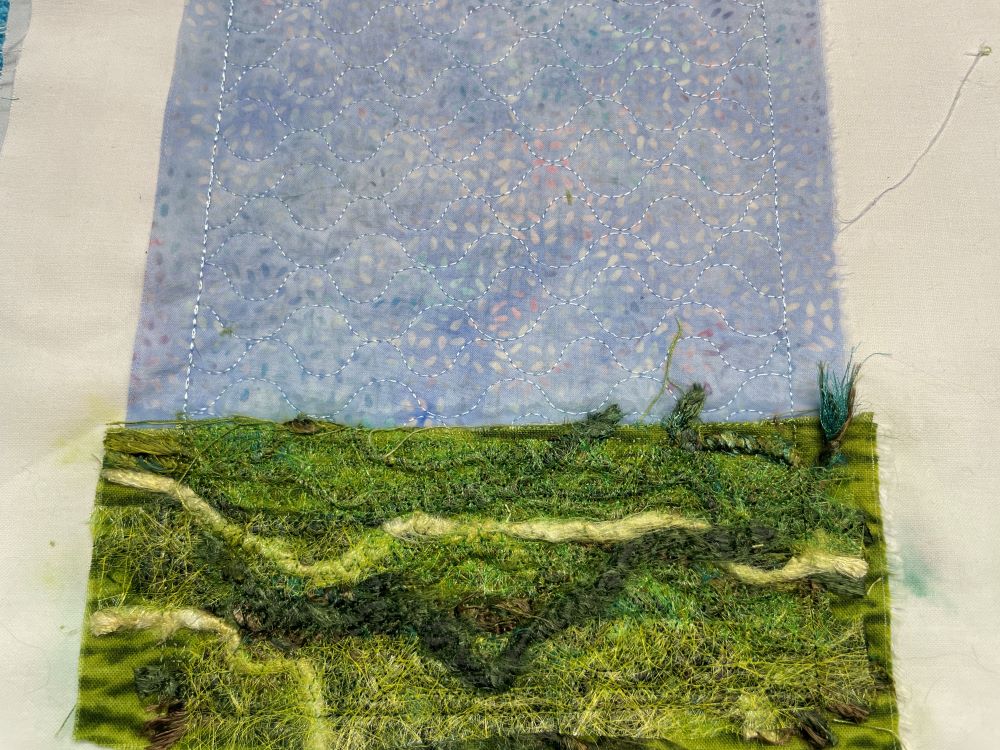
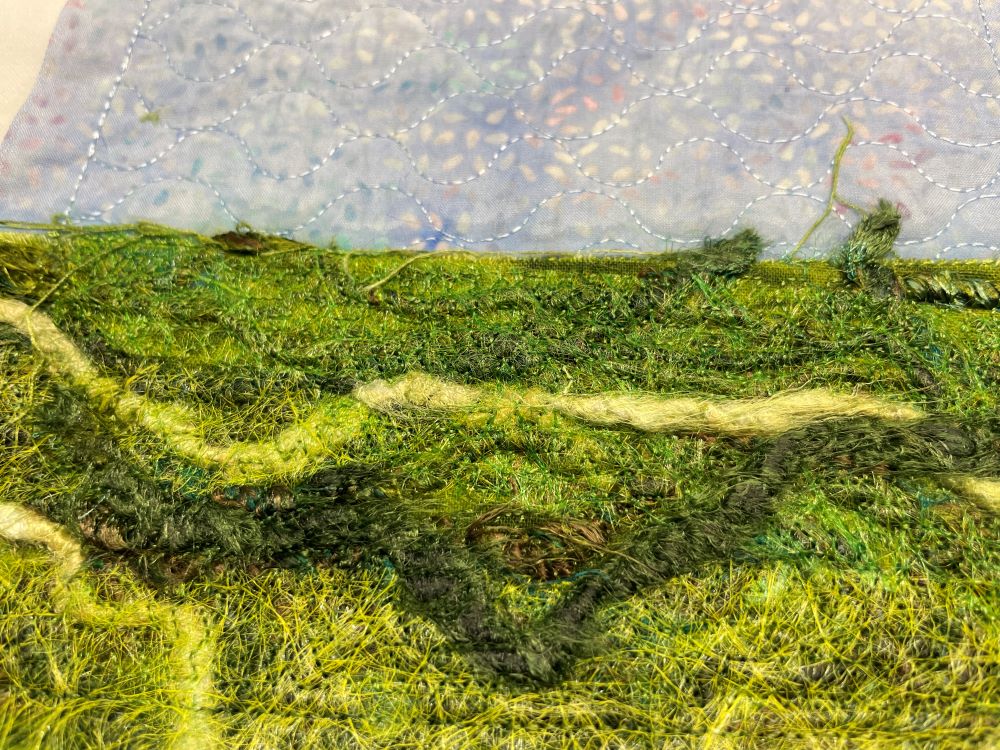 51. You can use a brush to raise the surface and make the fibers blend together. Brush upwards to achieve the look of grass.

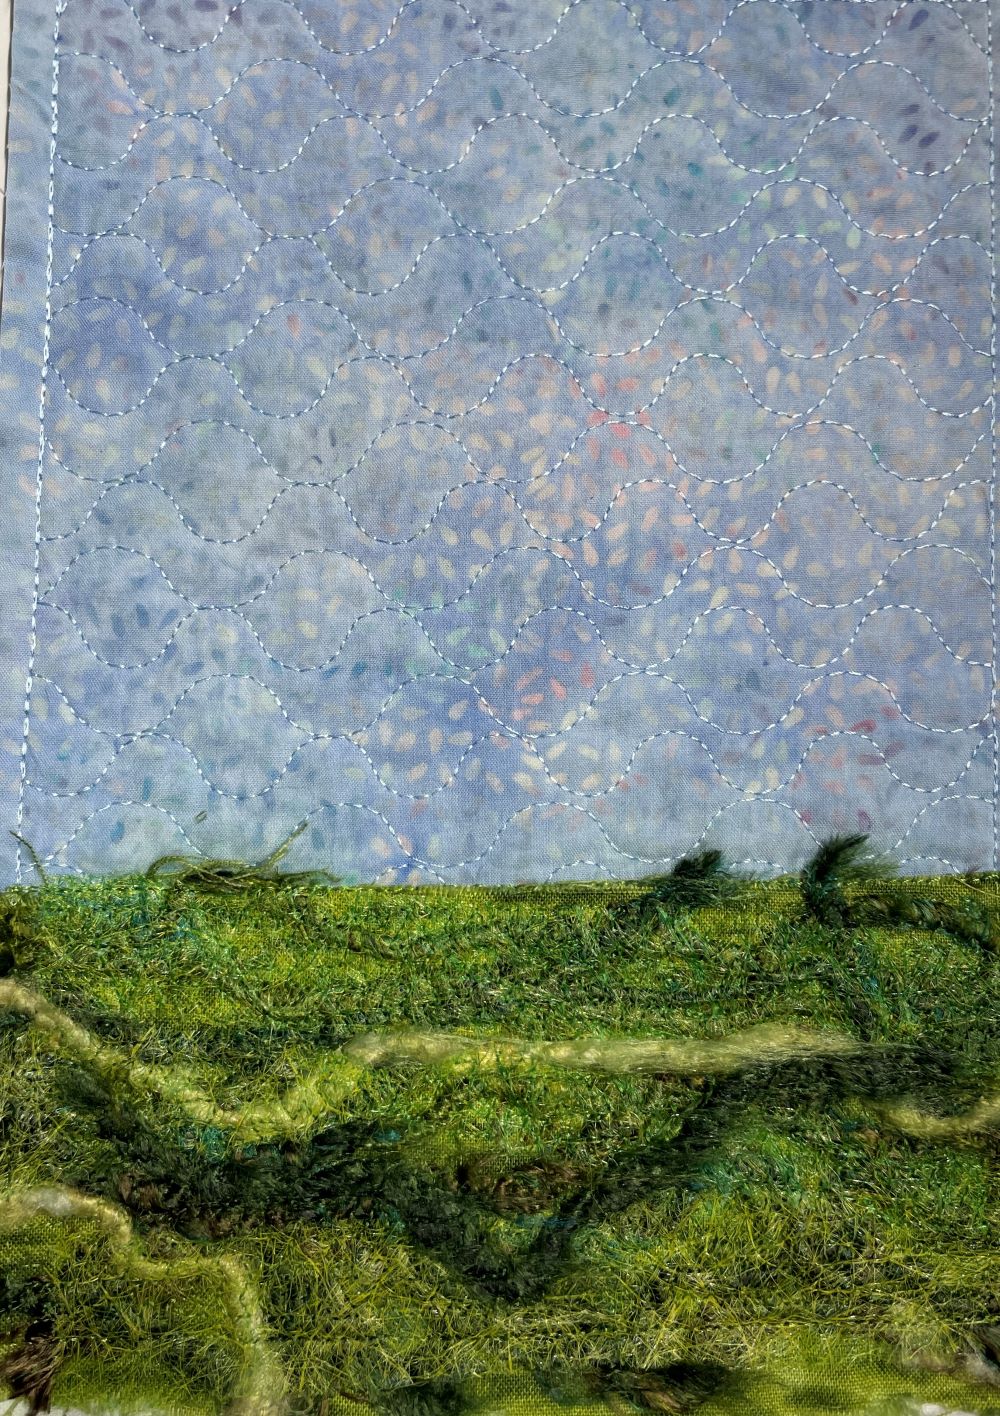
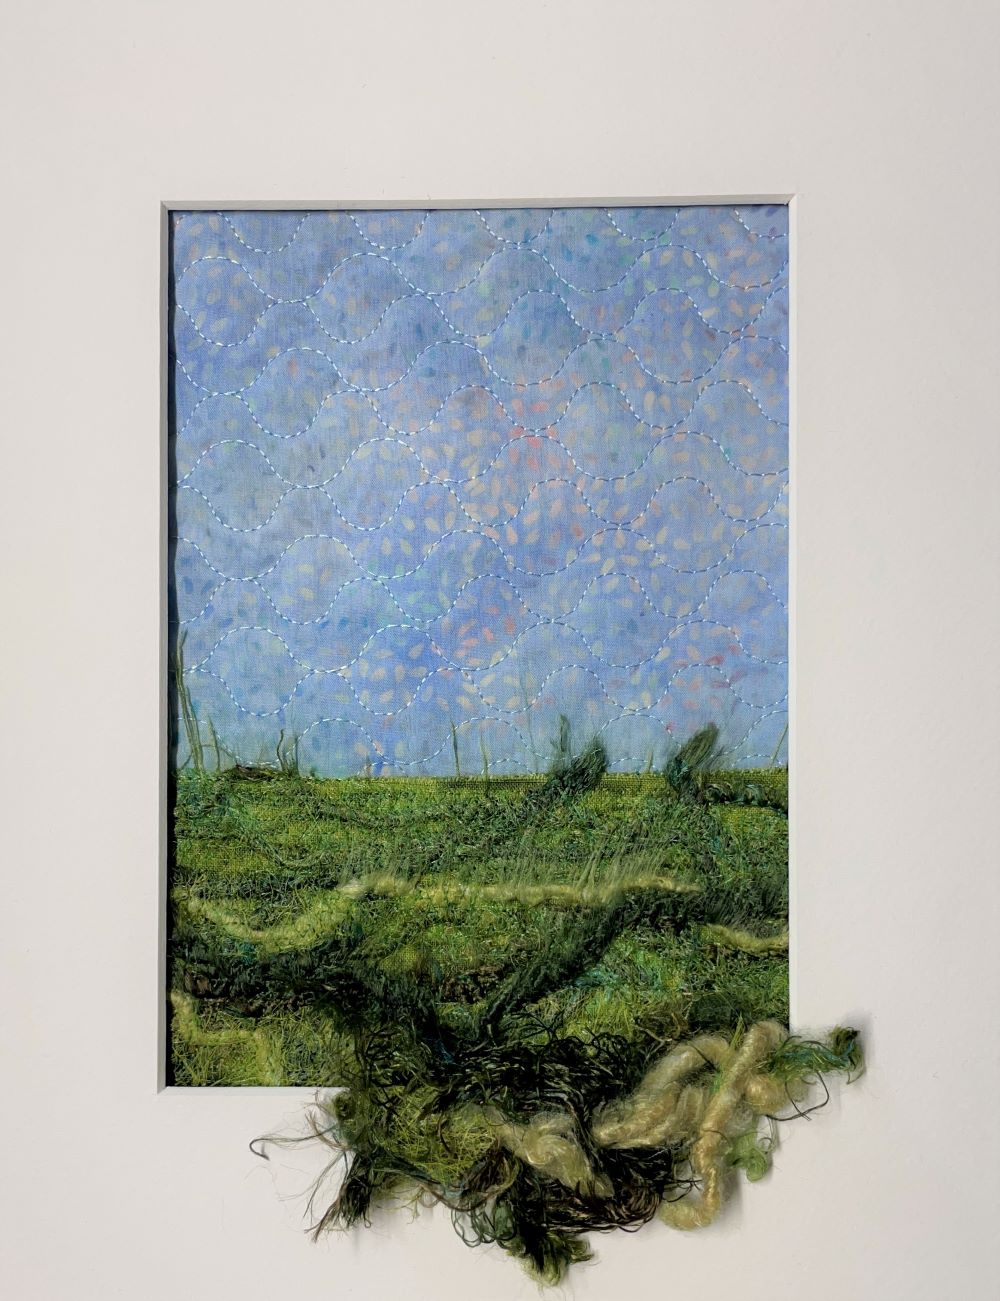
52. The result would look like this. Now it is time for the final steps, putting your art piece into a picture frame.
53. Place the picture behind the passepartout and arrange the cutaway fiber together with some other small findings such as a bit of moss, a stone, a piece of driftwood etc. Glue in place and put it inside a frame with a distance between the picture and the glass.
This was fun, wasn't it?
Learn how to make Fine Art with your Embroidery Machine, Part 2 Releasing on 5.29!