United States
Digitize Your Own Oven Mitts
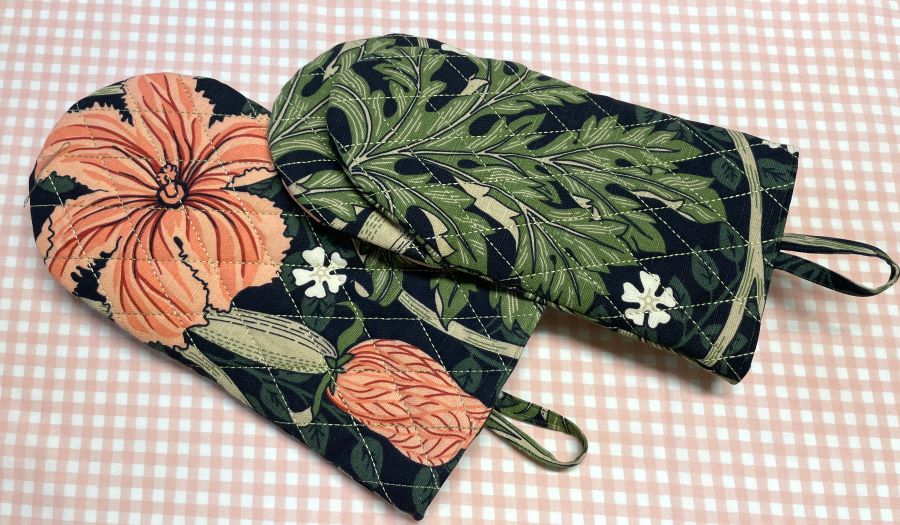
This oven mitt can be finished in many ways. We will start by digitizing the base file which is the same for all other variations we will publish later on. The different parts are stitched out in the hoop, and then put together with the sewing machine. This instruction will guide you all the way!
What you need
To Digitize your Own Oven Mitt requires:
- mySewnet embroidery software, platinum level
-
With 30-day Free Trial of mySewnet Embroidery Software you will get to try out the most user-friendly and feature rich digitizing software on the market. It works with all embroidery machine brands and is available for both Windows and Mac.
-
- Background picture, find it Here:
To make your Oven Mitt you need:
- Stabilizer, I recommend an old bedsheet or other fabric, it will not be visible when finished
- Fabric for the outside, you can use quilters cotton or thin canvas. Remember it must be heat resistant (synthetics can melt)
- Lining fabric
- Ordinary Batting for the back and front pieces
- Heat resistant batting for the inside grip.
- Sewing thread
How to make:
Preparation: Digitizing the different parts of the Mitt
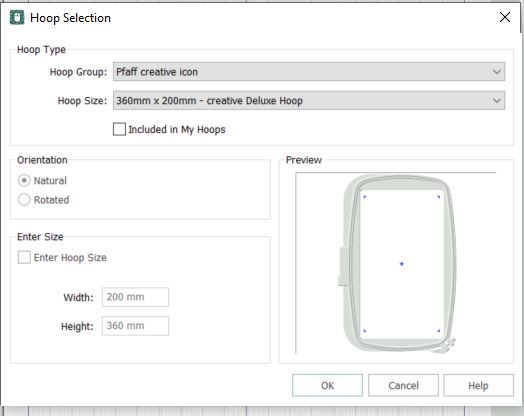
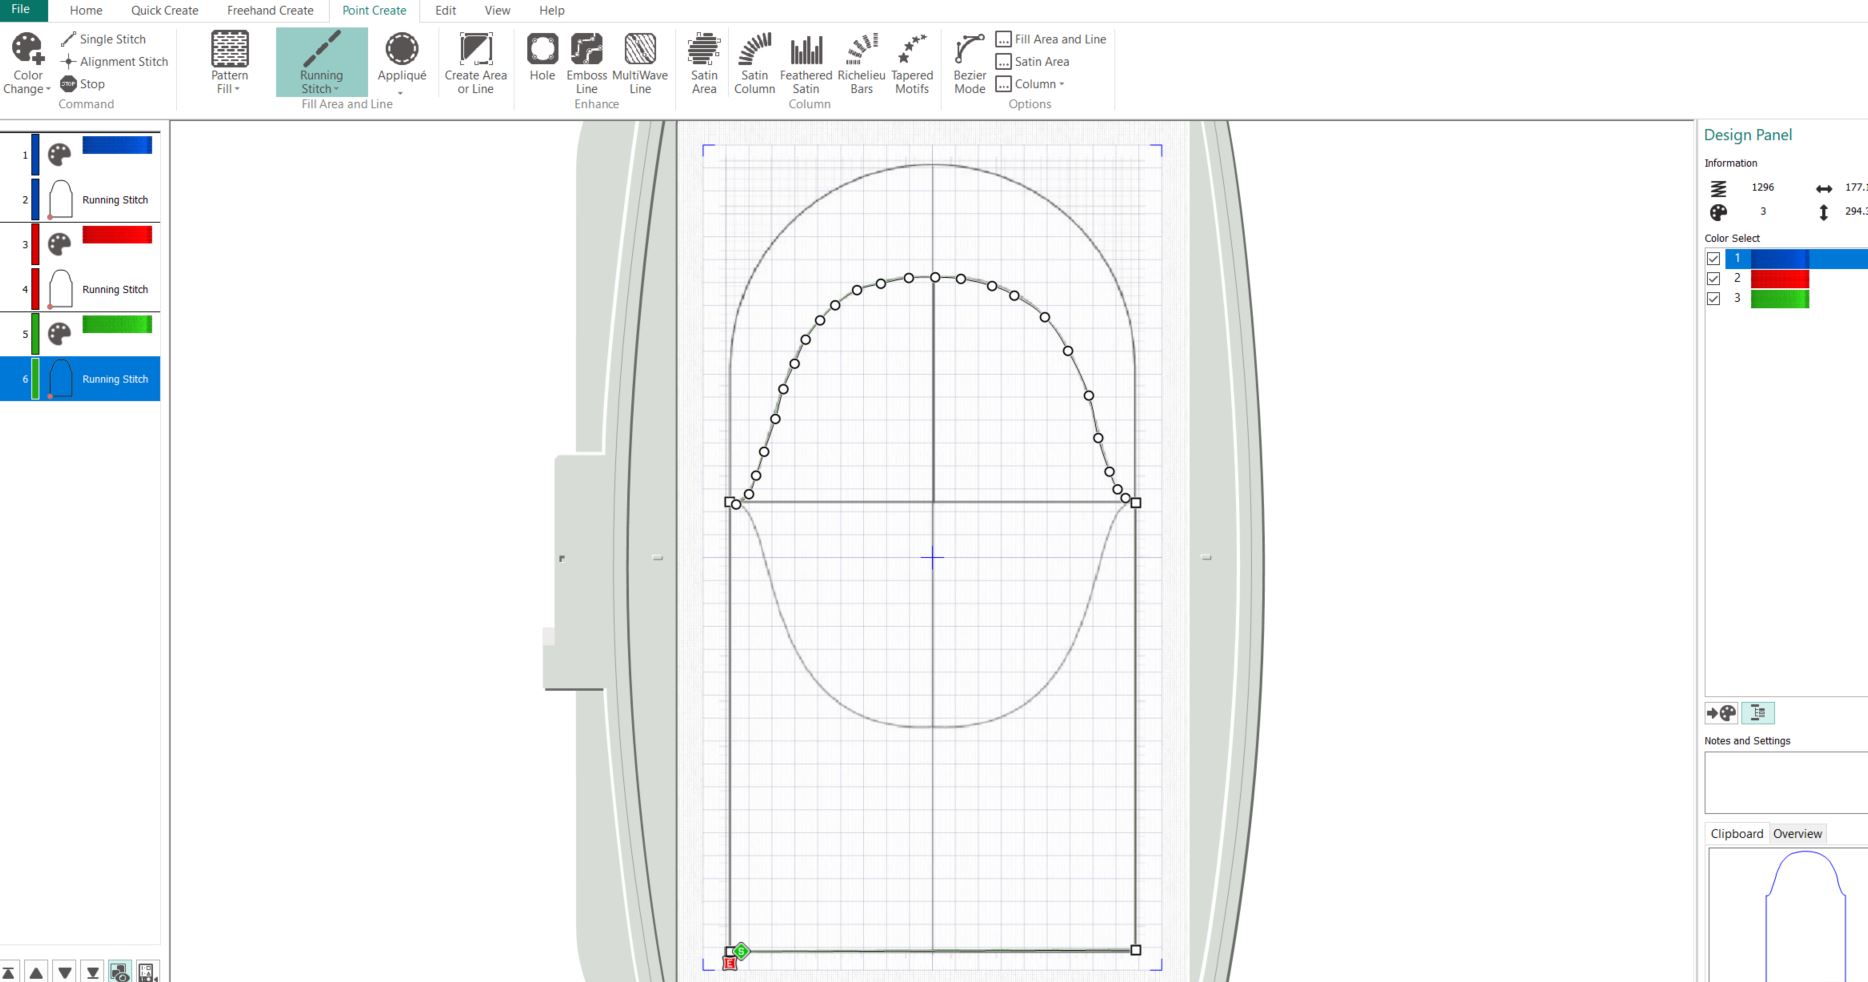
1. Open mySewnet embroidery software, select Blank Canvas.
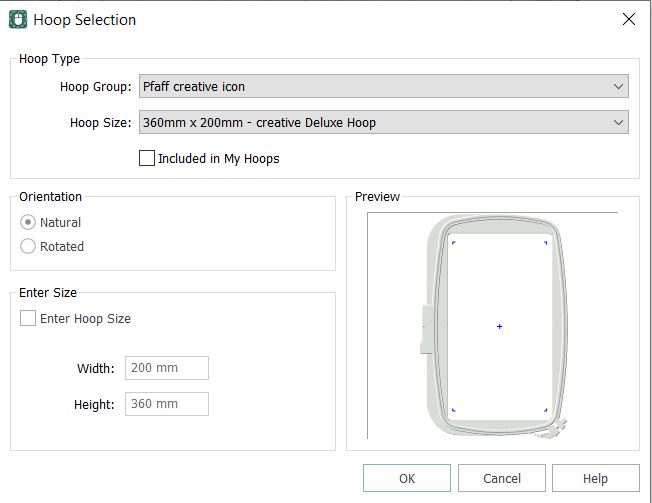
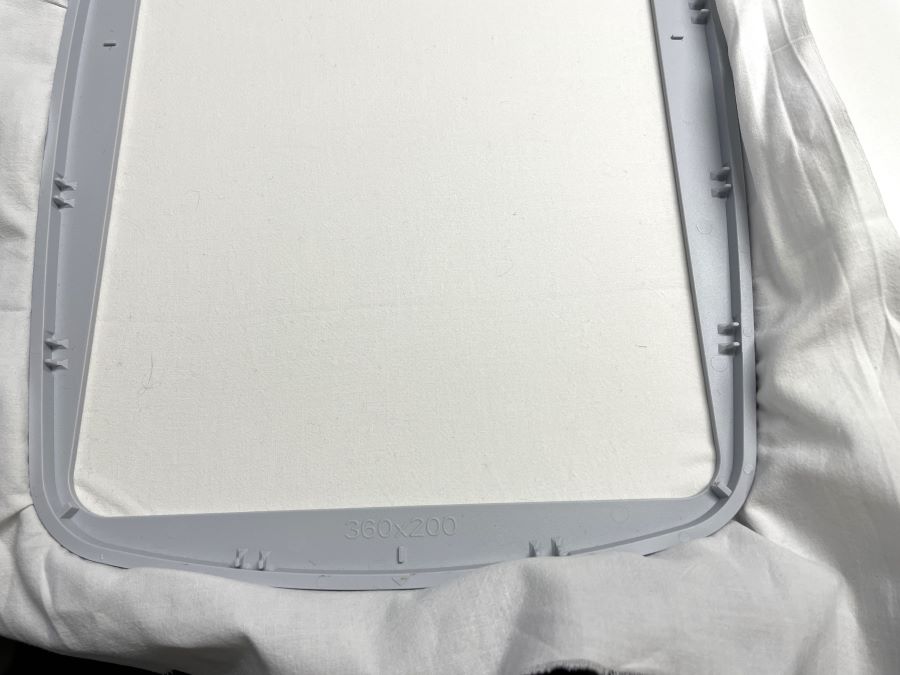
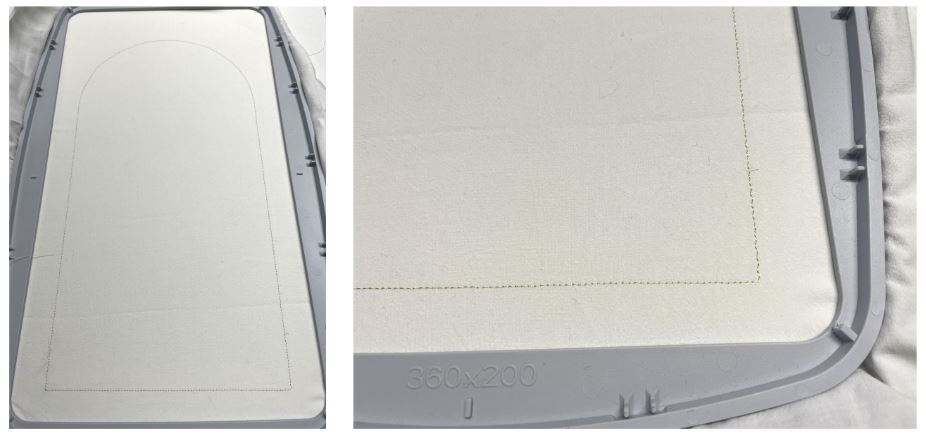
2. Set the hoop size to 360x200mm
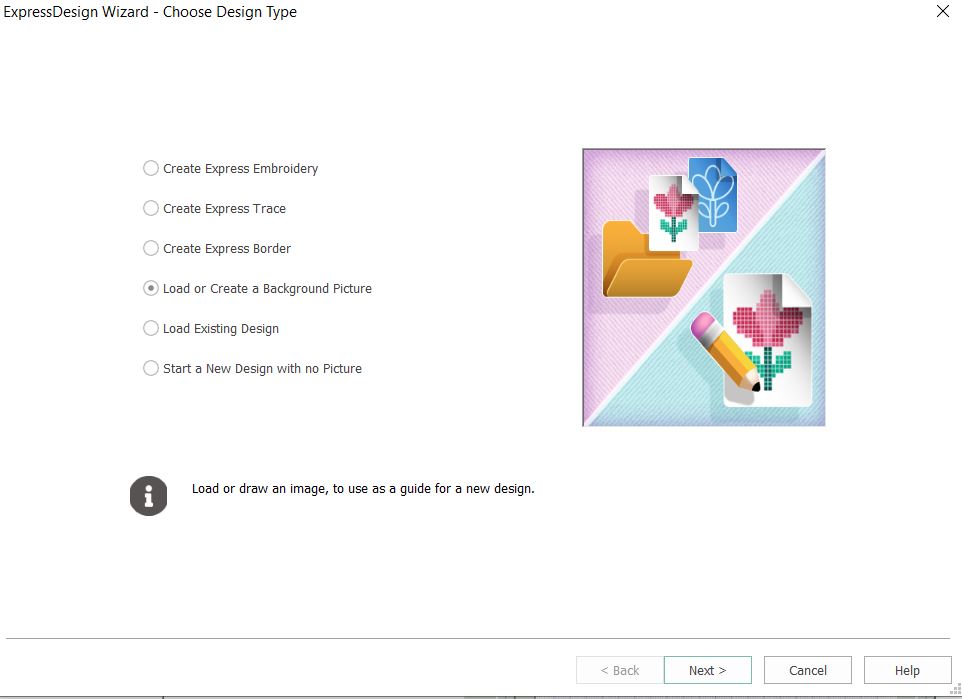
3. Click on Create and select Digitizing.

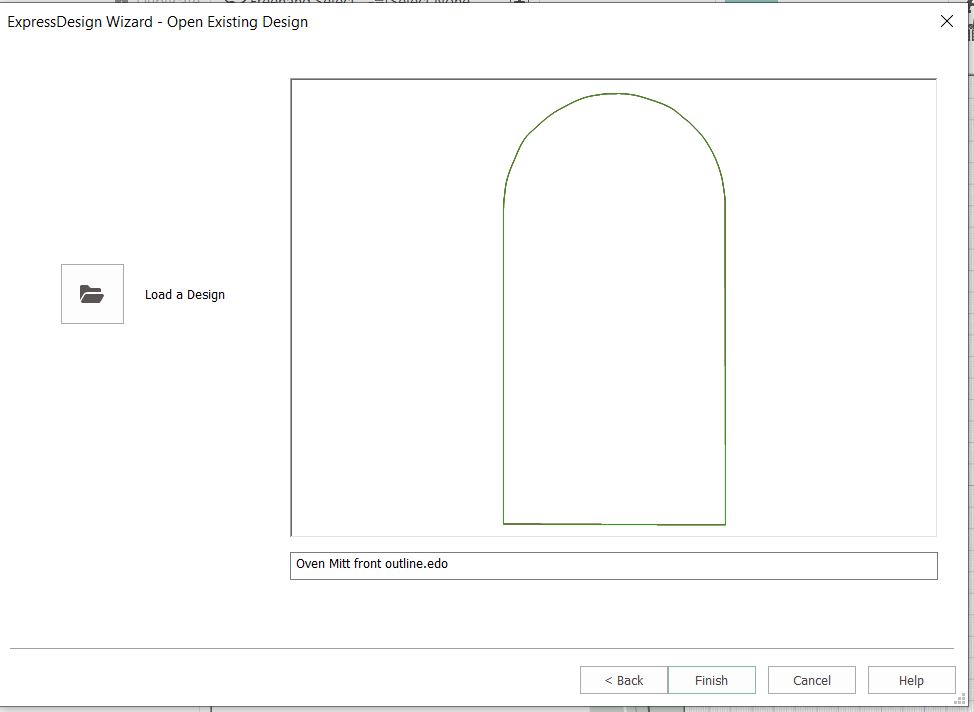
4. A new window and a dialog box will open, select Load or Create a Background Picture, click Next.
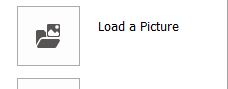
5. Select load a picture.
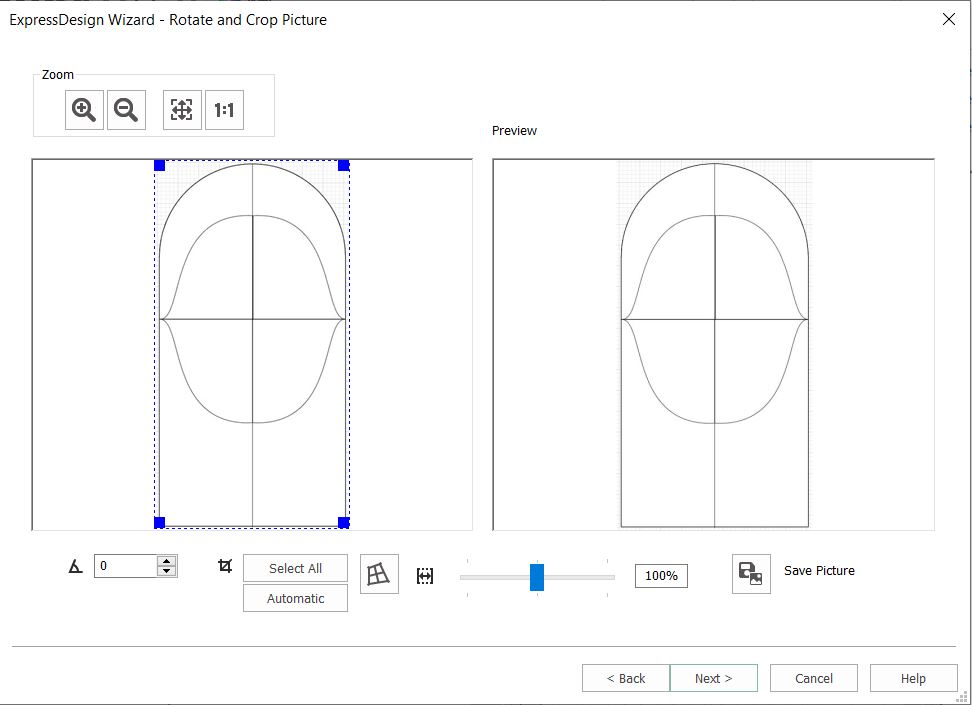
6. Locate the image on your computer: Oven Mitt Background Image.JPG. Click OK. The image will be visible in the dialog box. Click Next.
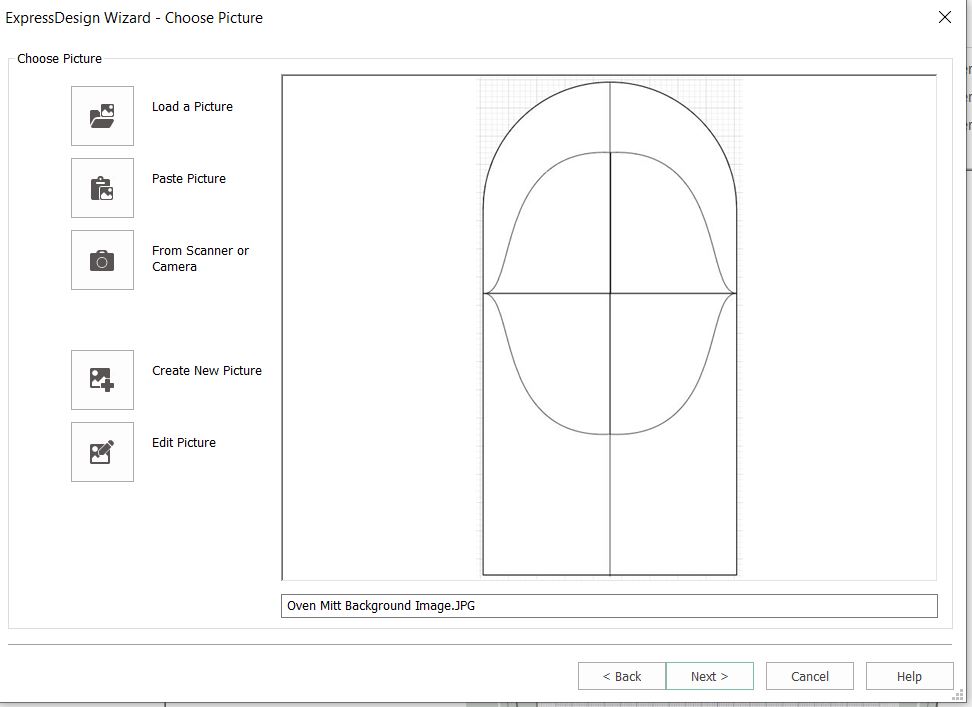
7. Now it should look like this: Click Next.
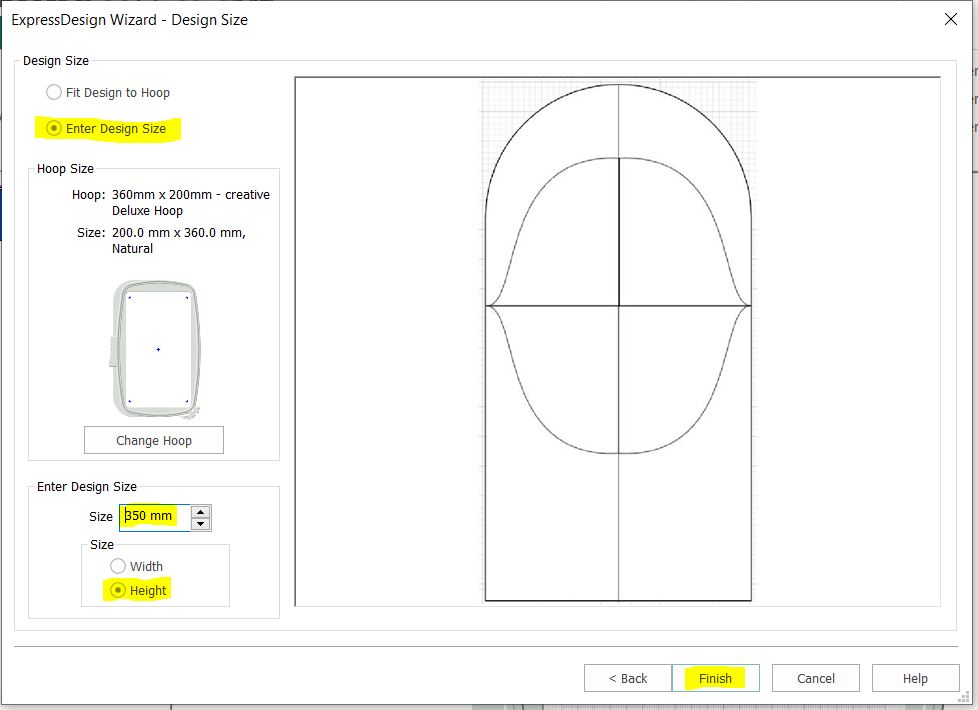
8. Now we will set the size of the background image: select the Enter Design Size and set the height to 350mm, click Finish.
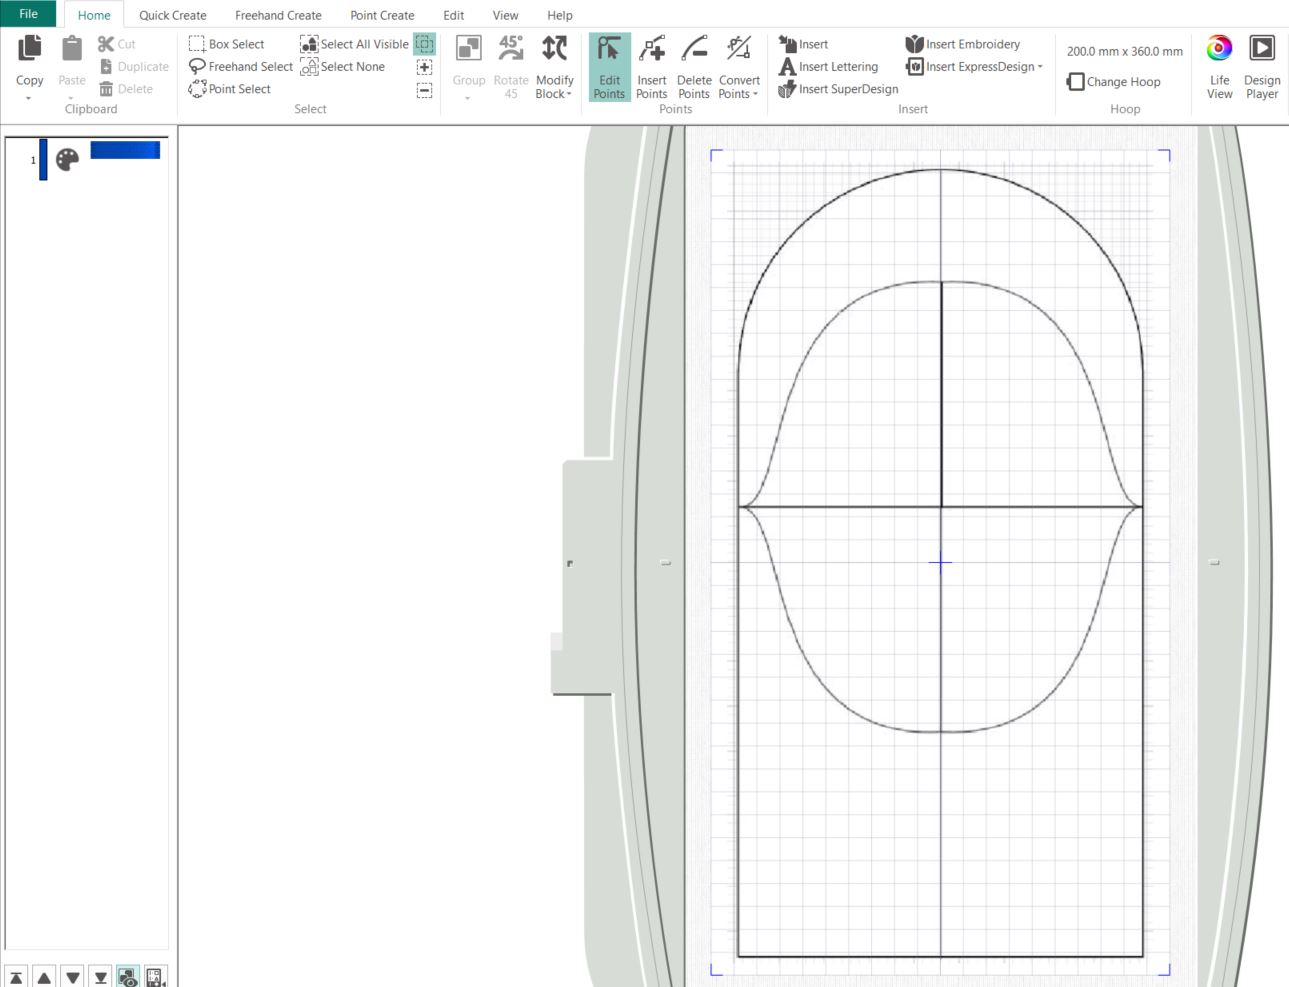
9. The background image is now transferred to the Hoop area.
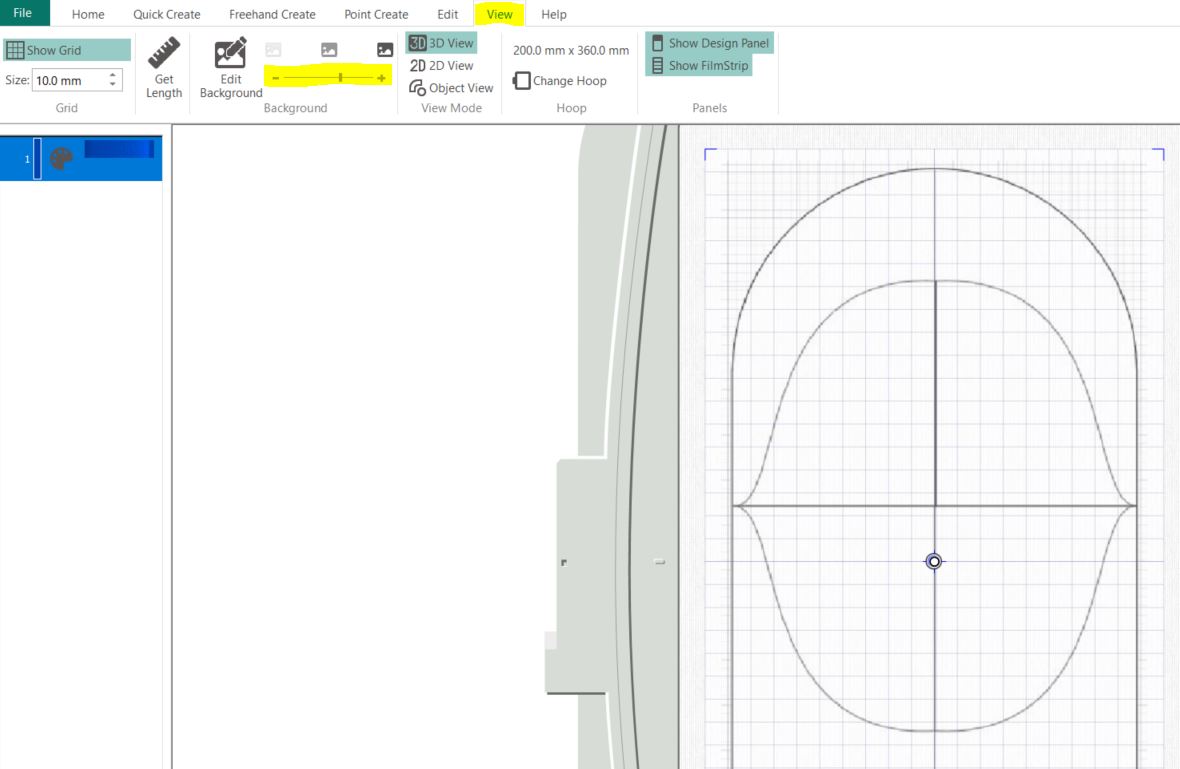
10. If you want to fade the background image you can go to view, Edit background and use the slider to make the background image less visible. If you move the slider all the way to the left the image will disappear. This is helpful when you want to see how the stitchline you’ve made.
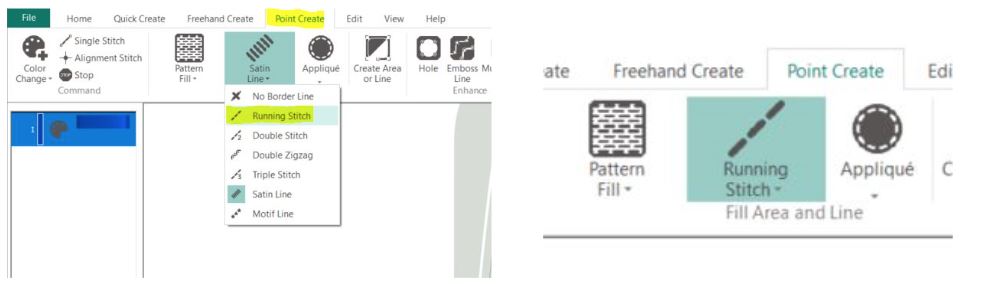
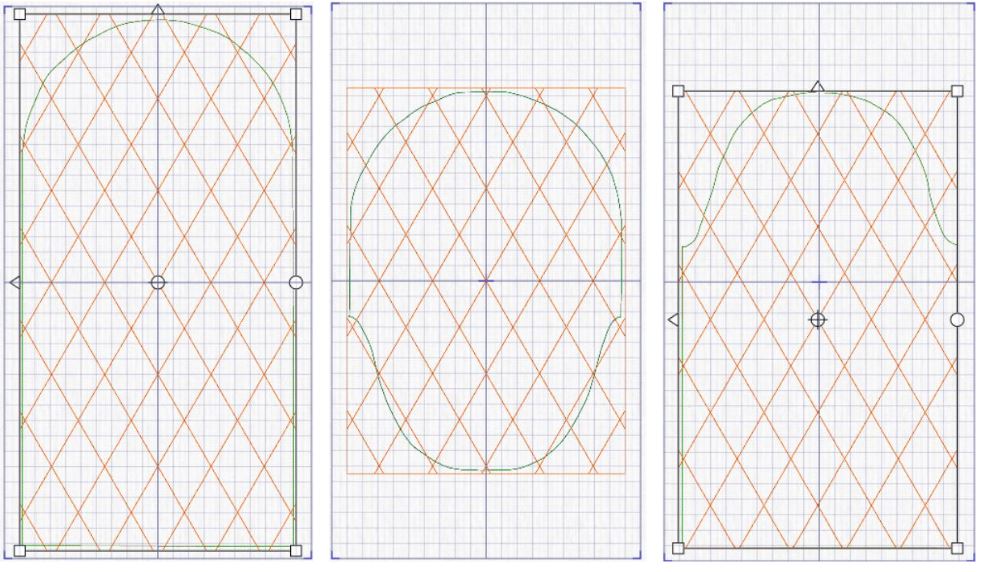
Digitizing the front outside piece
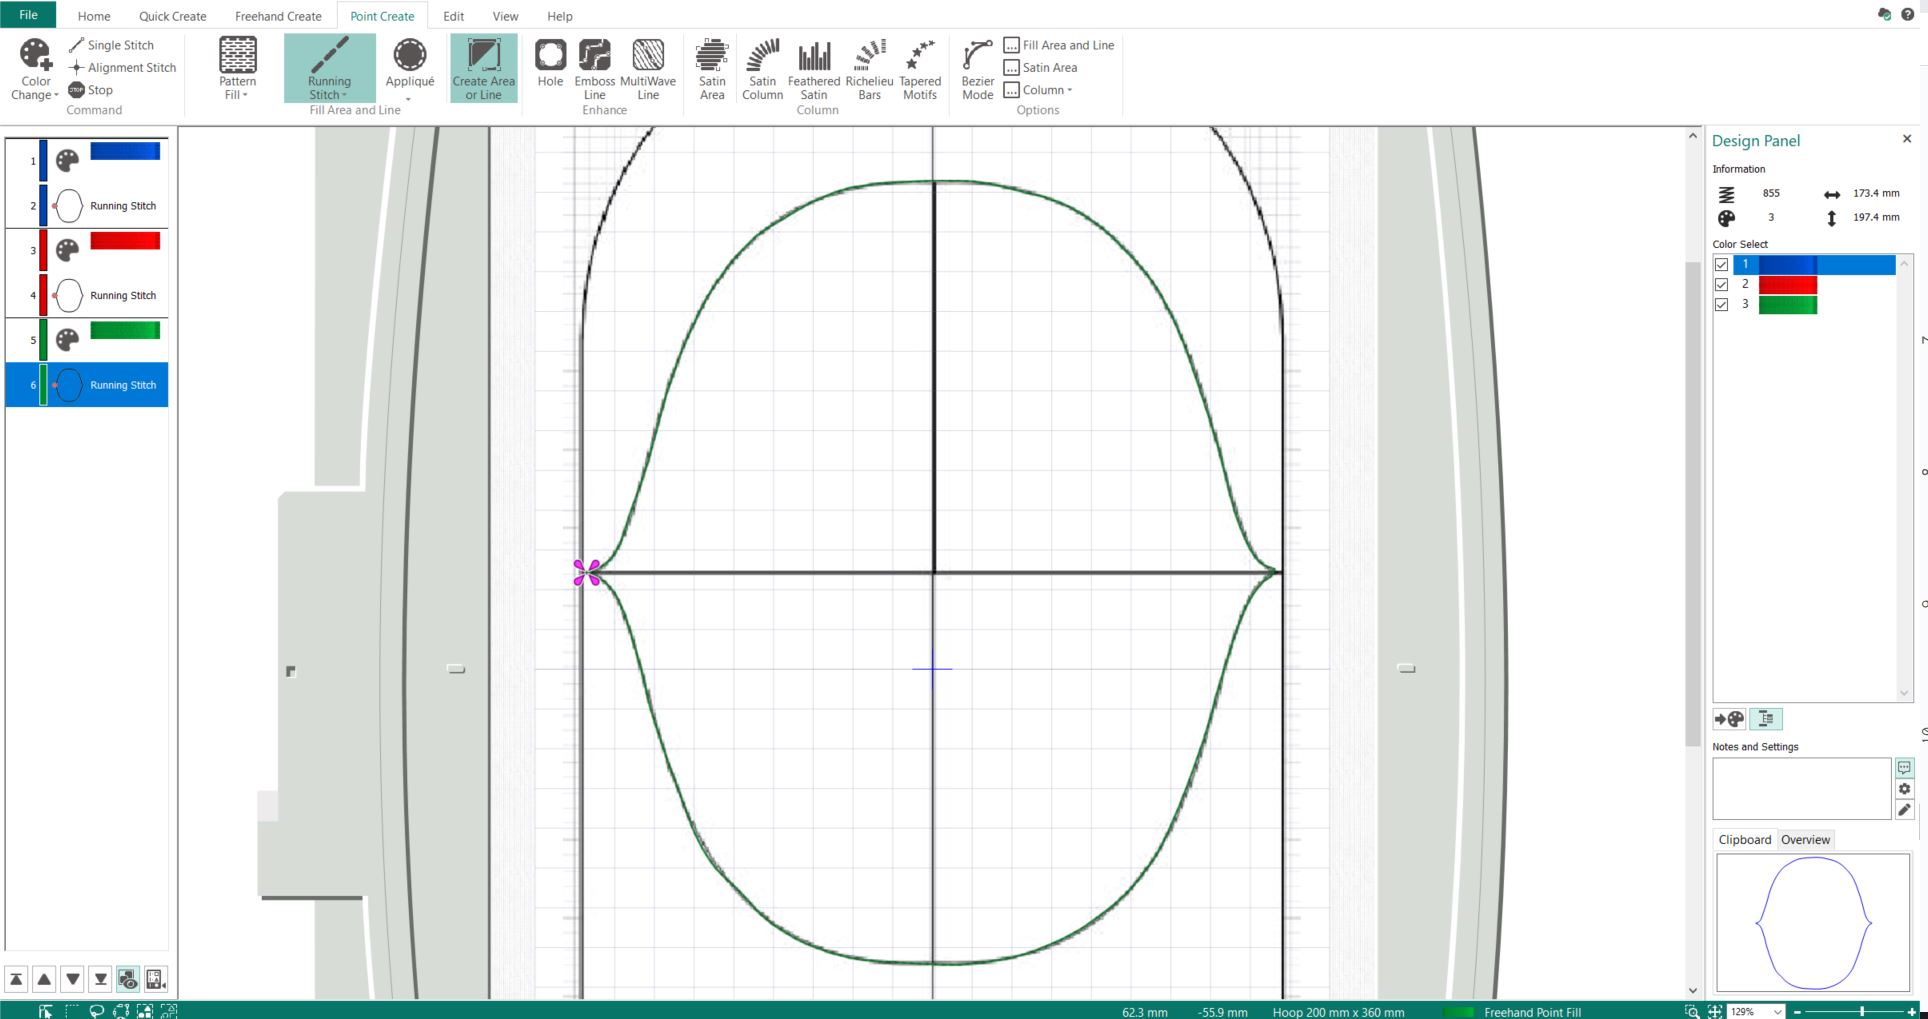
11. Go to Point Create, set the Pattern Fill to No Fill and change the Satin Line to Straight stitch.
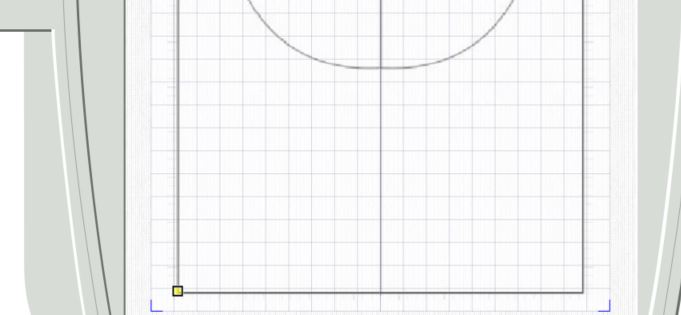
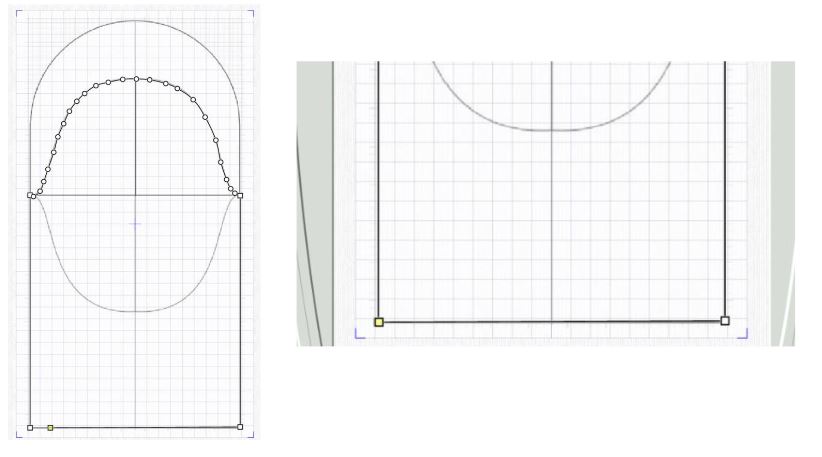
12. Click on Create Area or Line. The cursor will now change to a point. Start placing points along the outer edge of the image. If you hold down the Shift key, the points will change to a square, this means that you will get a sharp point. Use this in corners and where you want straight lines. You can always change the points later if you don’t get it right. Strat at the lower left corner, hold down shift and make the first point.
13. Hold down the shift key and make the next point on the left side, where the line is starting to curve.Continue to add points along the curved line without holding down the shift key. The last point on the curved line needs to be square so hold down the shift key when placing it.
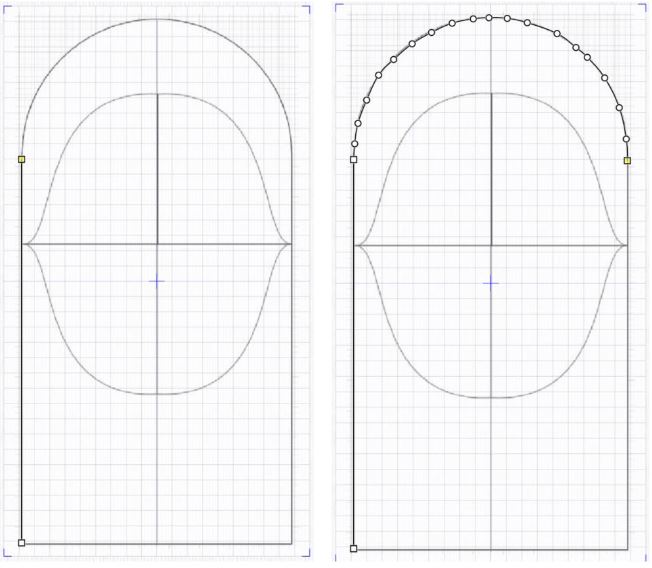
14. Lace next point (square) at the corner on the right side.

15. Place the last point(square) close to the first and drag it on top of the first point.
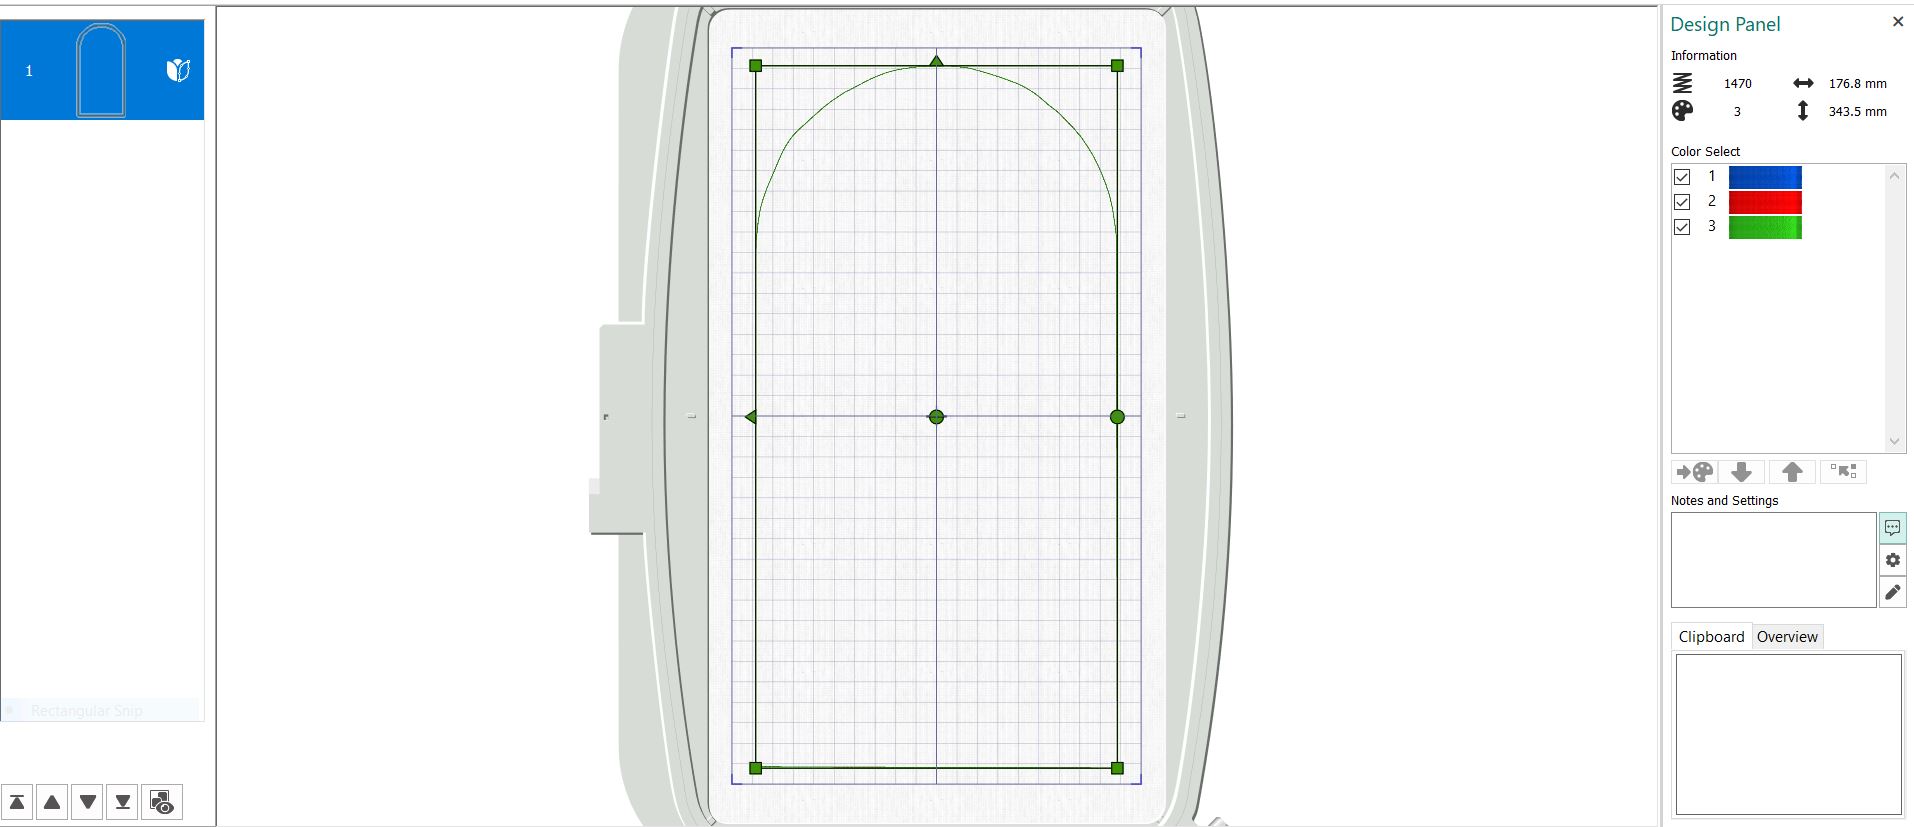
16. Right click, this sets the line to a running stitch. It will also show up in the Film Strip at the left side.
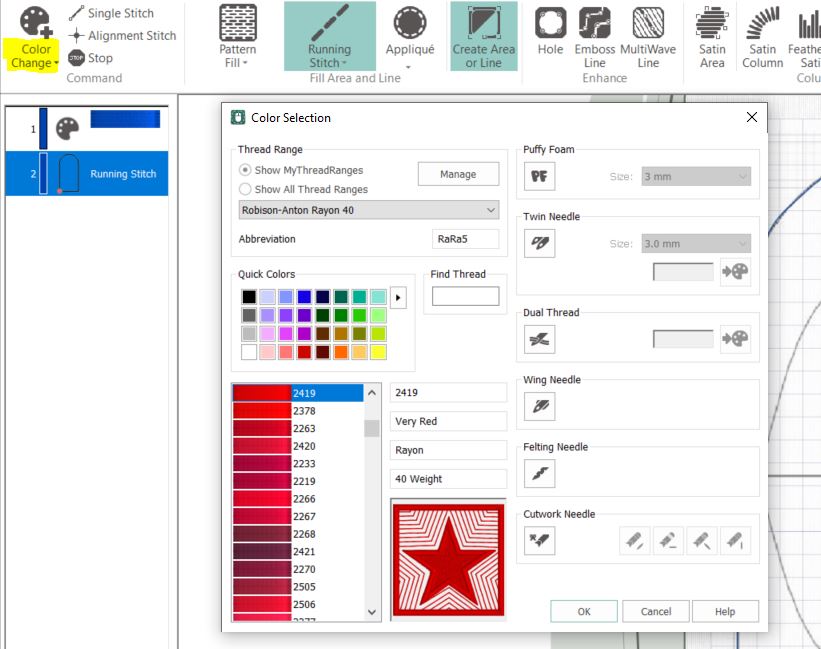
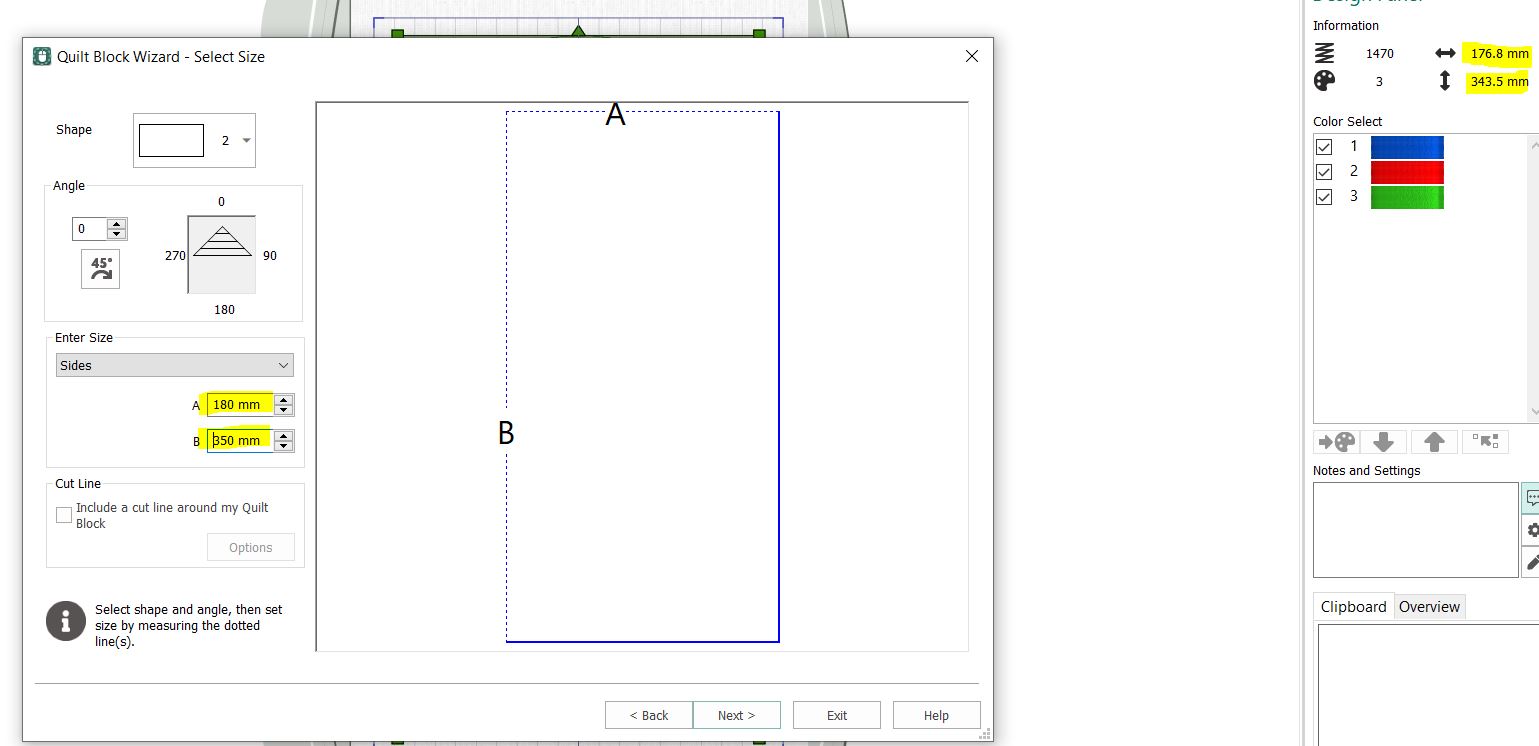
17. When we stitch out the embroidery design later this will be the placement stitch for the batting. To secure the batting in the hoop we need to copy and paste this line.
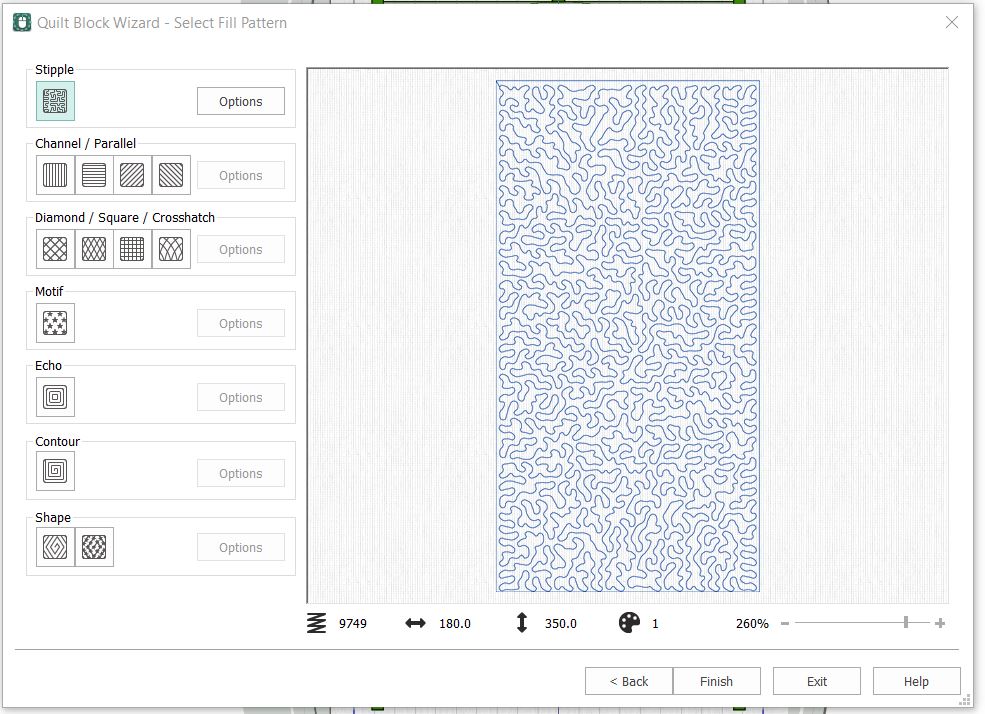
18. Click on Color Change and select a red color for the next line.
19. Right click on the stitchline in the filmstrip (it has number 2) and select Copy. Then go to the red color in the filmstrip (3) and click Paste. The pasted line will be placed right on top of the first line and will show up in red on the filmstrip. This is the batting secure line.
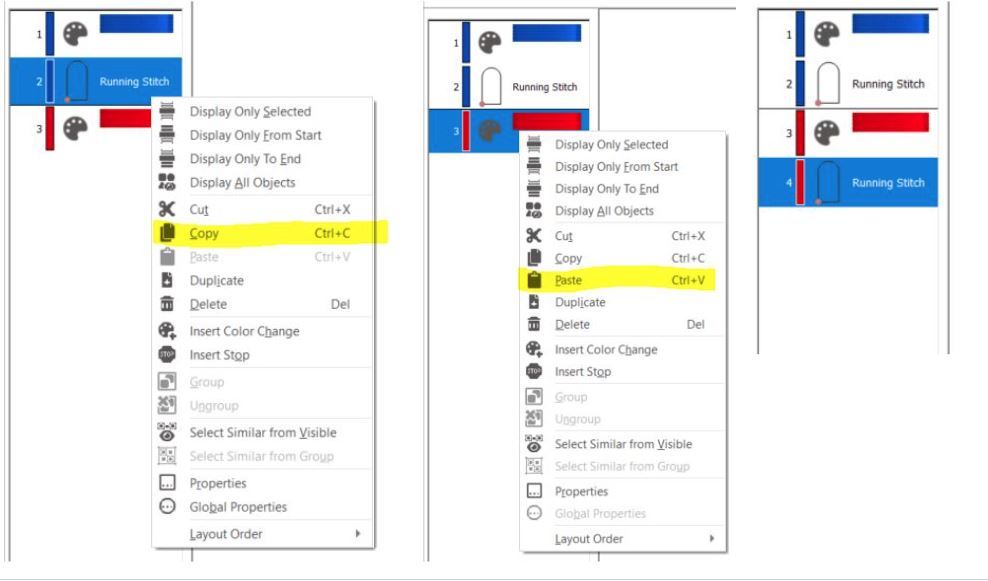
20. Change the color to Green and repeat one more time, this is the fabric securing line.
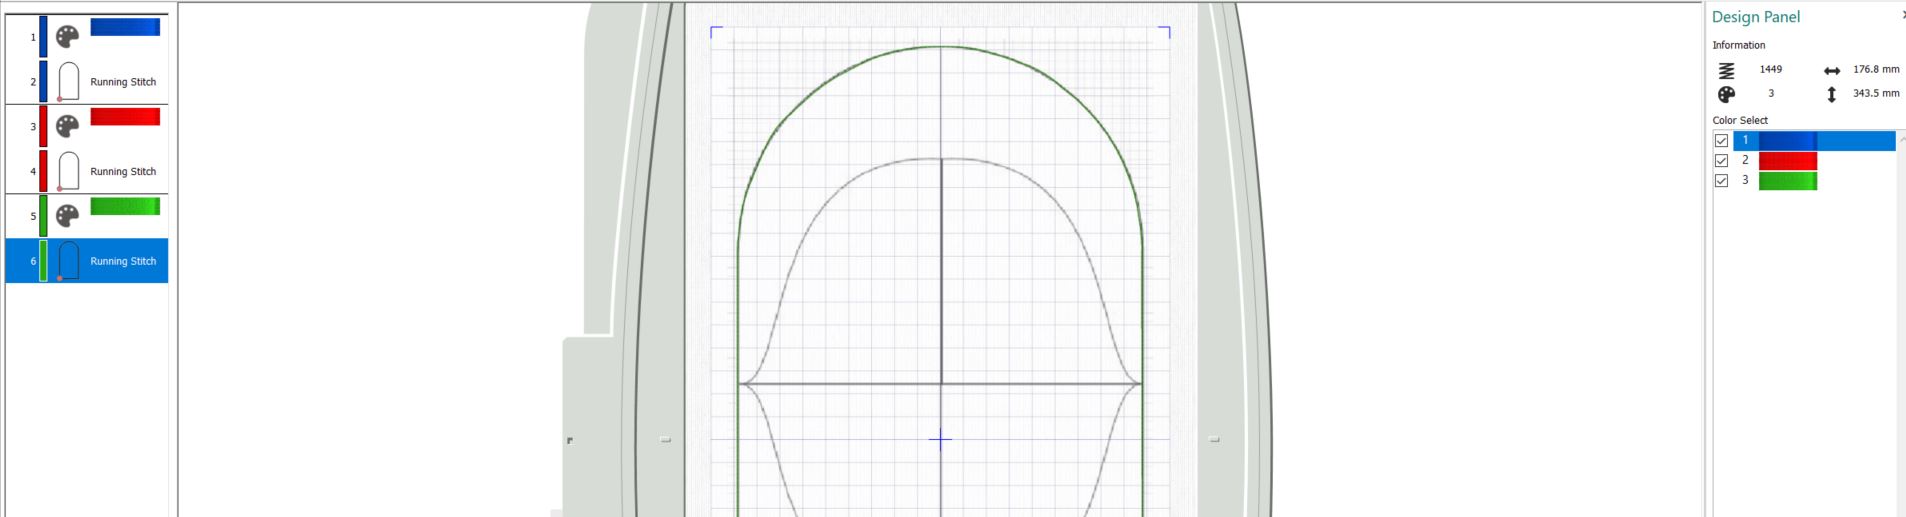
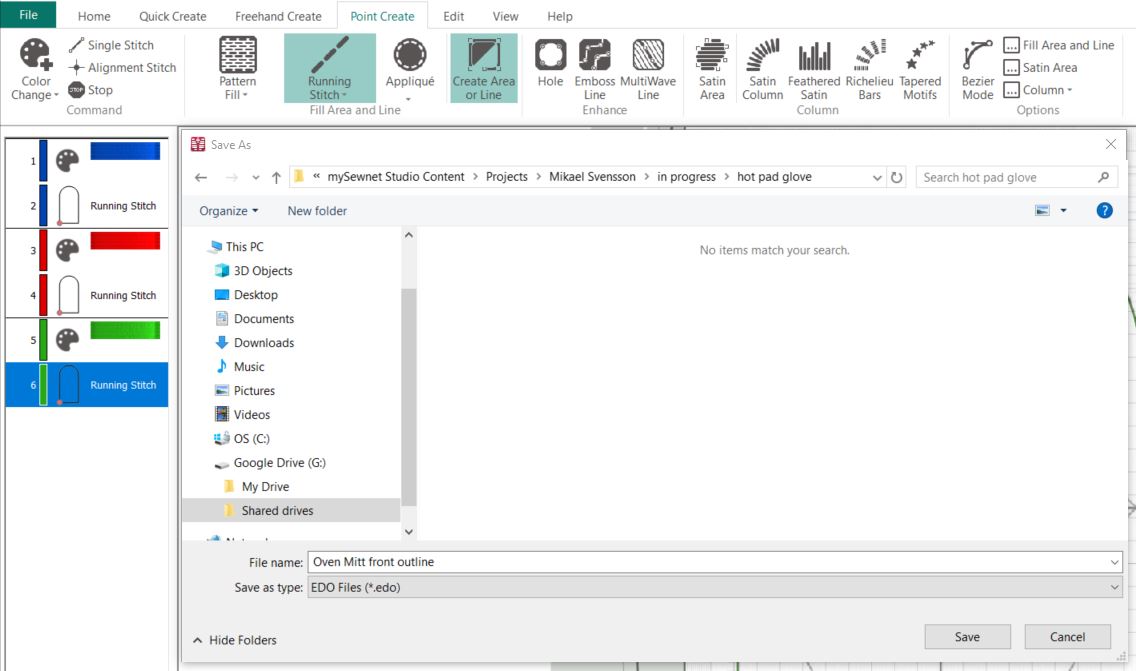
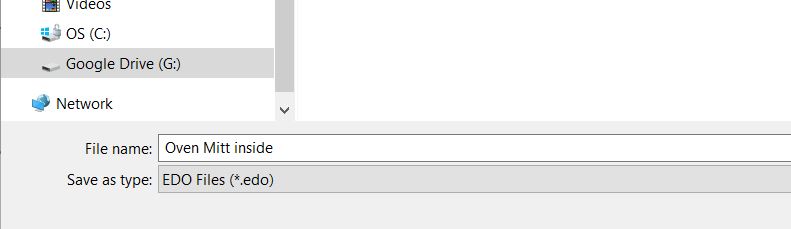
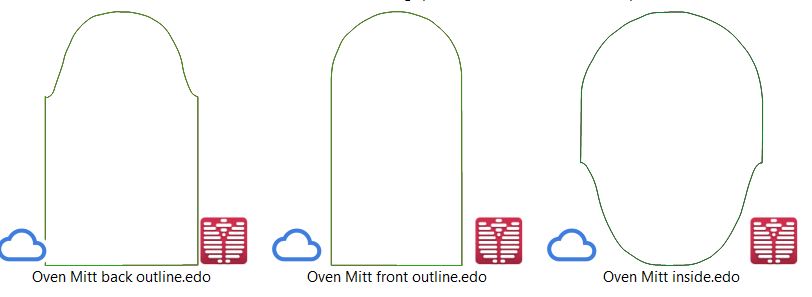
21. Now the outline of the first part is finished. Click on Save as: Oven Mitt front outline. It should be saved as an EDO file.
Digitizing the outside back piece
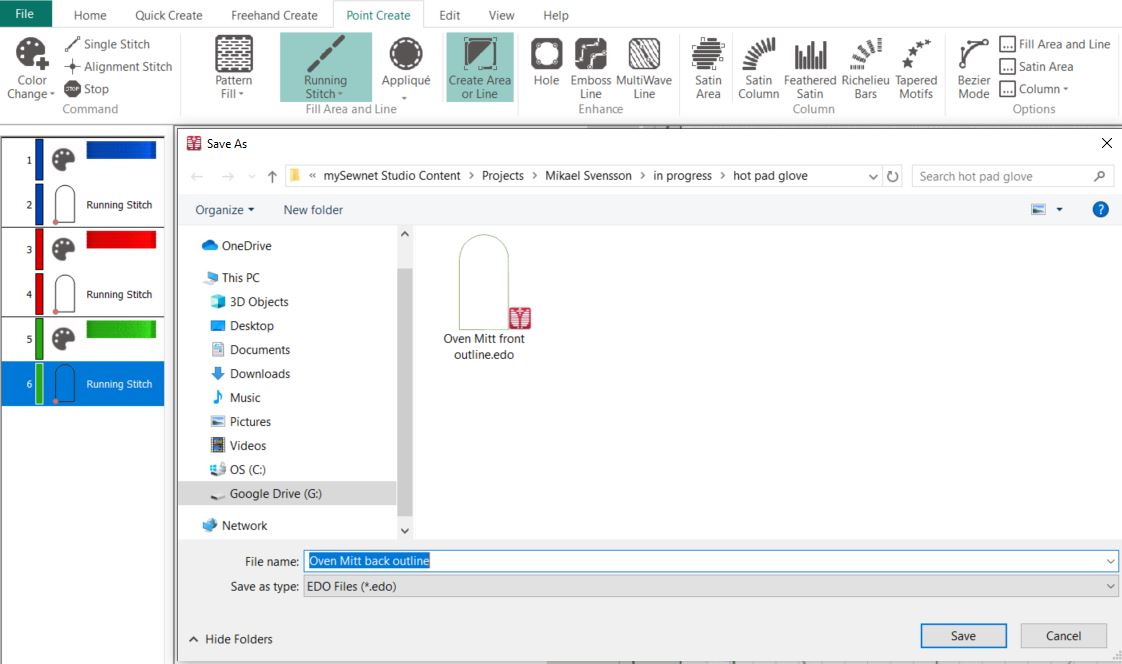
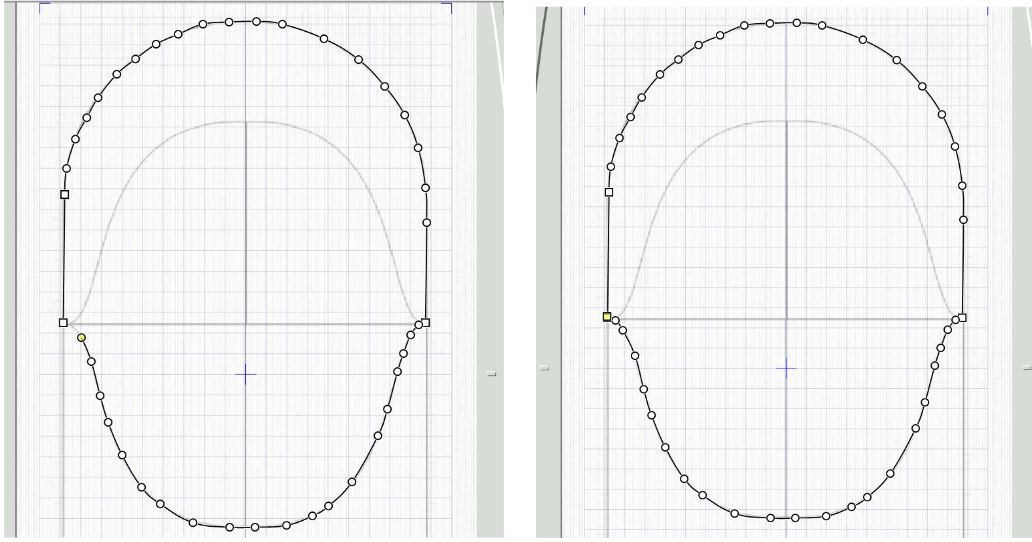
22. We will use the same background image for the rest of the digitizing. Start by going to File Save As and save the File As Oven Mitt back outline.
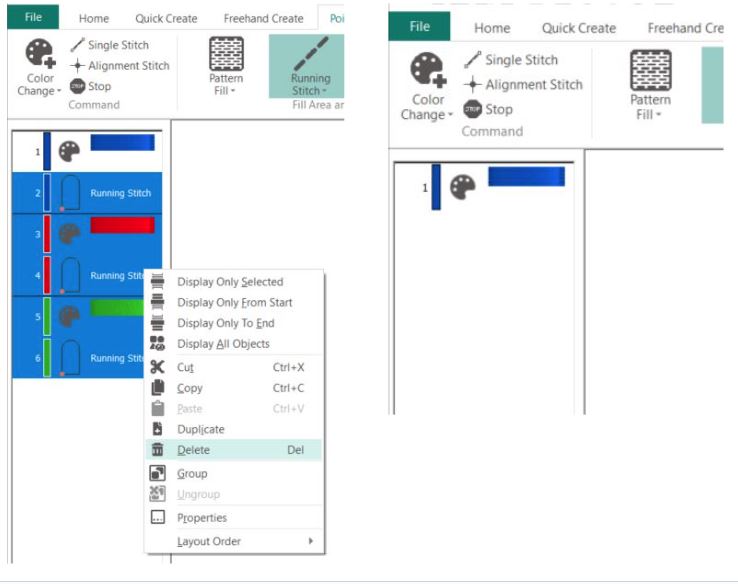
23. Select all the images and colors in the Film strip except the blue color. Right click and select Delete.
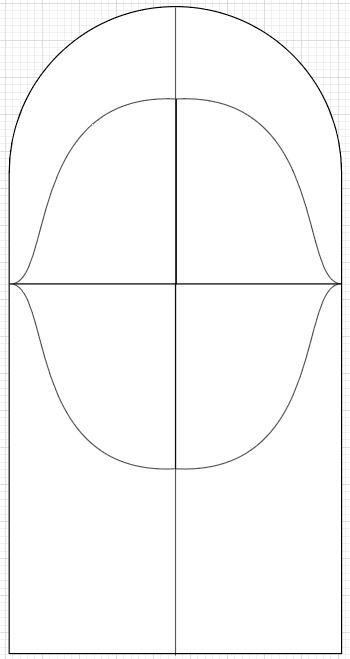
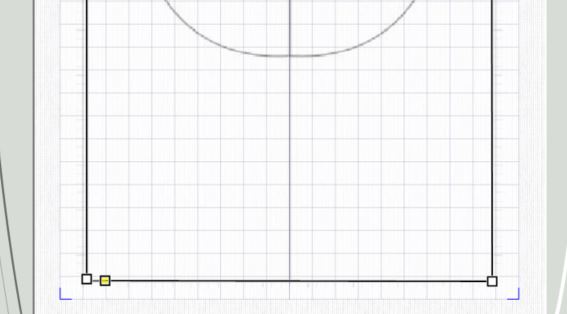
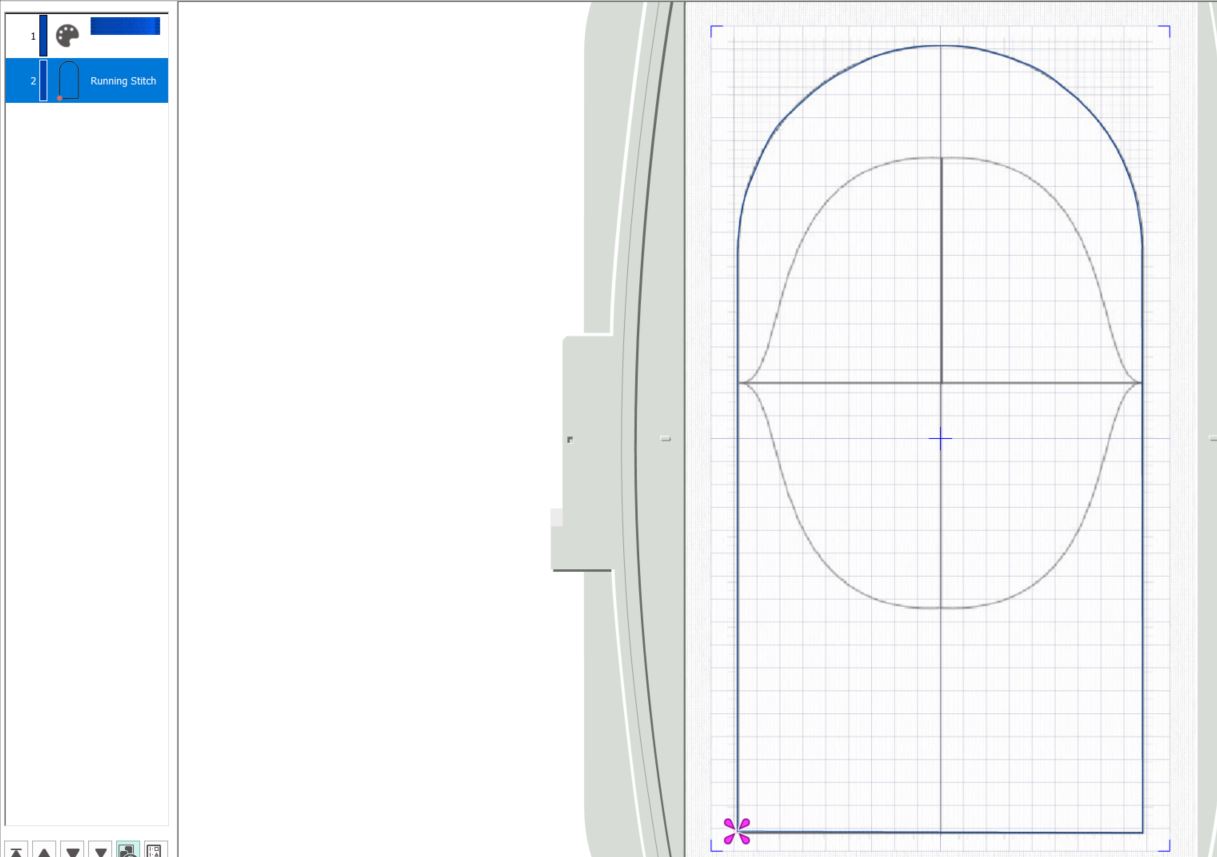
24. Click on Create area or line and start digitizing again in the left corner. This time move in ans follow the upper arch in the image, see below for clarity. Finish by dragging the last point on top of the first.
25. Right click to set the line.
26. Repeat step 17 to 21 and save the file. ( Oven Mitt back outline)
Digitizing the inside of the mitt
27. Click on Save As and rename the file Oven Mitt inside.
28. Delete all in the filmstrip except the blue color.
29. Digitize the inside part, this is the rounded edge and the lower arch, see image below .
Close the line by dragging the last point on top of the first as before.
30. Follow steps 17-21 and save the file.
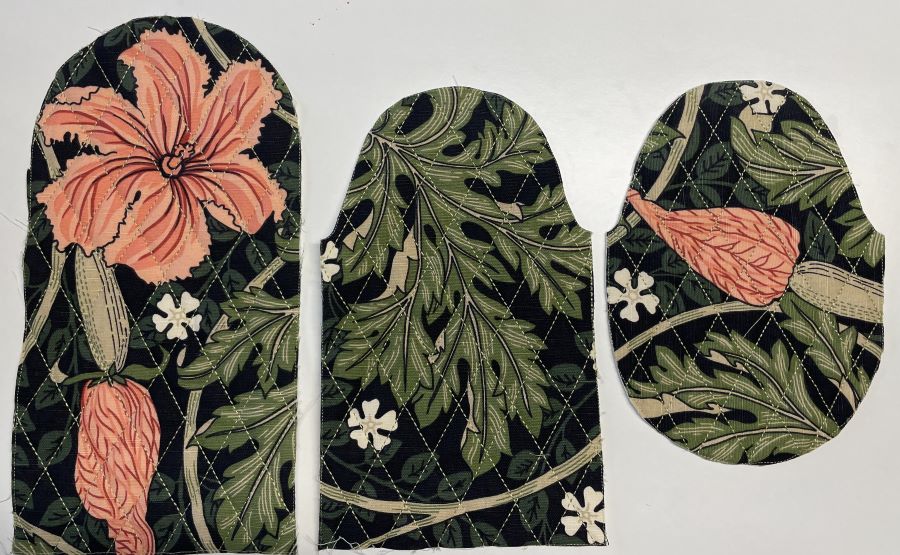
31. Now we have digitized all the pattern pieces for the oven mitt! Let’s continue with the quilting!
The advantage of making the quilting as separate files is the possibility to make different layouts without having to start from the beginning each time. This saves a lot of time!
Making the quilt files for the oven mitt.
Front outside
32. Open mySewnet software blank canvas, select 360x200mm hoop.
33. Go to Create and select Digitizing. A new window will open.

34. Select Load Existing Design and click Next.
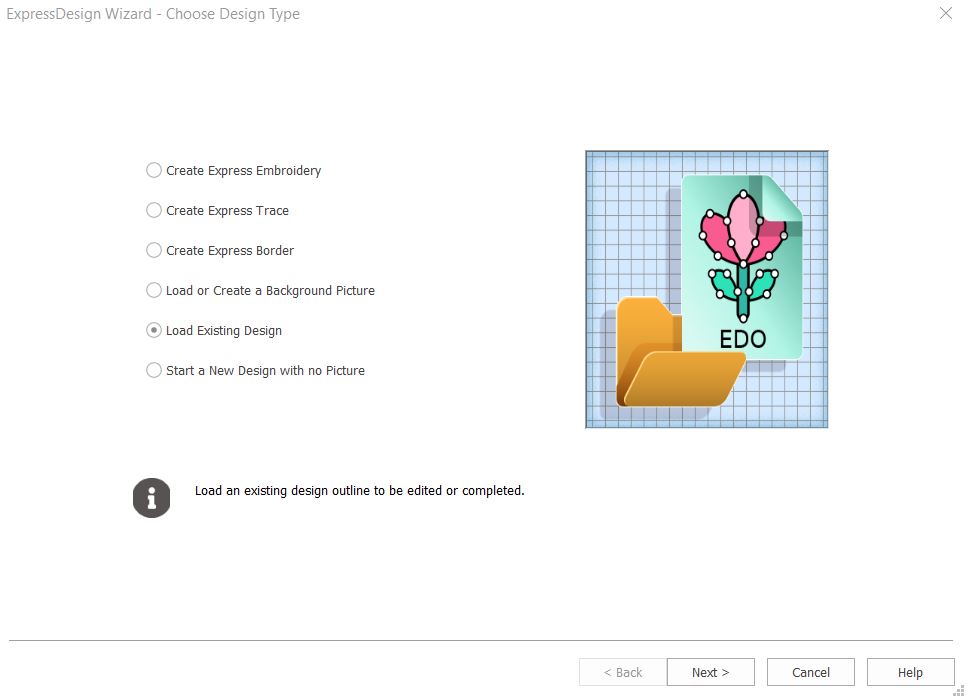
35. Click on Load a Design, locate your EDO-file (oven mitt front.EDO) and click on it. An image of the file will appear in the window, click Finish.
36. Close the digitizing program, the EDO-file will now open in your embroidery program window, as a VP4-file.
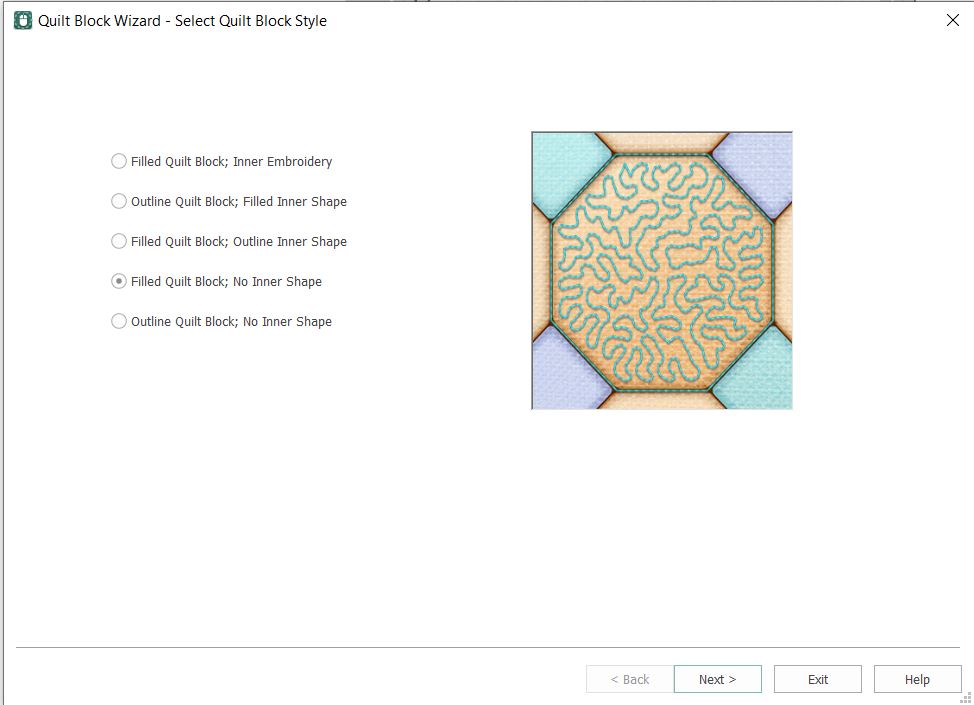
37. Click on Create and then Quilt block. Select Filled Quilt Block; No Inner Shape. Click Next.
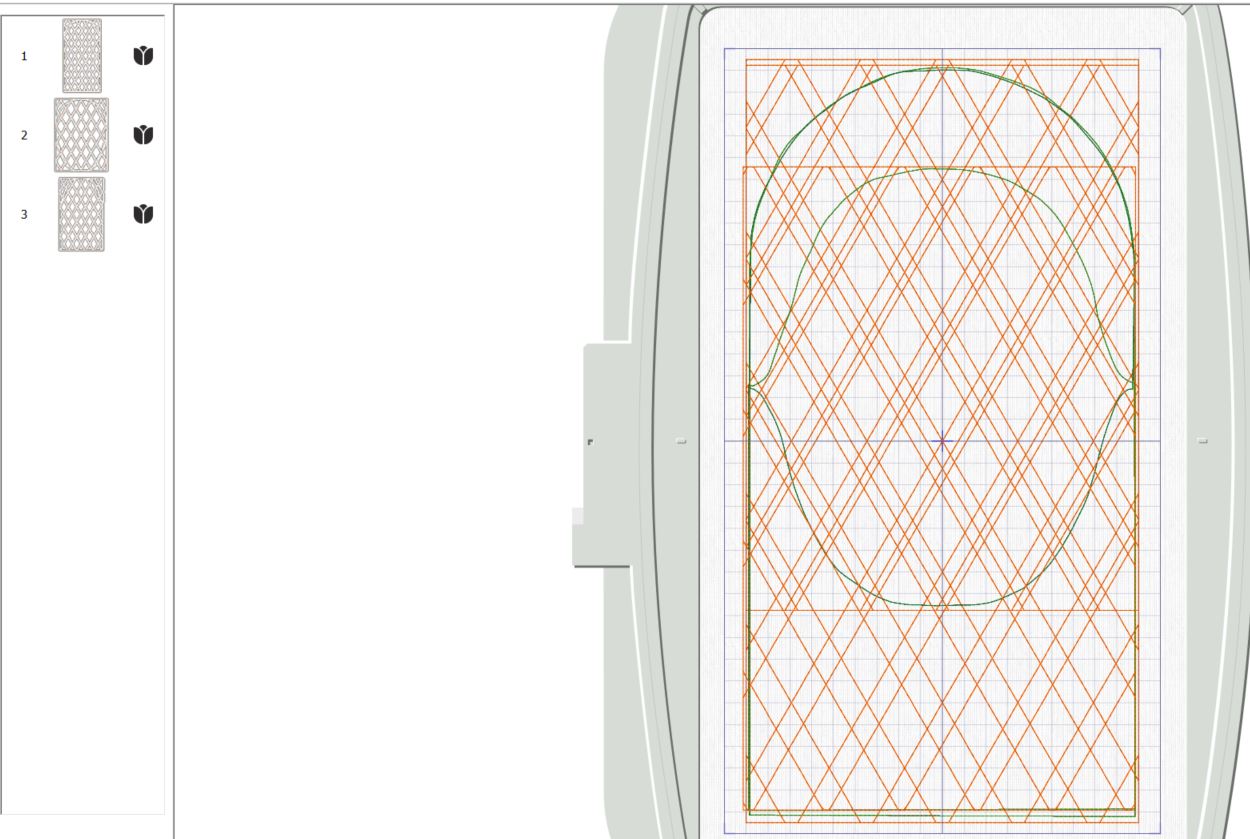
38. Select Shape 2 (rectangle) set the size according to the size of the existing embroidery file. (you can see the size in the Design Panel on the right side). In this case the size is: width 176,8 mm and height 343.5 mm. I made the quilt block a little larger, 180x350mm. Click next.
39. Now we have some different choices to make. You can see how it will look in the dialog box. The preset is Stipple, but I want a diamond pattern:
40. Click on Diamond Fill, and the Options.
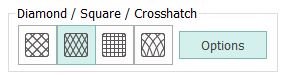
41. Set the spacing to Gap 30mm, the style to Diamond, the Stitch Type to Triple Stitch and the stitch length to 3,5mm. Click OK and then Finish.
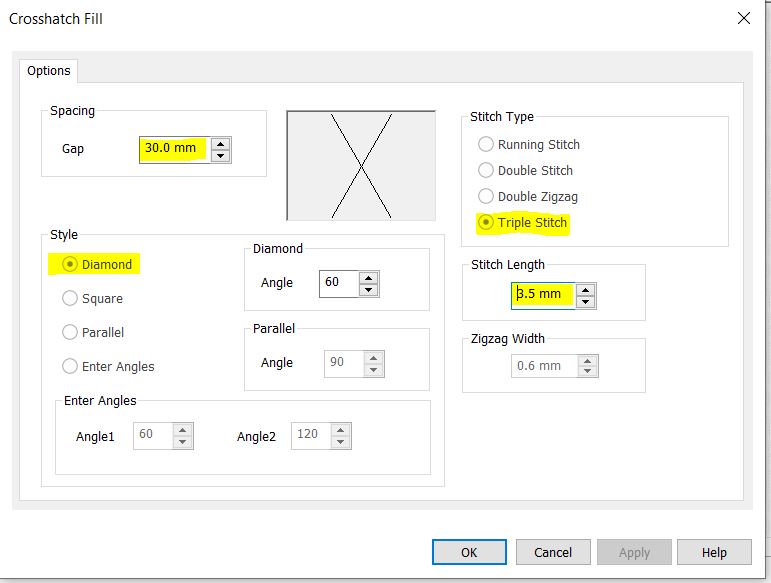
42. The quilt pattern will now show up as an overlay on the embroidery file. Change the color to Orange. This is to reduce the risk of different steps being combined if you should colorsort later.
43. Go to the Home tab. Click on Select All, then click on Group. The design will be grouped together instead of combined. The advantage of this is that you can easily adjust or change the design later. The corners and Handles around the design will turn orange.
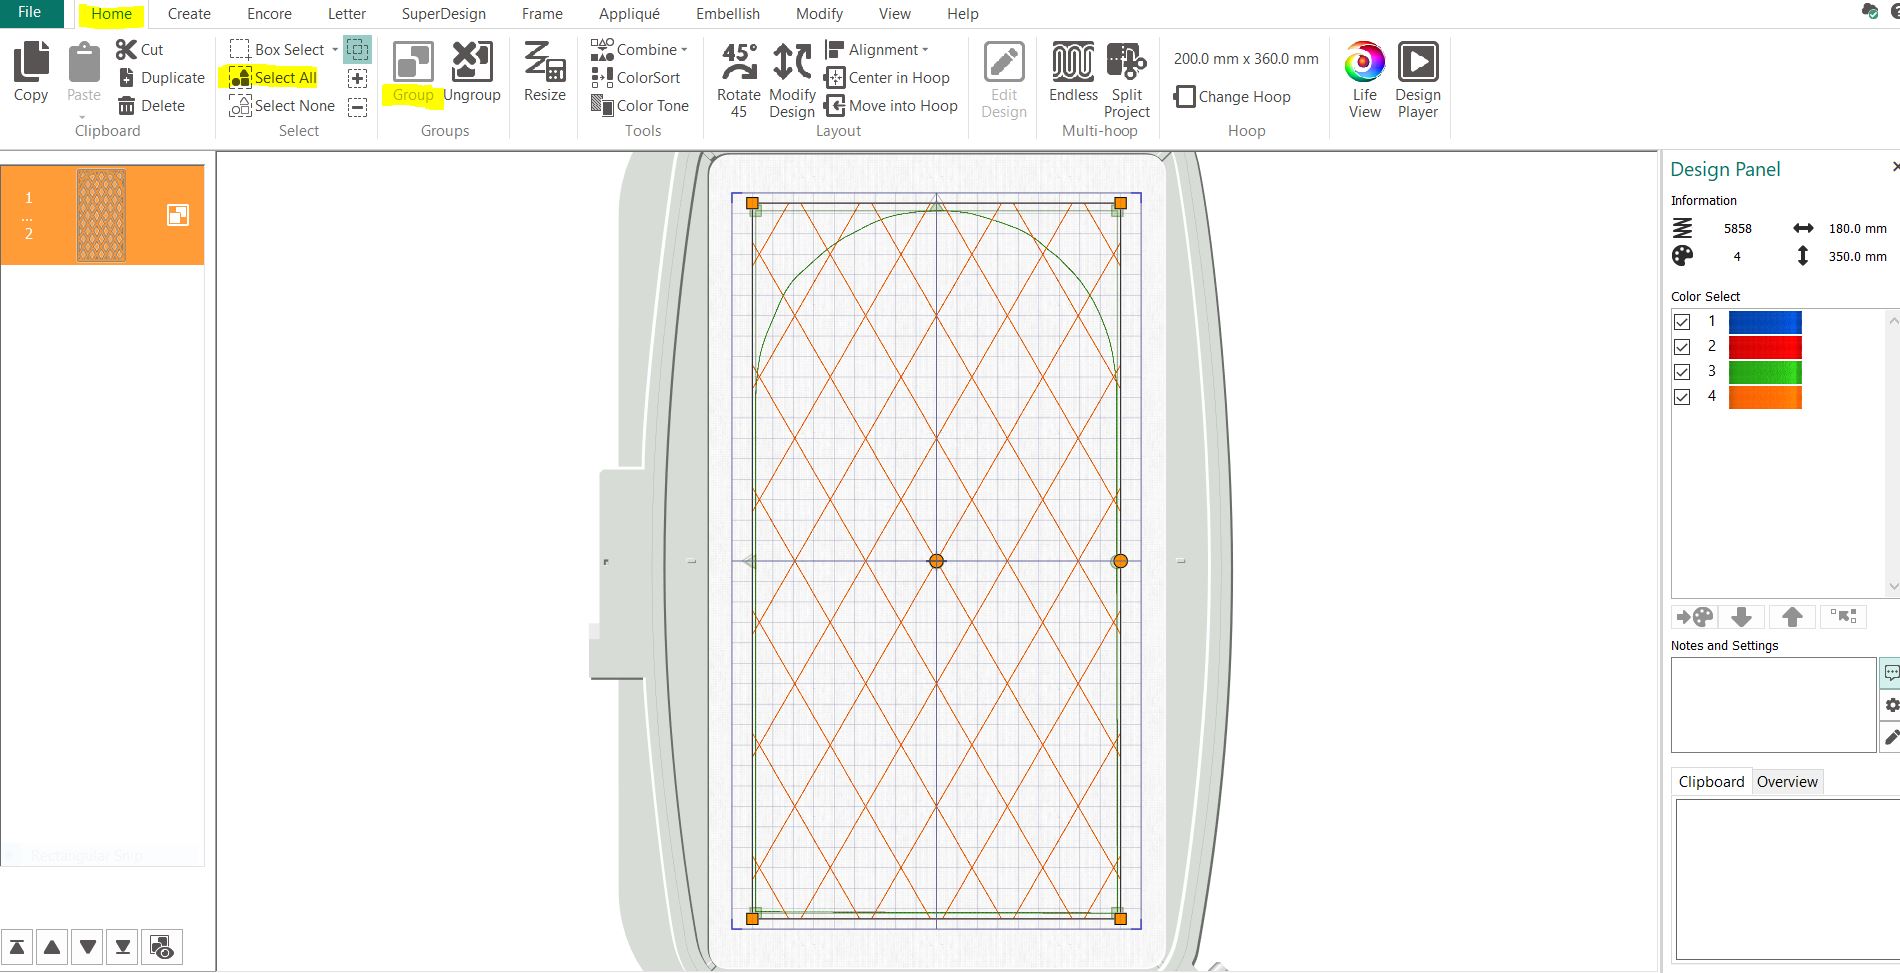
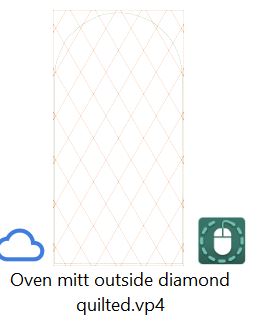
44. Click on File, Save As and name it: Oven mitt outside diamond quilted.vp4
Export the design
45. Go to File, Export. In the dialog box uncheck everything except Combine. Select your preferred format for your embroidery file, in this case .vp3. click OK.

46. Save the file with the name: Oven mitt outside diamond quilted.
47. Repeat from step 32 with the other two parts of the Oven Mitt.
Stitching out the different parts
48. Hoop the stabilizer in the 360x200mm hoop. I used an old bed sheet for this. It will not be visible in the finished project.
49. Stitch out color 1, this will make the outline for the batting.
50. Place batting in the hoop covering the outline on all sides. It is not necessary to use heat resistant batting on this piece, since it will not be exposed to direct heat when using the mitt. Using a thinner and softer batting will make the mitt more pliable and soft.
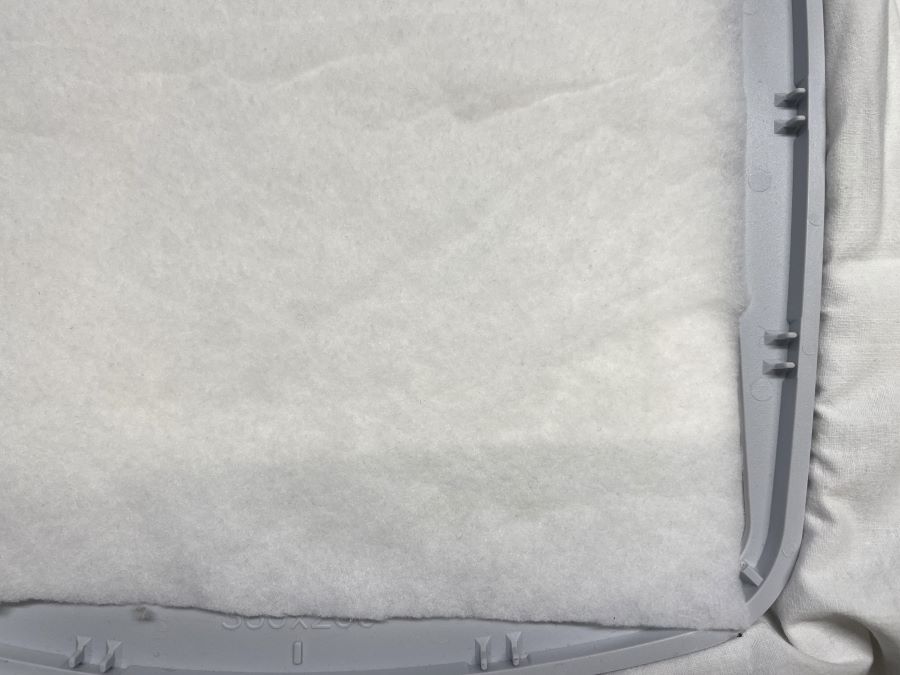
51. Stitch out color 2, this will secure the batting in the hoop.

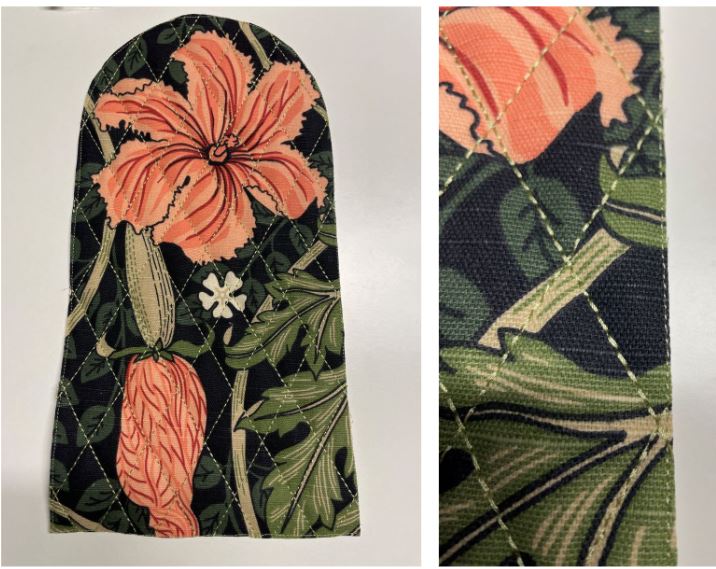
52. Place the fabric for the outside of the mitt right side up in the hoop, covering the stitching on all sides. You have the opportunity to place the fabric so you get the most out of the fabric pattern, e.g centering a flower or similar, using the stitch line as a guide. Remember that you will use a ⅜” (1cm) seam allowance on all sides.
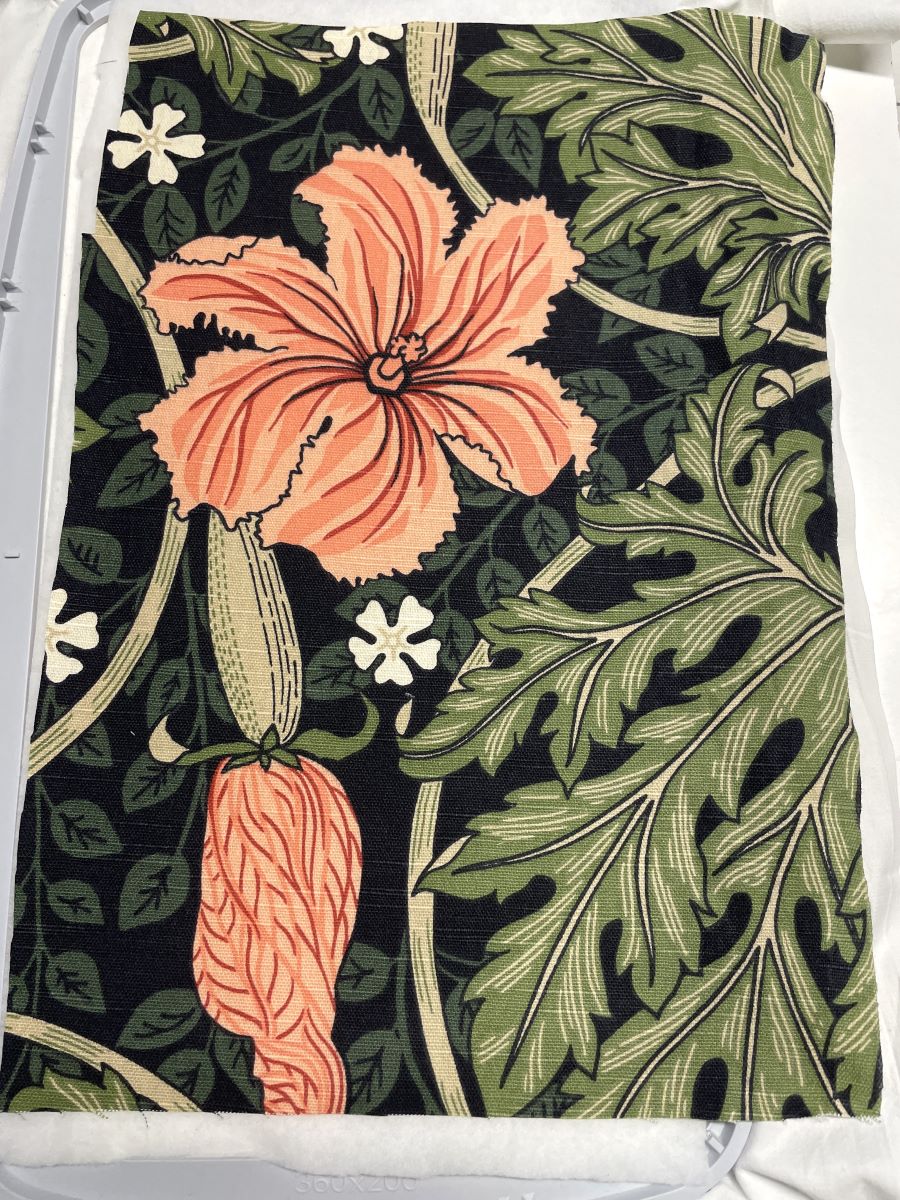
53. Stitch out color 3, this will secure the fabric in the hoop.
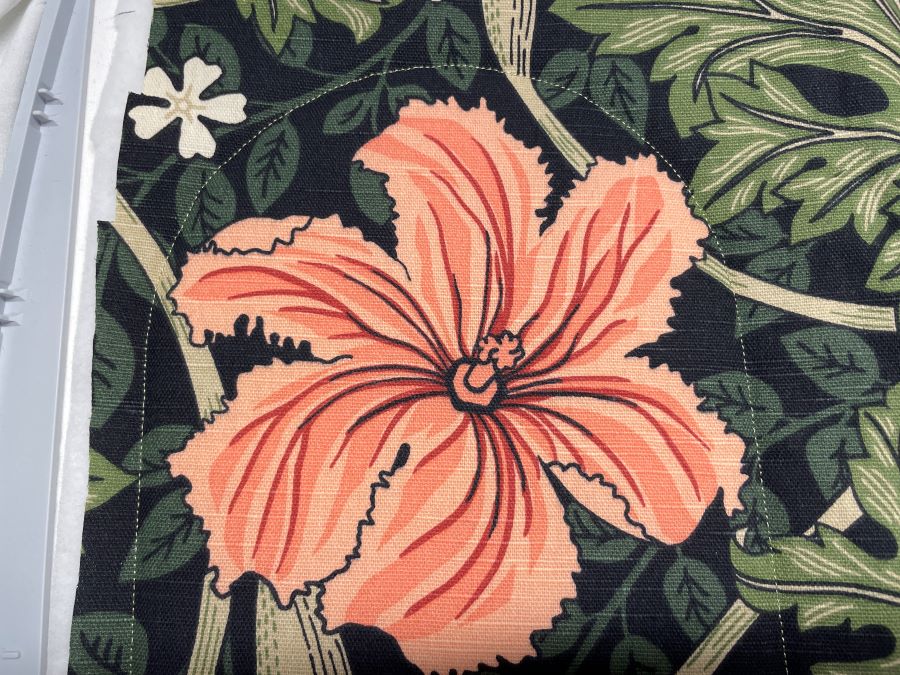
54. Stitch out color 4, the quilting. It will be made with triple stitch.
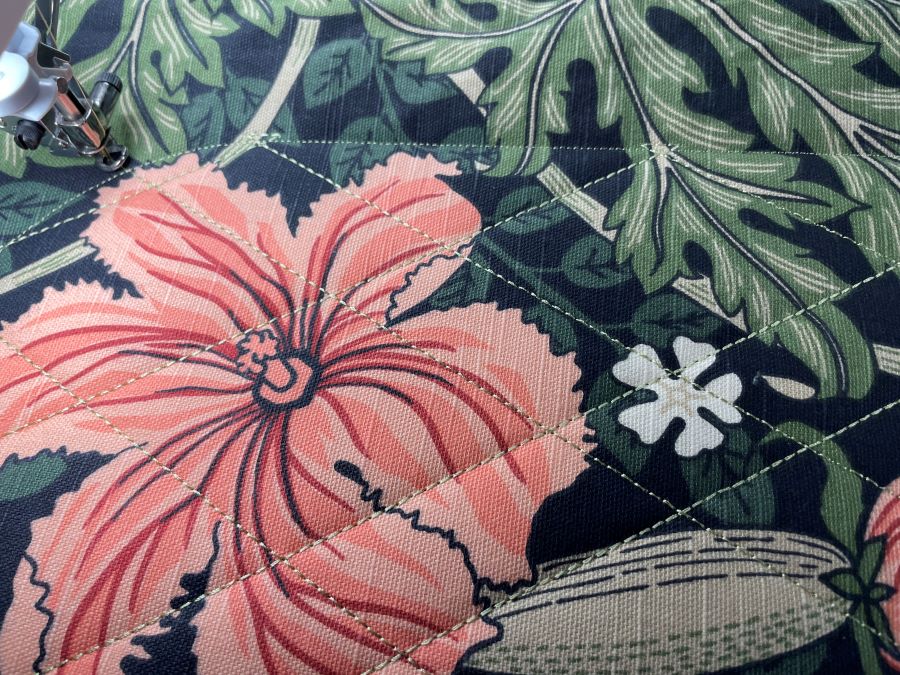
55. Unhoop and cut out just outside the outline stitching.
56. Repeat with the other parts. Remember to use a heat resistant batting for the Oven mitt inside part, since this is where you will hold the hot items later.
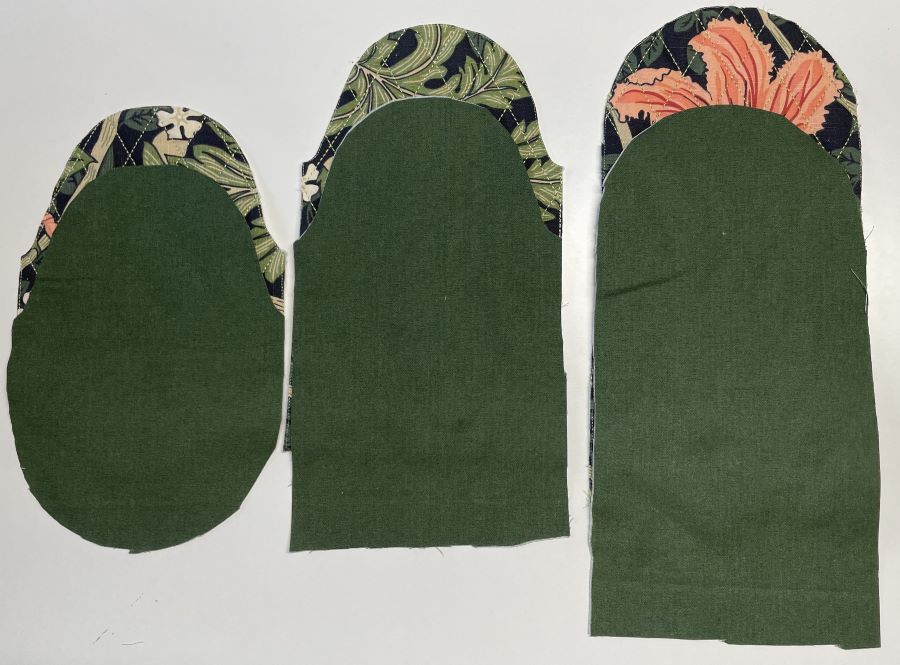
Cutting out the lining:
57. Cut out the lining parts using the outside pieces as a guide. From outer fabric cut a piece 6”x1½ (15x4cm) for the hanger.
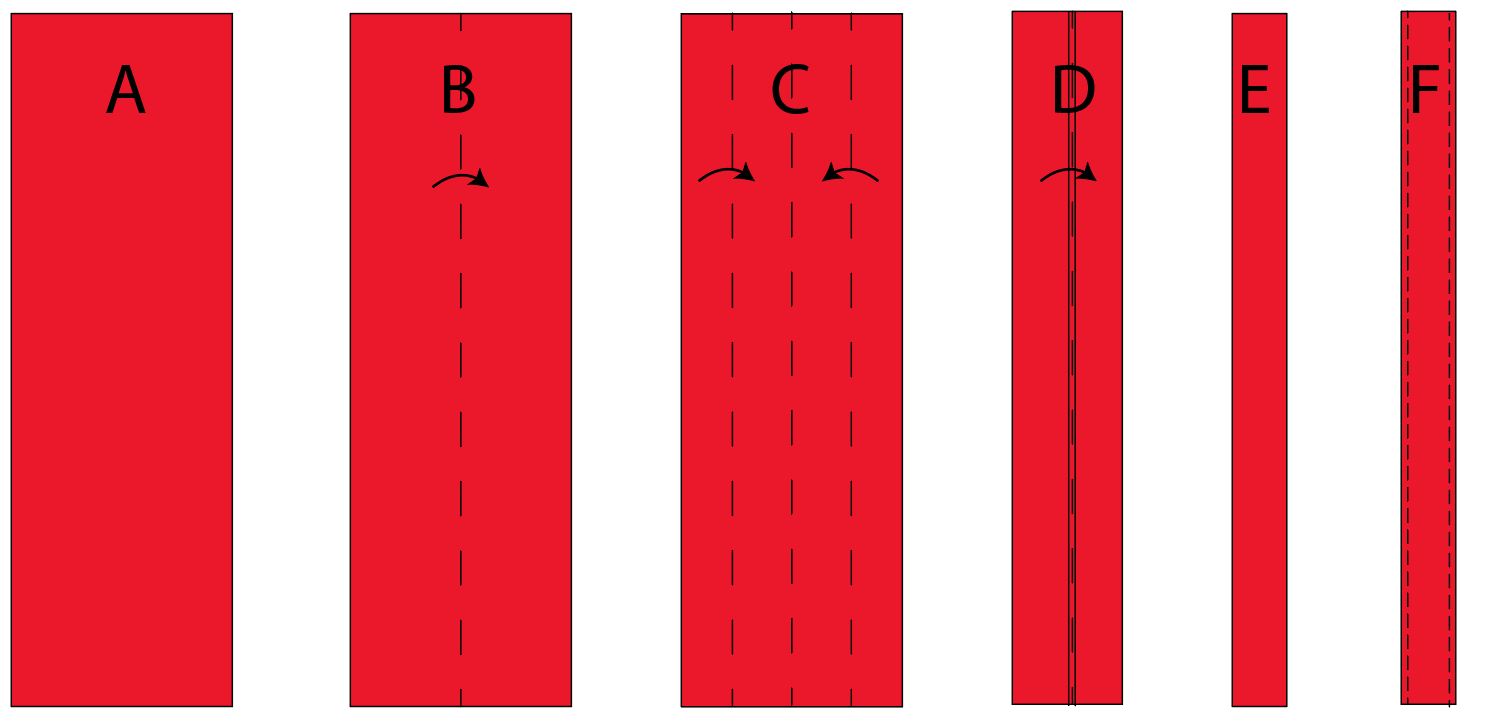
Sewing it all together:
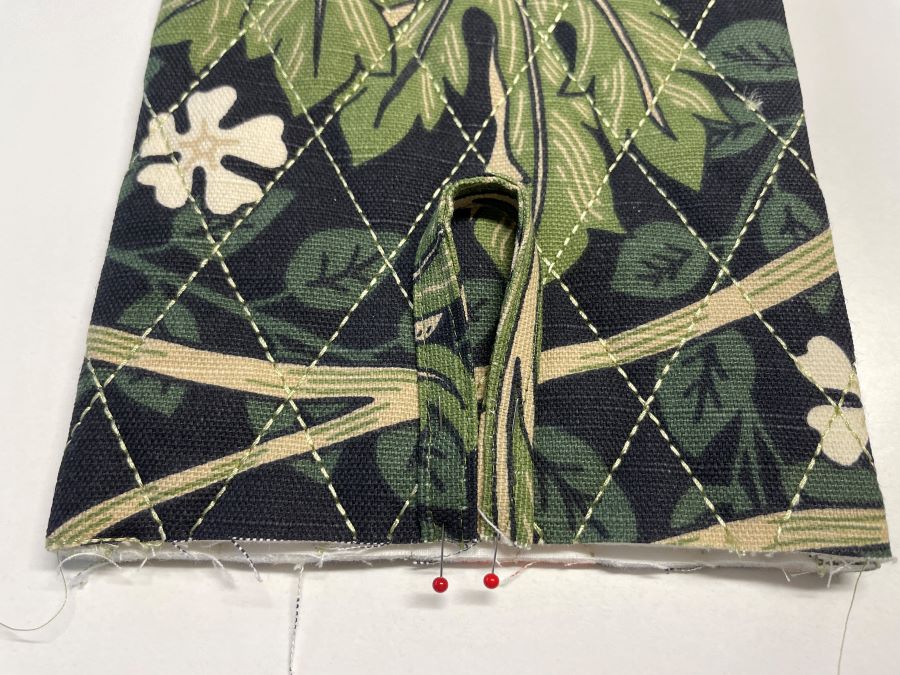
58. First we make the hanger: Fold the steps A to F Fold the piece lengthwise(B), open and fold the edges towards the middle( C-D). Fold together and topstitch close to the edges.(E-F)
59. Sew the mitt inside and back piece together at the rounded edge. Use a small seam allowance here, ¼” (6mm).

60. Place the front on the table right side up and place the sewn piece on top. The front piece will be a little longer at the bottom edge. Cut away the excess.
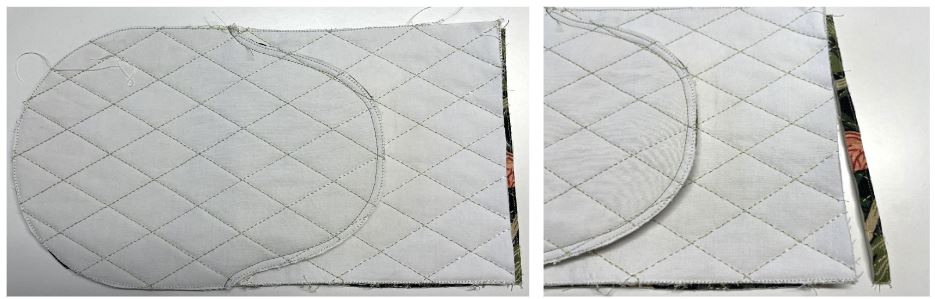
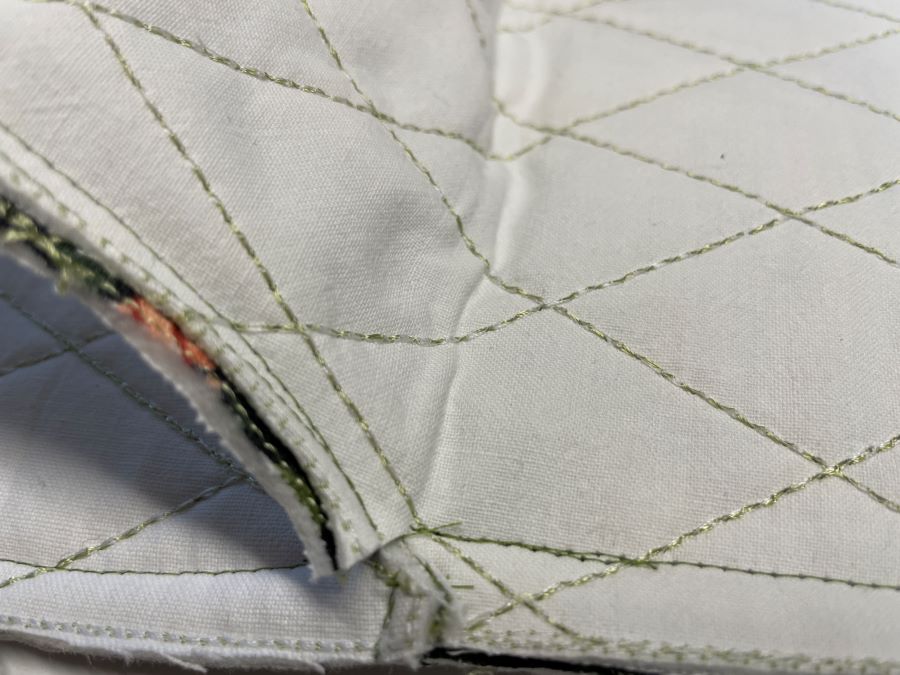
61. Sew the pieces together up to the intersecting seam and tie off. Move the grip piece down and continue to sew around the rounded edge, tie off. Move the grip back again and sew the last section of the seam.
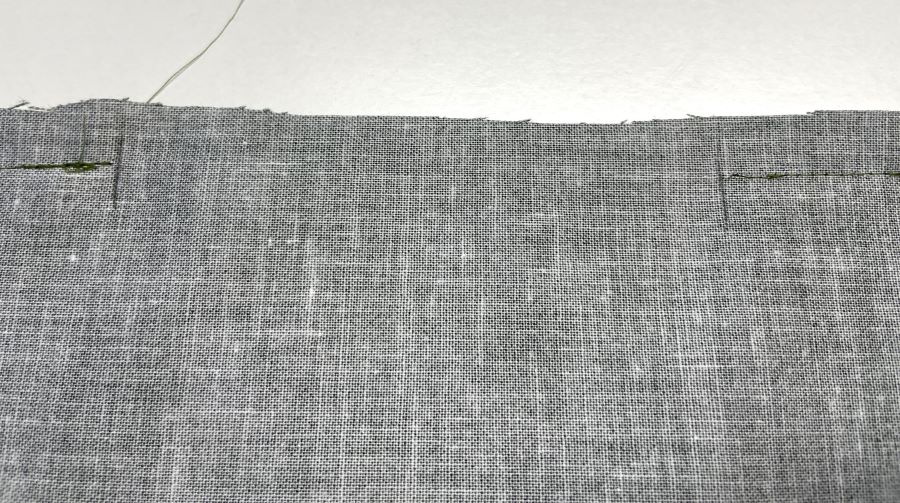
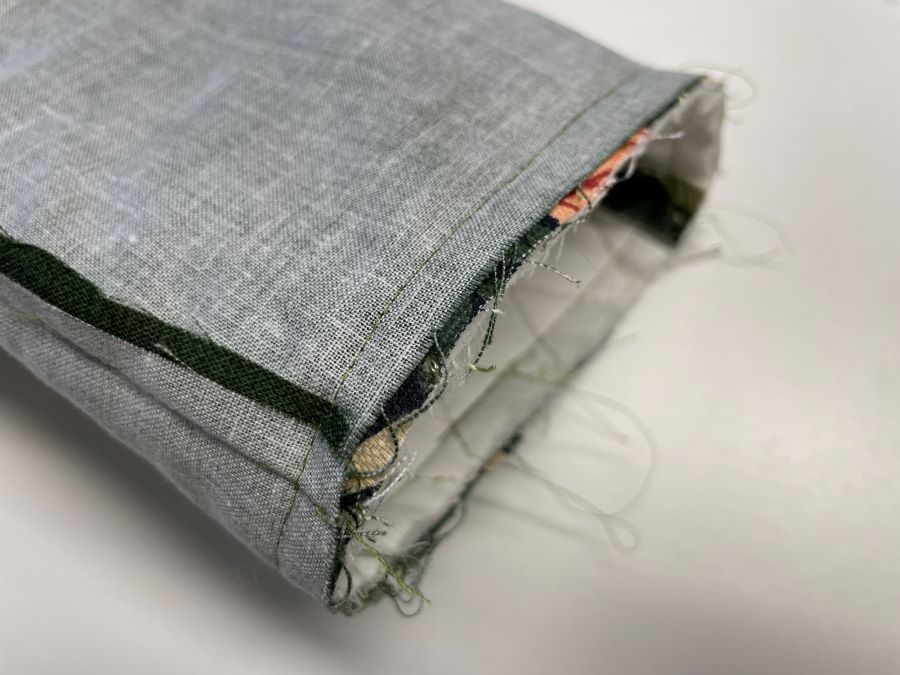
62. Turn right side out and press.

63. Repeat with the lining pieces, but leave an opening at one of the sides for turning.
64. Locate the middle of the back piece and pin the hanger in place.
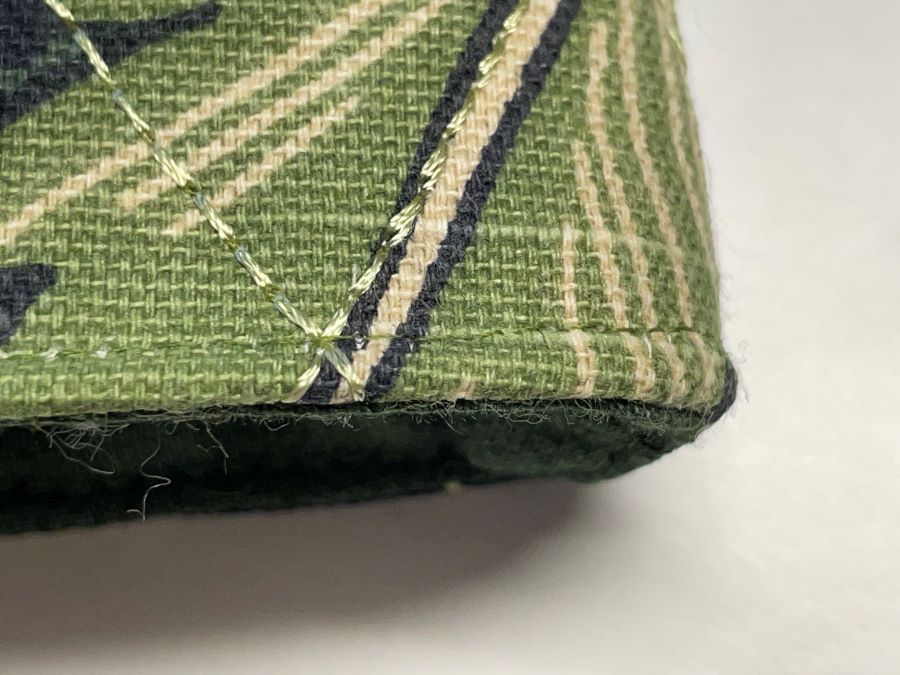
65. Put the lining and the outer mitts together, right sides facing each other. Take care to get the lining pinned in the correct position,the front piece to the front piece and the back piece to the back piece. Sew together with a ⅜” (1cm) seam allowance around the edge.
66. Turn right side out and fold the seam allowances on the lining together. Topstitch close to the edge to close the opening.
67. Turn the lining to the inside and topstitch close to the edge around the opening.
Now you have finished your oven mitt! In the future there will be instructions on how to change and personalize the design.
68. TIP: It is possible to use the resize function if you want to make the oven mitt smaller, just remember to resize all the different parts so that they will fit together. Place the embroidery files on top of each other in the program before stitching out to ensure accuracy.