United States
Create your Own Custom Clutch Purse
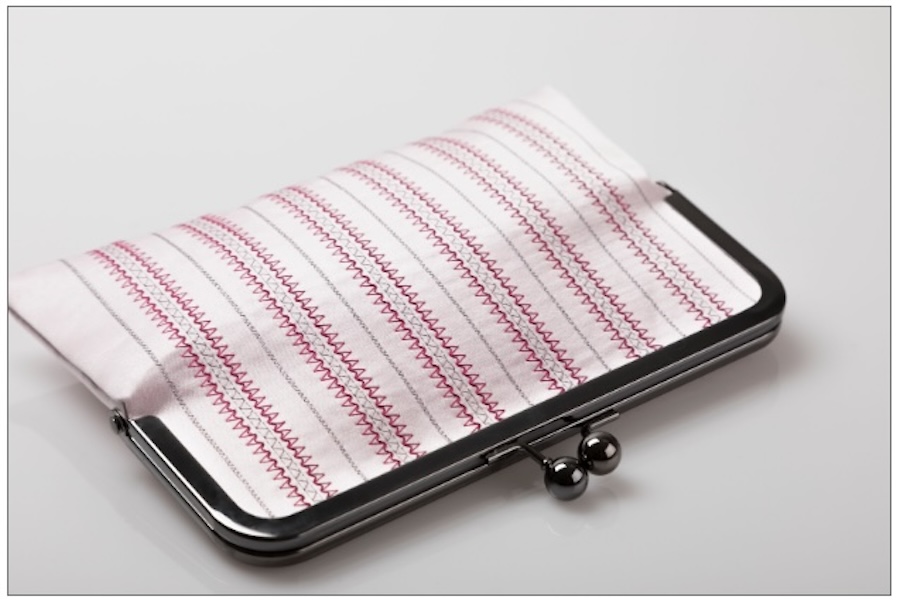
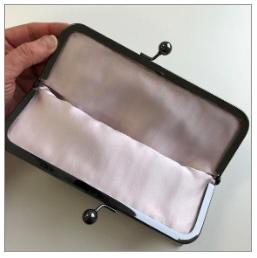
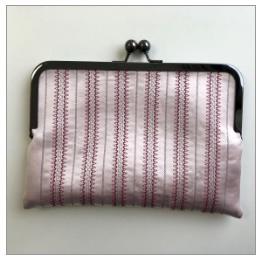
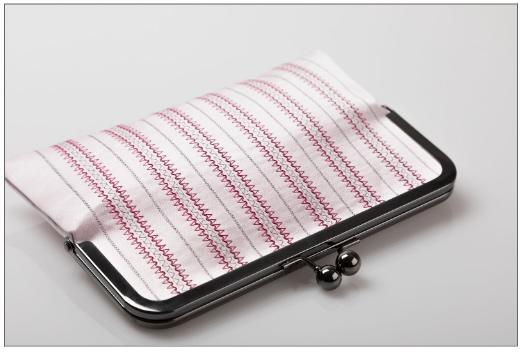
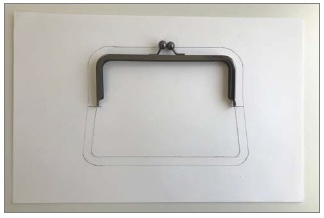
Use your machine’s decorative stitches to embellish fabric for a customized clutch purse. Purse hardware is generally available in a variety of sizes and colors. These instructions show how to create your own pattern for the clutch purse, no matter the size or shape of your purchased purse hardware. The clutch purse shown features hardware that is 8” (20cm) wide.
What you need:
- 8” (20cm) clutch purse hardware
- 2 pieces of 9” x 12” (23cm x 30.5cm) fabric for outside of purse
- 2 pieces of 9” x 12” (23cm x 30.5cm) fabric for purse lining
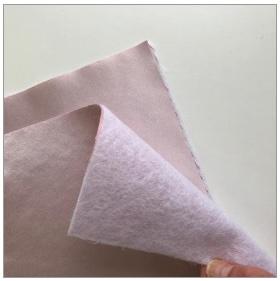
- 2 pieces of lightweight fusible batting
- 2 pieces of lightweight fusible interfacing
- All-purpose thread for construction
- Assorted rayon and/or metallic threads for decorative stitching
- Lightweight tear-away stabilizer
- Paper and pencil (to draw the pattern)
- Hand sewing needle
- Stiletto or point-turning tool
- Glue (strong, clear-drying)
- Removable fabric marking pen
- Ruler
Sewing Directions
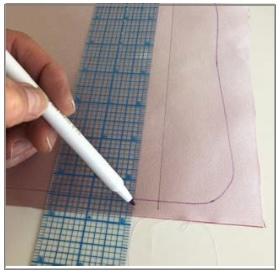
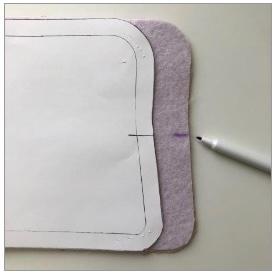
1. Place the clutch clasp hardware on top of your pattern paper. Trace around the top of the hardware first, then continue to draw for the shape of the bag you want. After drawing your desired shape, add a ½” (13mm) seam allowance all the way around. Place a marking on the pattern to indicate where the hinges are.
2. Apply the lightweight fusible interfacing to the wrong side of the two outer fabric pieces, which will help provide stability when you do the decorative stitching, as well as more structure for the finished purse.
Note: Use only a lightweight fusible interfacing, as any interfacing heavier than this can make the purse fabric too thick to fit into the frame when assembling the purse.
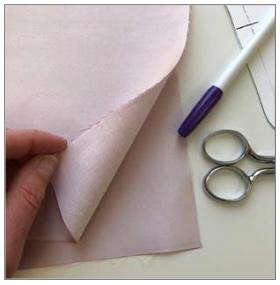
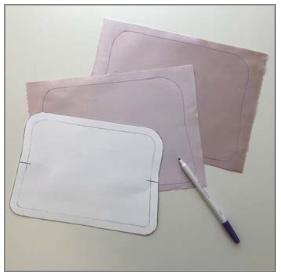
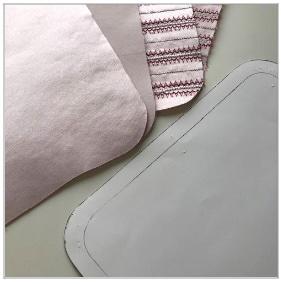
3. Cut out your drawn pattern template. Trace it onto the right side of the outer front fabric. Repeat for the outer back fabric.
4. To determine which stitches you want to sew onto your purse front and purse back fabrics, first use a scrap of your fabric to experiment with various stitch patterns and thread colors until you find a combination that you like.
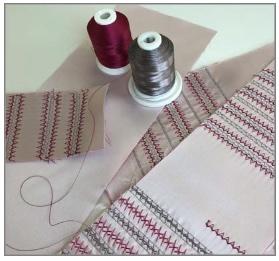
5. Use a ruler and removable fabric marking pen to draw stitching guide lines on the outer purse fabric pieces. Place the lightweight tear-away stabilizer underneath the fabrics. Sew the stitches as desired. When stitching is finished, remove the excess lightweight tear-away stabilizer.
6. Apply the lightweight fusible batting to the wrong side of the lining fabric pieces, following the batting manufacturer’s recommendations for application.
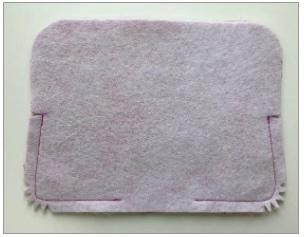
7. Cut the outer purse front and back fabrics using the pattern template you created back in Step 1. Use the same pattern template to cut the two lining fabrics.
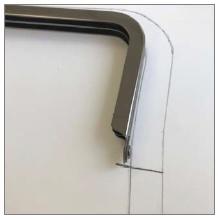
8. Use the removable fabric marking pen to transfer the hinge markings (from the pattern template) onto the wrong side of all four fabrics. Make a small clip within the seam allowance near the clip markings on all four fabrics - this will help make it easier to sew the upper part of the purse later.
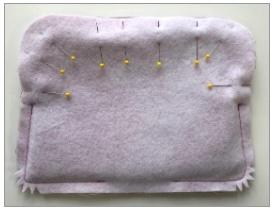
9. Thread the top of the machine and bobbin with all-purpose thread. Pin the two outer sections together, with right sides facing. Starting at the first hinge marking, stitch around the purse bottom using a ½” (13mm) seam allowance, ending at the opposite hinge marking. Repeat this for the two lining pieces, but leave an opening approximately 2½” (6.5cm) at the bottom, used for turning the purse right side out in a later step. Be sure to backstitch at the beginning and end of seams so that the stitching doesn’t unravel. Clip the curves on the bottom corners of the purse front and lining.
10. Turn the outer purse fabric section right side out and place it inside the lining section, making sure that the right side of the outer fabric is facing the right side of the lining. Starting on one side of the purse, sew the outer and inner flaps together, beginning at the first hinge marking and stitching around the top until you reach the opposite hinge marking. Repeat for the flap on the other side. Clip curves to help reduce bulk. Carefully clip the hinge markings, as well.
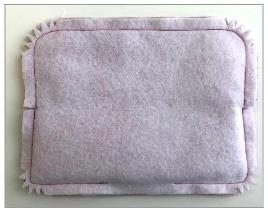
11. Turn the entire purse right side out by bringing the outer fabric through the opening that was left in the bottom of the lining section. It may be helpful to use a stiletto or similar type of point-turning tool to ensure that the bag is turned right side out completely. Press. Before stitching up the opening in the lining, check to see that the purse flaps fit nicely in the frame. If they are too thick, you may need to trim down the seam allowances a bit. When you are satisfied with the fit of the purse in the frame, stitch the opening in the lining using a hand sewing needle (or stitch by machine, if desired).
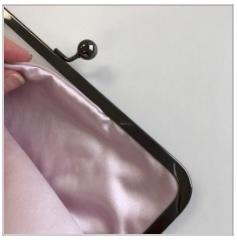
12. Carefully place glue in one side of the frame, then insert the purse flap. Hold the purse and frame hardware together for about a minute to make sure they set. Repeat for the other side. Allow the purse to dry completely before using it.